Introduction
Whilst studying for the Modern Desktop Administrator Associate certification its been a tremendous help to setup a virtualised homelab consisting of a Windows Server virtual machine and multiple Windows 10 virtual machines. This step-by-step instruction set will show the same steps which I used to get setup and configured.
Prerequisites
- Multi-core CPU with support for virtualisation (Intel® VT/AMD-V)
- Enough RAM for host and minimum 2 clients (>6GB)
- Windows Server ISO
- Windows 10 ISO
- Virtualbox
Virtual Machine Setup
Choose an appropriate name for the VM (Virtual Machine), in this case W19SRV.
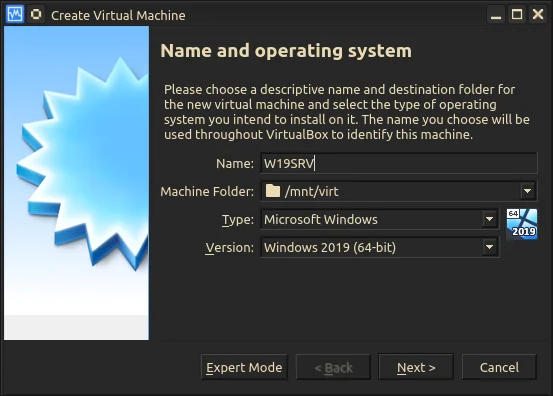
Screenshot of VirtualBox showing the name and operating system fields.
Allocate an adequate amount of memory to the VM.
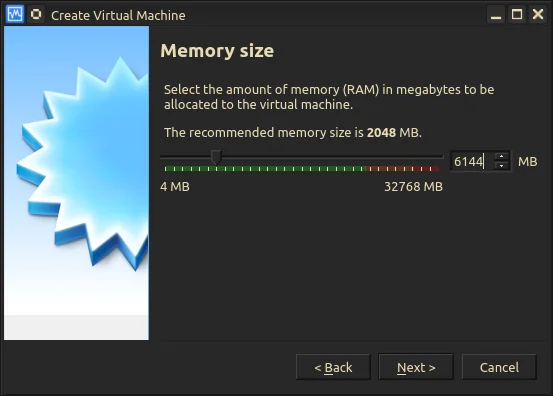
Screenshot of VirtualBox showing the memory size selector.
Create a virtual HDD with default options, this will be more than adequate for testing purposes.
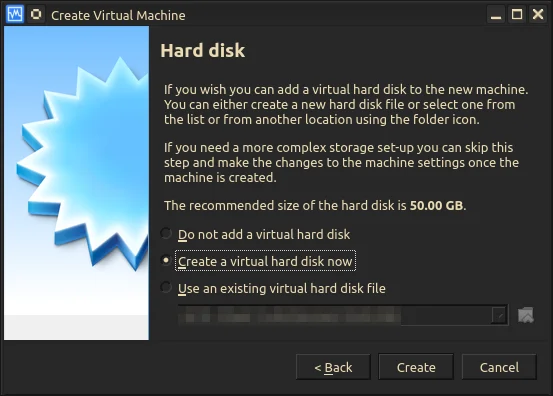
Select Create a Virtual hard disk now.
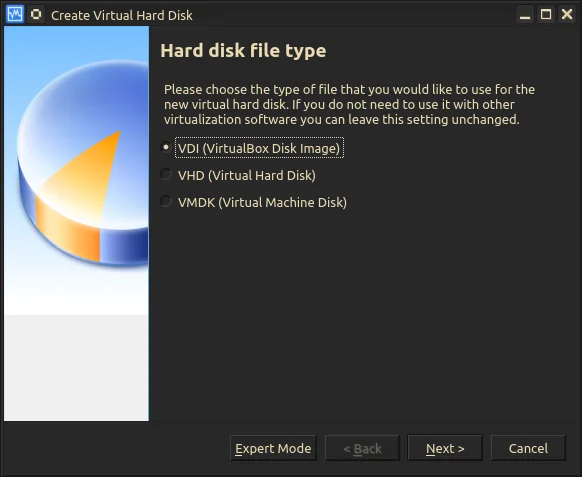
Select VDI (Virtual Disk Image).
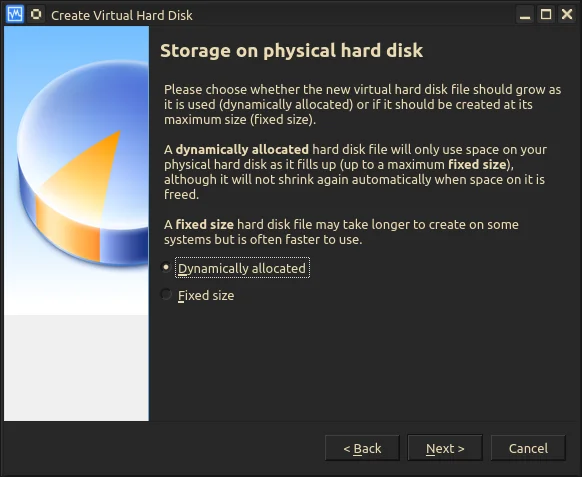
Select Dynamically allocated.
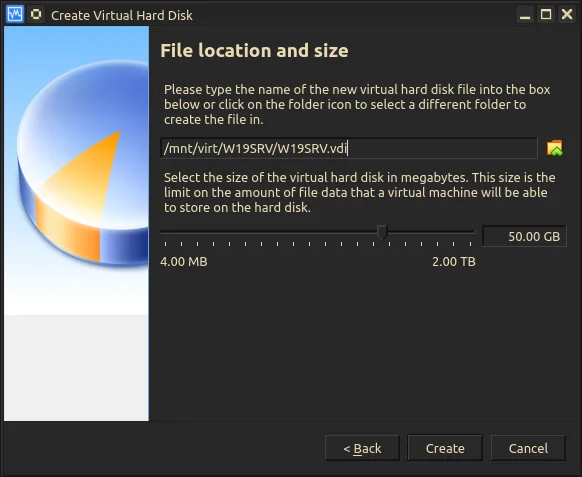
Name the VDI and set the disk size.
Assign CPU cores to the VM, in this case 4 although 2 cores is fine.
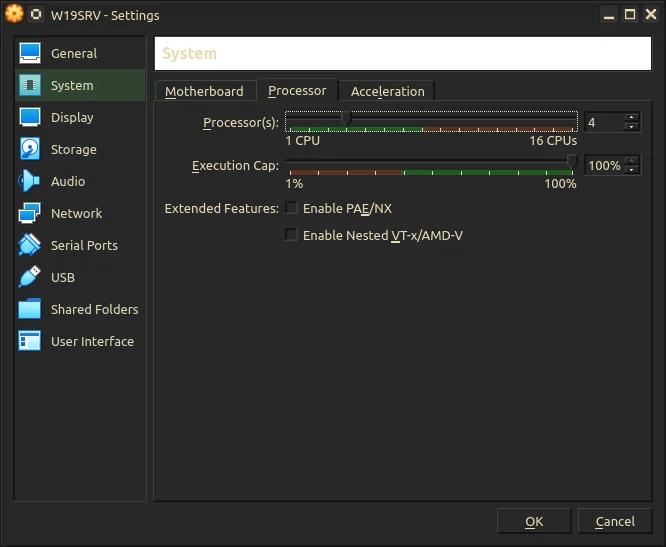
Setting the number of processor cores.
Tick the Enable 3D Acceleration checkbox and allocate more video memory to the VM. As we will install the Desktop Experience version of Windows Server more video memory is beneficial here.
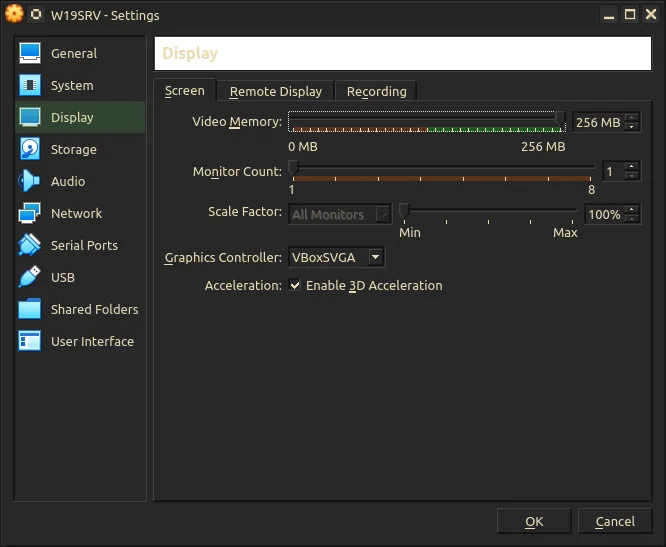
Setting the amount of Video Memory.
Attach the Windows Server ISO.
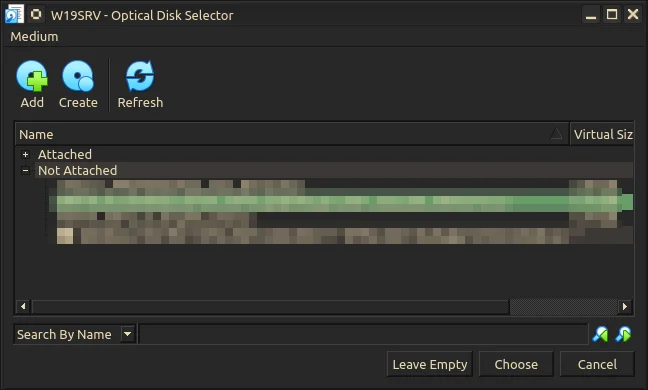
Attach the ISO file.
Assign the first NIC to NAT to grab an IP dynamically and have access to the Internet.
Assign the second NIC to an Internal Network, this will seperate the Windows 10 Clients from your network.
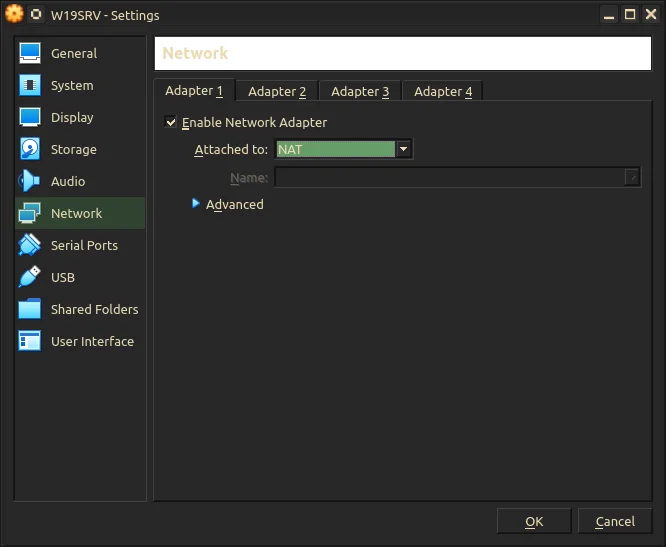
Set network adaptor 1 to NAT.
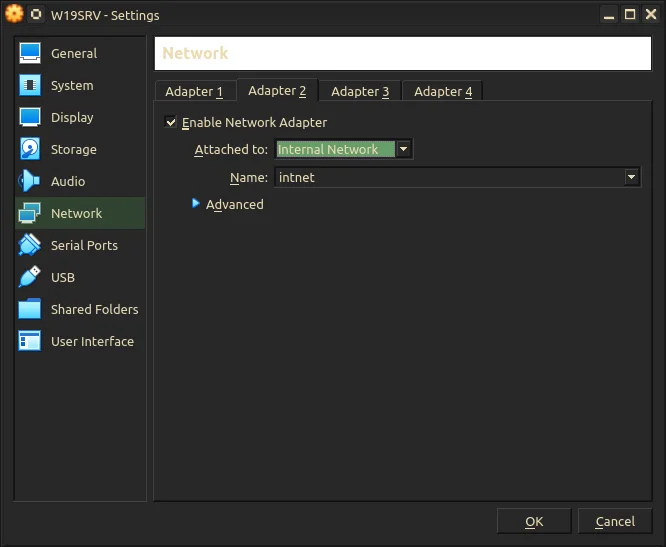
Set network adaptor 2 to Internal Network.
If all the settings look good, lets move onto installation.
Installing Server 2019
The Windows installation experience for both Desktop and Server is straight-forward even more so within a VM, click Next, agree to terms, click Next some more. Done.
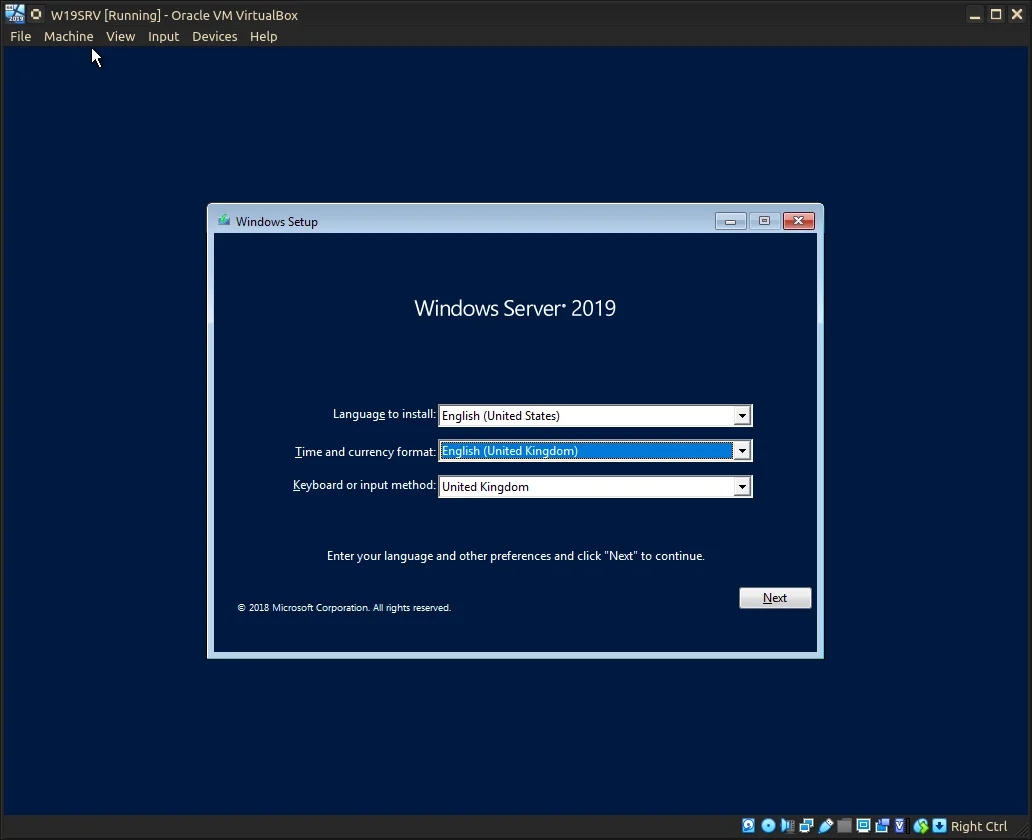
Windows Server 2019 OOBE.
Ensure the (Desktop Experience) version is selected otherwise all further configuration will be done through the command-line only.
Differences between Standard and Datacenter editions boil down to Hyper-V Virtual Machine limits/licensing and the Datacenter edition having support for Software-defined Networking.
Choose either as the server will ONLY be for testing, if unsure Standard will do fine for our purposes.
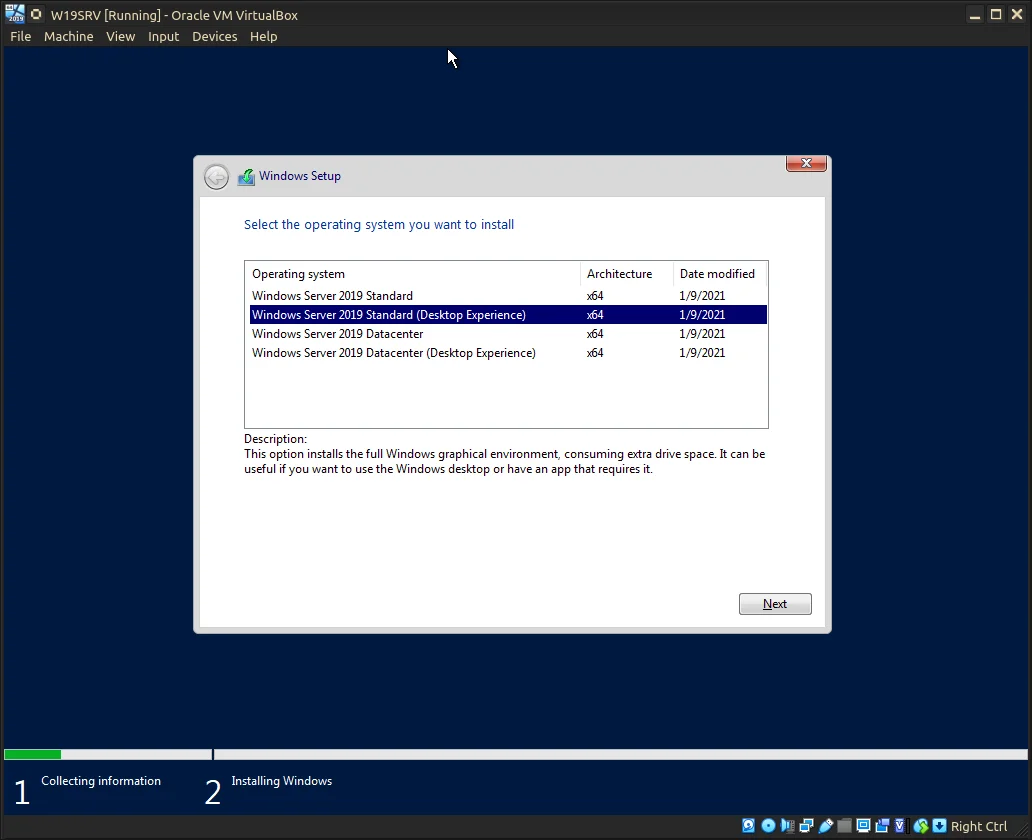
Select Windows Server 2019 Standard (Desktop Experience).
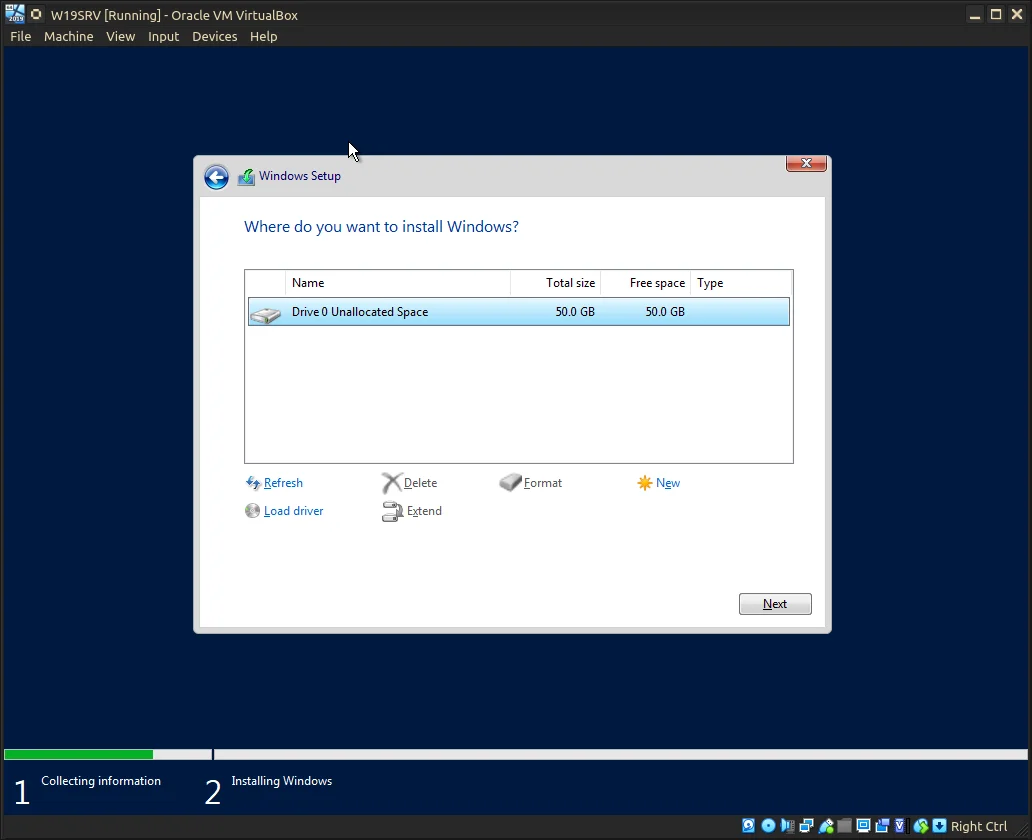
Select the attached VDI.
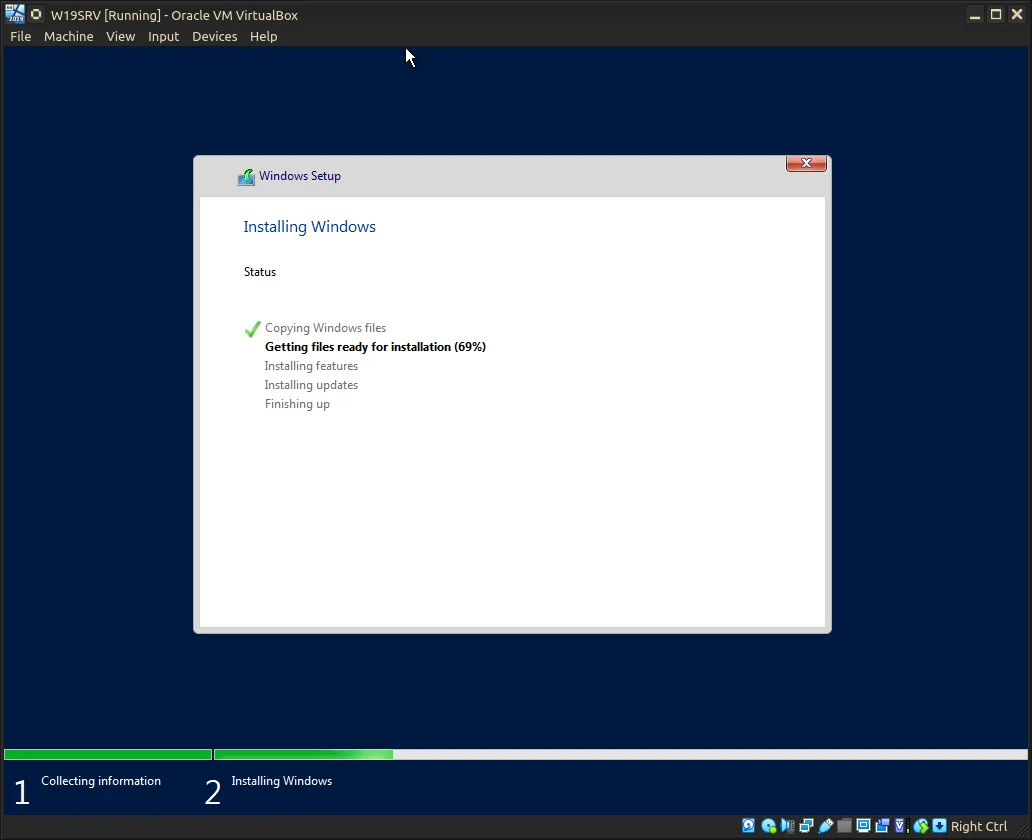
Windows Server 2019 Installing...
Once installation has finished the VM may restart a number of times before reaching the following screen (see image below).
Choose a strong, memorable password and let the installation finish.
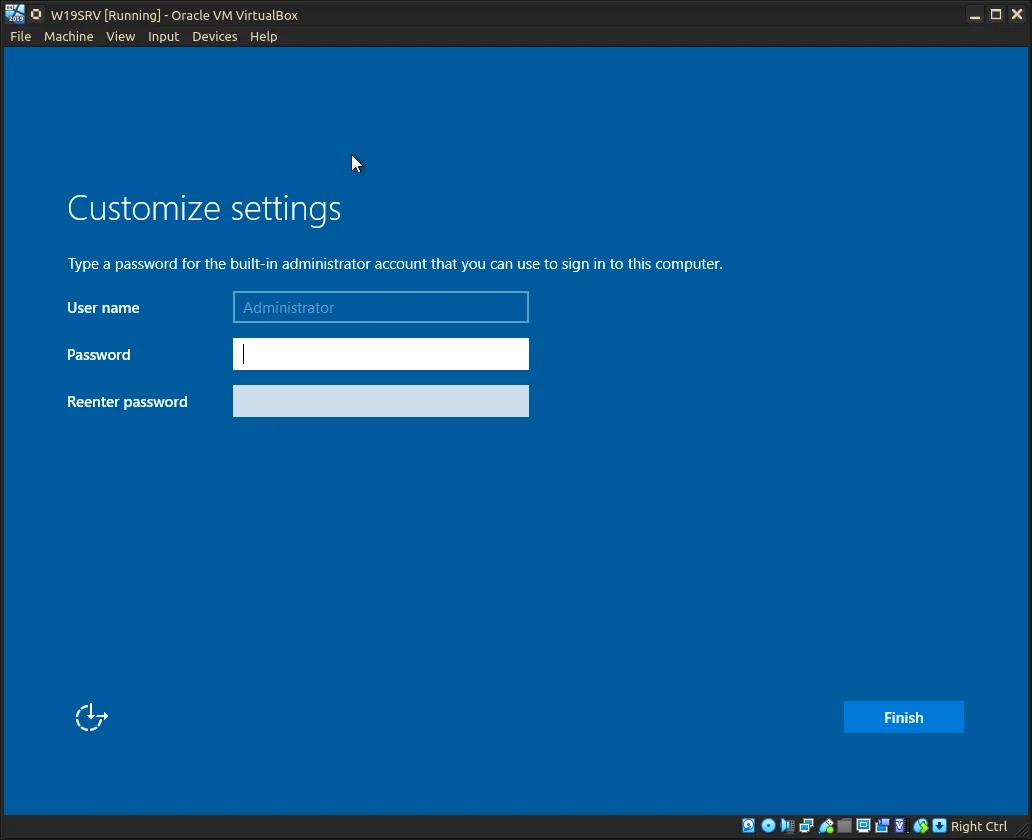
P@ssw0rd! is not a good choice...
Once at the Desktop, Server Manager will start automatically. To make out lives easier we will change the name for our Server.
Under Start ⇾ System ⇾ System Info ⇾ Advanced system settings ⇾ Change… || Start ⇾ Control Panel ⇾ System ⇾ System Info ⇾ Advanced system settings ⇾ Change…
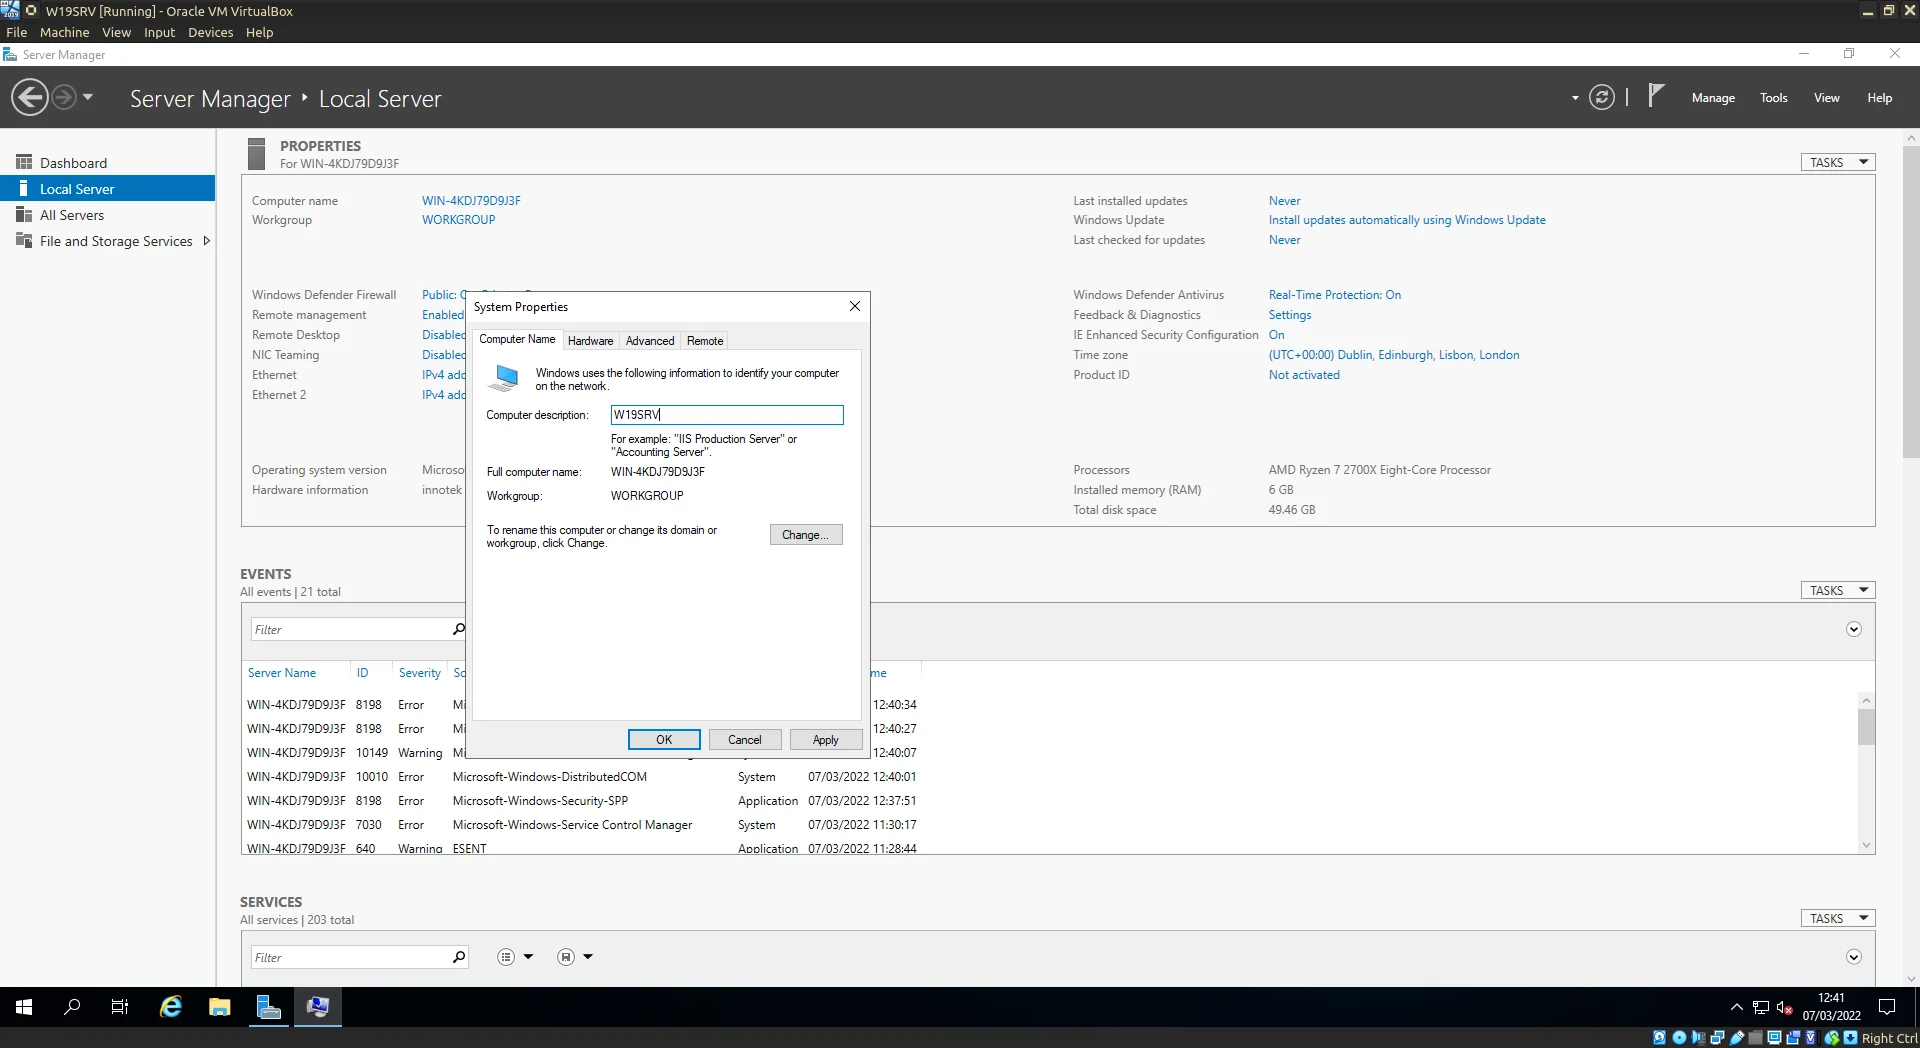
Change the hostname to something more memorable.
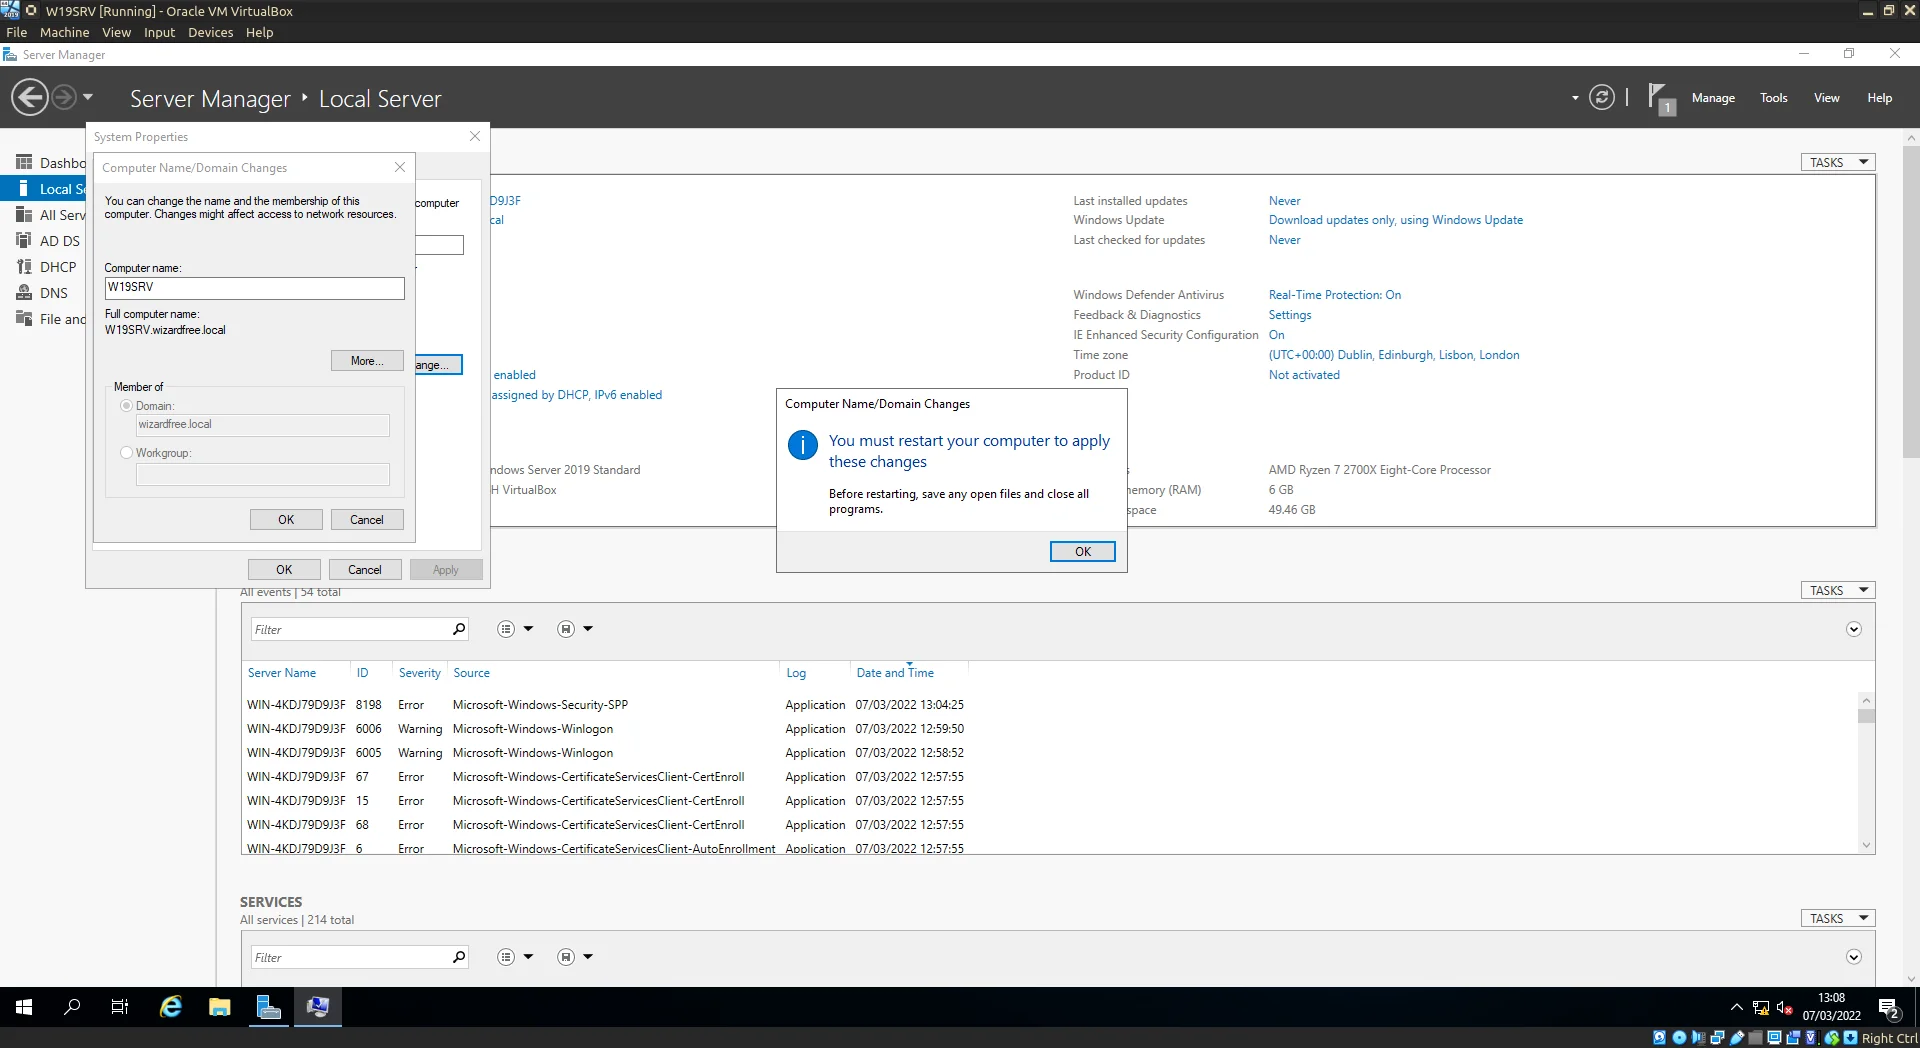
Restart to accept the changes to the hostname.
(Optional) VirtualBox Guest Additions
The following steps are optional and are done to enable better display options for the VM as well as Shared Clipboard/Folders between host and VM.
Insert the Guest Additions ISO through the VirtualBox context menu. If this is the first time Guest Additions have been used or a suitable image cannot be found locally you will be prompted to download the latest supported Guest Additions ISO.
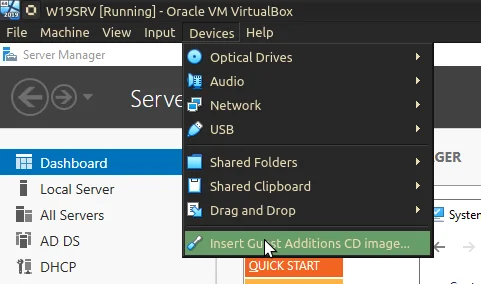
Select Insert Guest Additions CD image...
The ISO will act just like a CD Drive with an inserted disc.
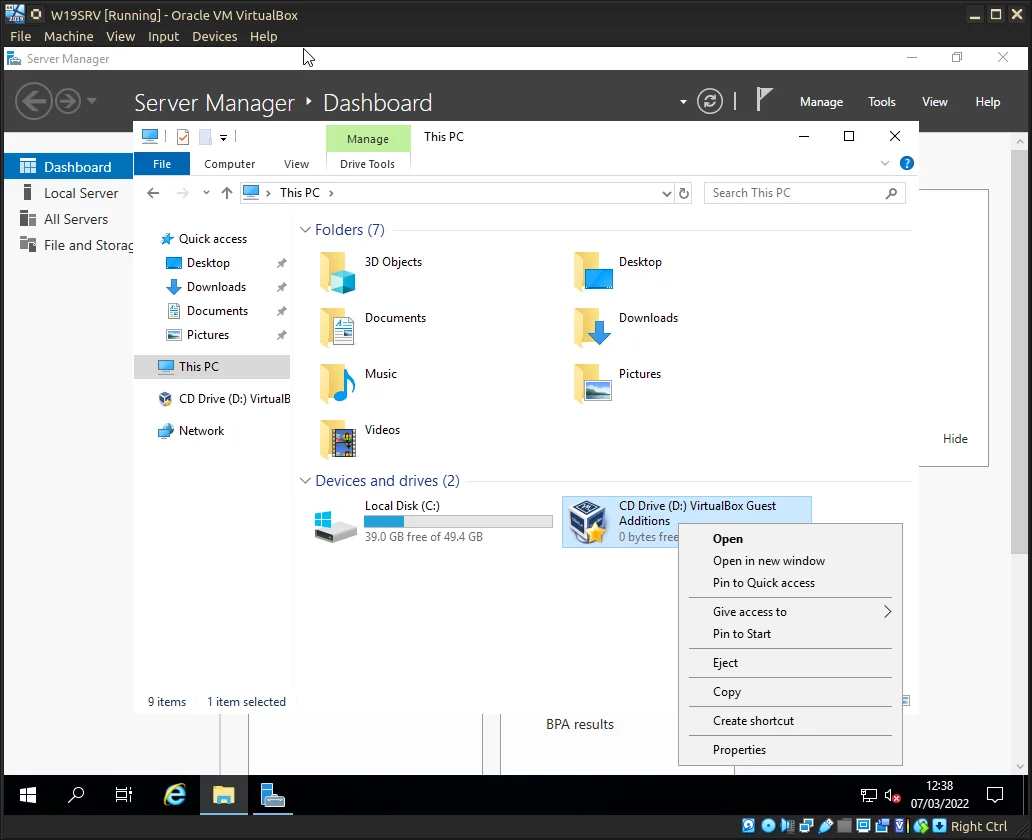
Guest Additions as it appears in Windows Explorer.
Install the additions using the provided executable for your architecture.
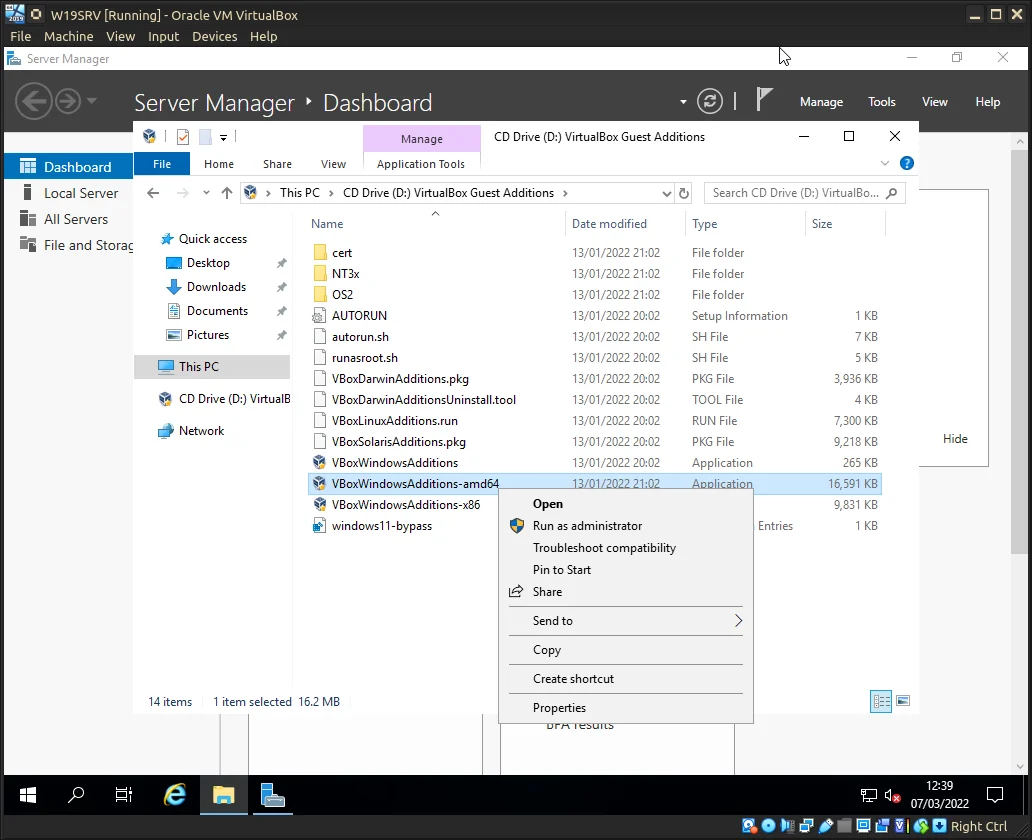
Install as Administrator for your architecture.
Once the installation wizard finishes you will be prompted to reboot. Do so now.
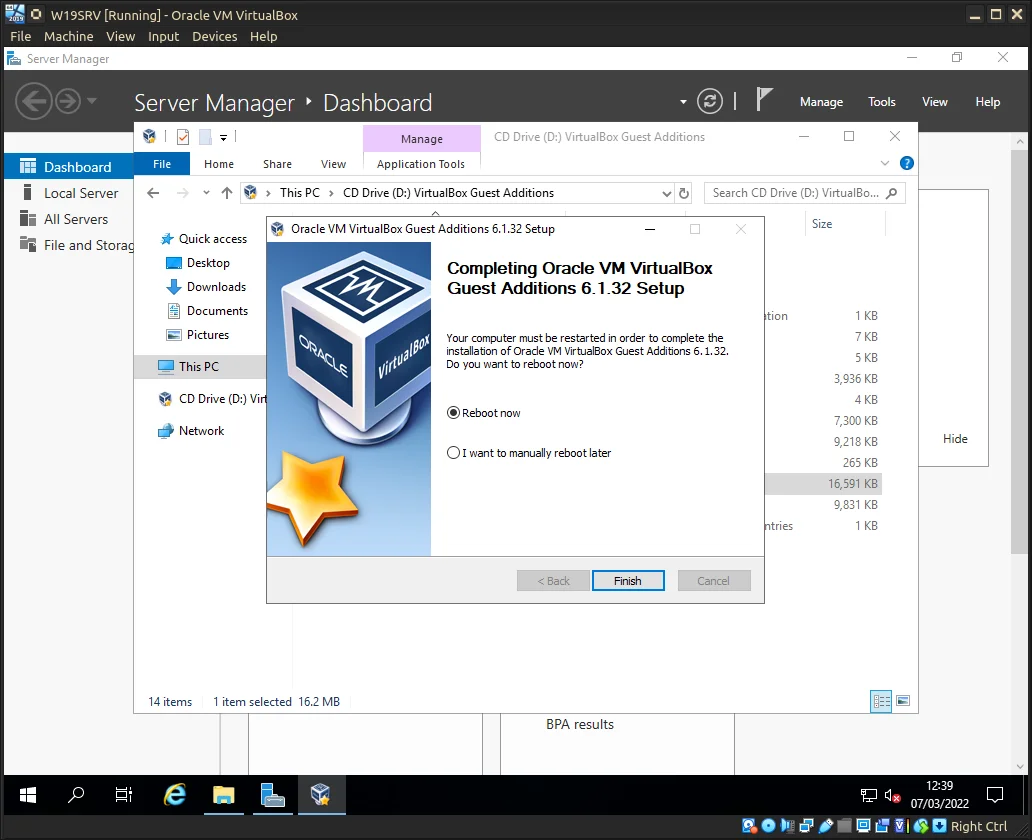
Restart to accept the changes to the Virtual Machine.
Once the VM reboots and you login the desktop should automagically scale properly. If not allow the VM to fully boot and then check the VirtualBox context menu: View ⇾ Auto-resize Guest Display is active (not greyed-out).
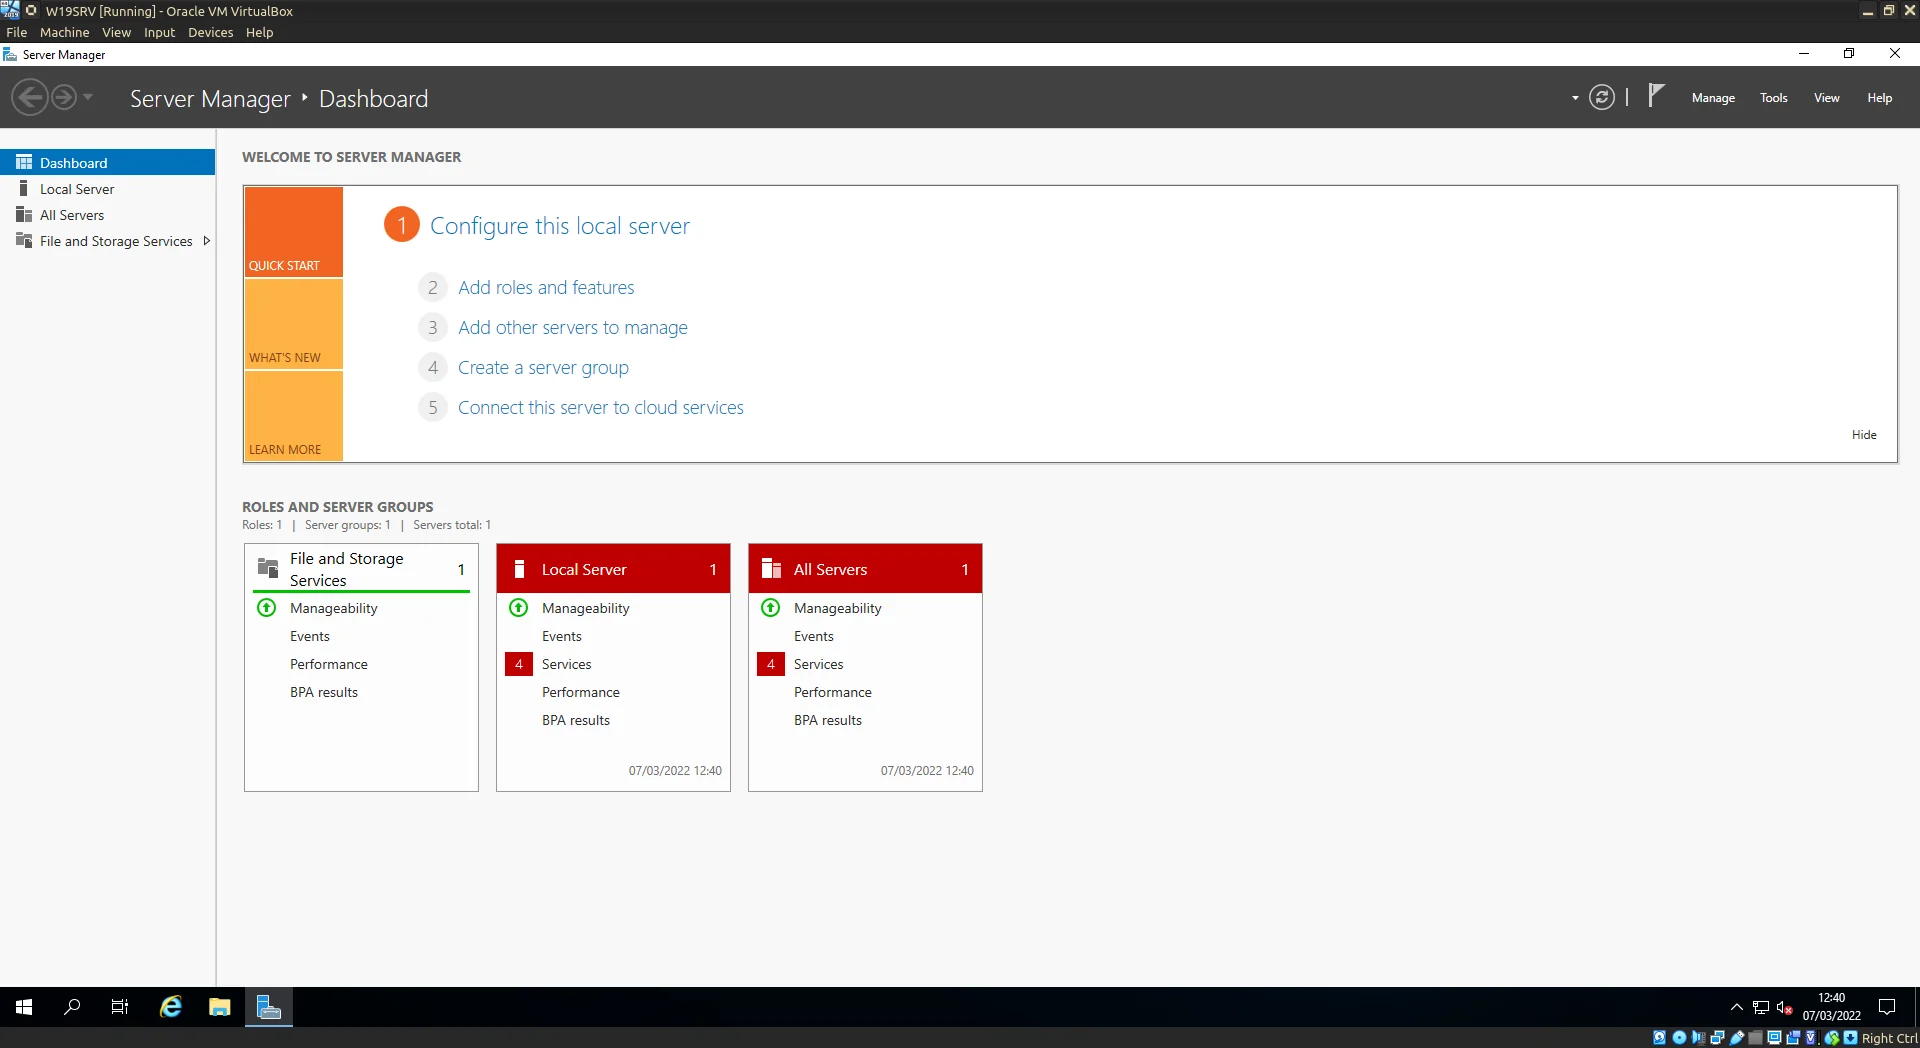
Look at all that room for activities...
Network Setup
Now the fun stuff, as per our VM setup earlier under Network Connections || ipconfig, we see 2 virtual NICs (Network Interface Cards) show up. Windows will default some settings such as the names for these interfaces (Ethernet, Ethernet 2) and attempt IP configuration dynamically. We now need to override these default values to something more useful. Pictured below is the 2 virtual NICs shown in Network Connections.
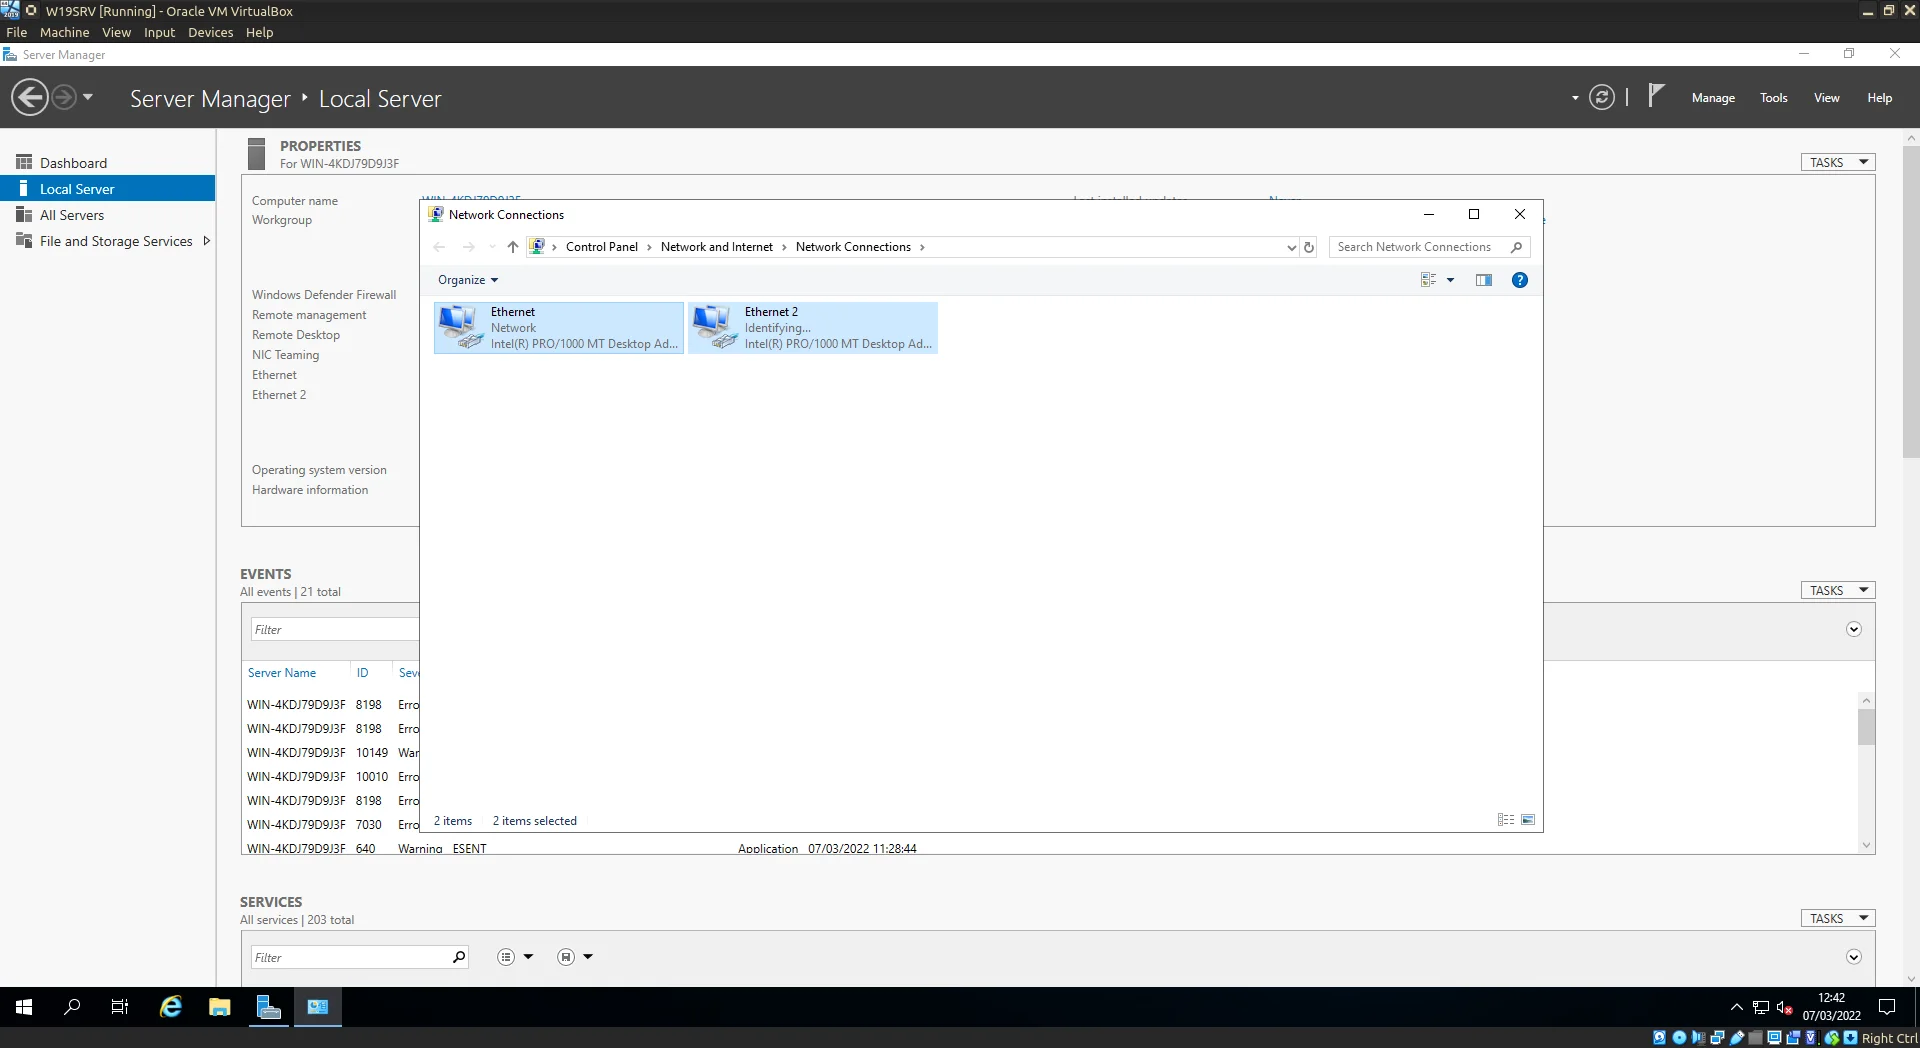
Both network adaptors as they appear in Network Connections.
(Optional) Start by renaming the NICs as to make them more readable quickly. Ethernet and Ethernet 2 aren’t particulary distinct at a glance.
In my case INTERNET and INTERNAL also aren’t particulary distinct but add some flair to yours, go wild.
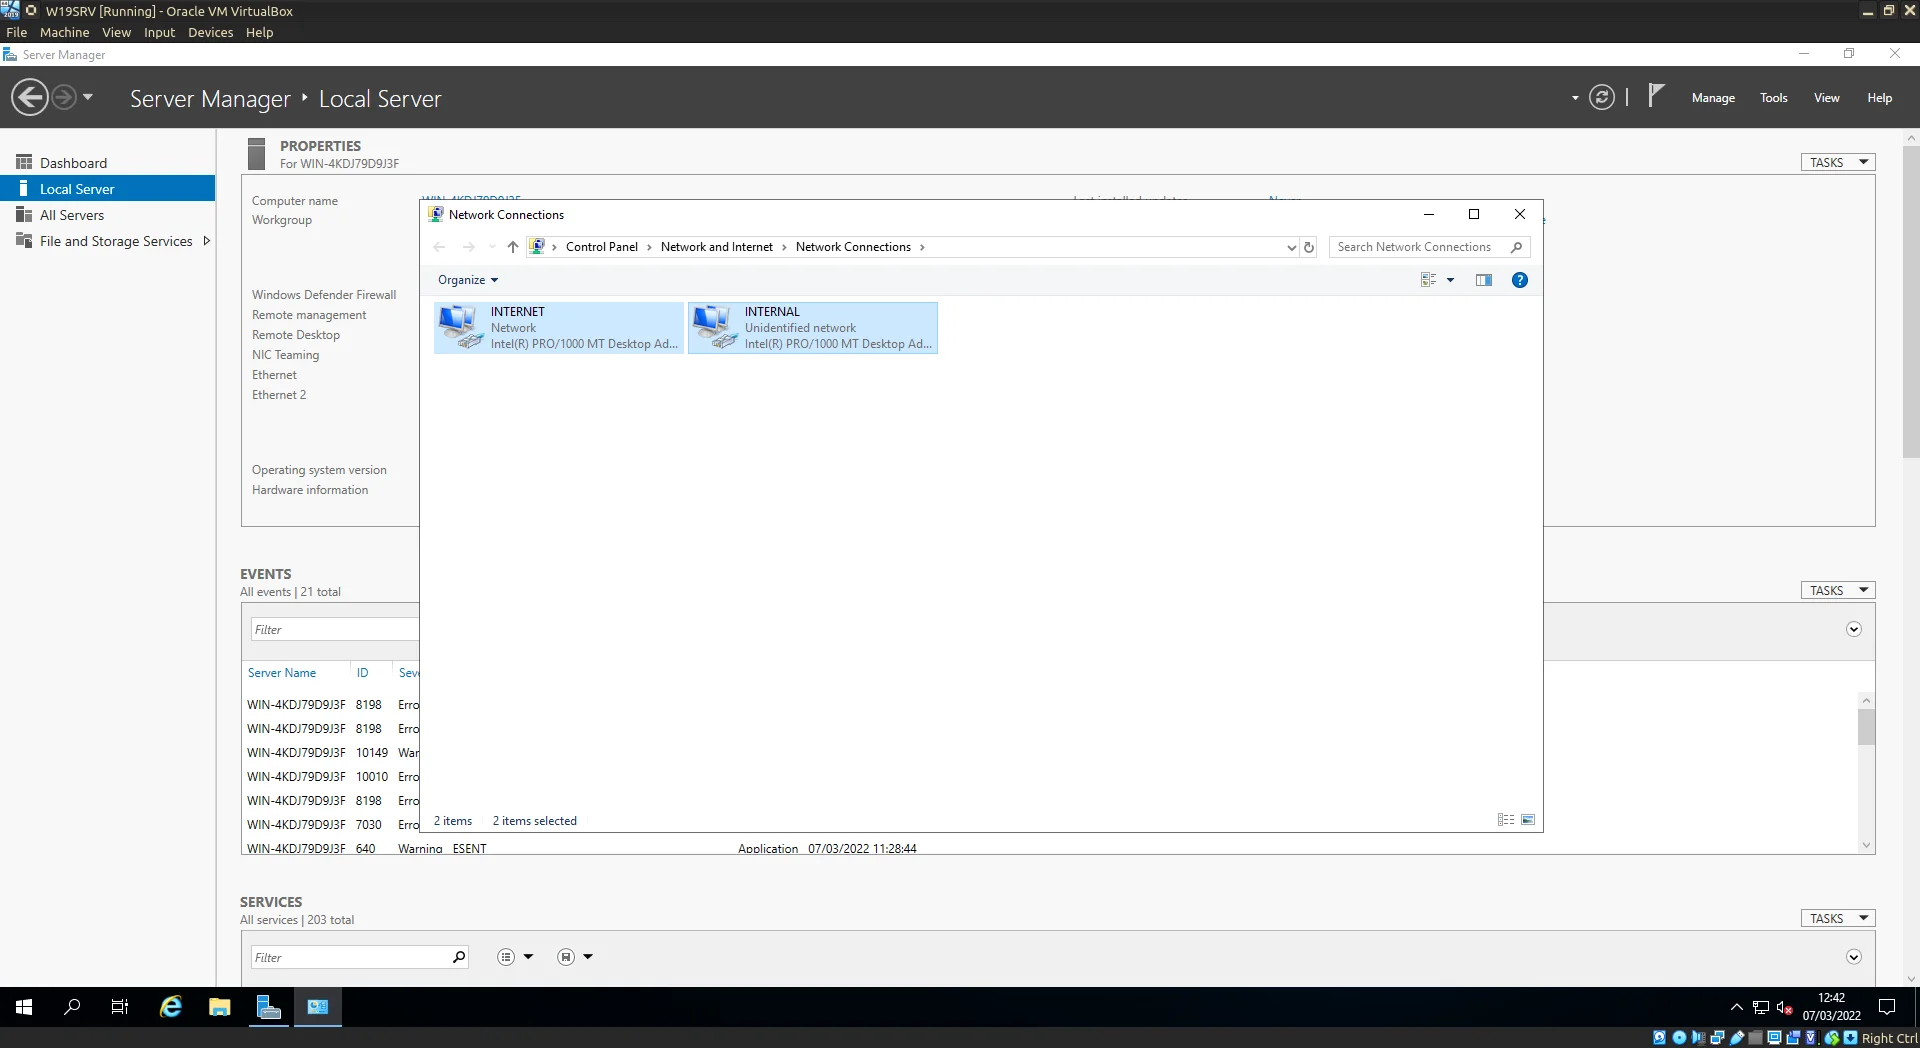
Alpha and Omega perhaps...
Firing up PowerShell we can run ipconfig to check out the current IP configuration for the Server at a glance. Currently the NIC connected the Internet is acquiring it’s IP configuration dynamically if you wish to set a static IP nows the time however in this case I’m happy to let it stay dynamic.
The Internal NIC however will require some configuration on our part.
Looking at the Internal NIC configuration currently we see the 169.254… tell-tell sign of an APIPA (Automatic Private Internet Protocol Addressing) address currently meaning that this isn’t a lot of use to us.
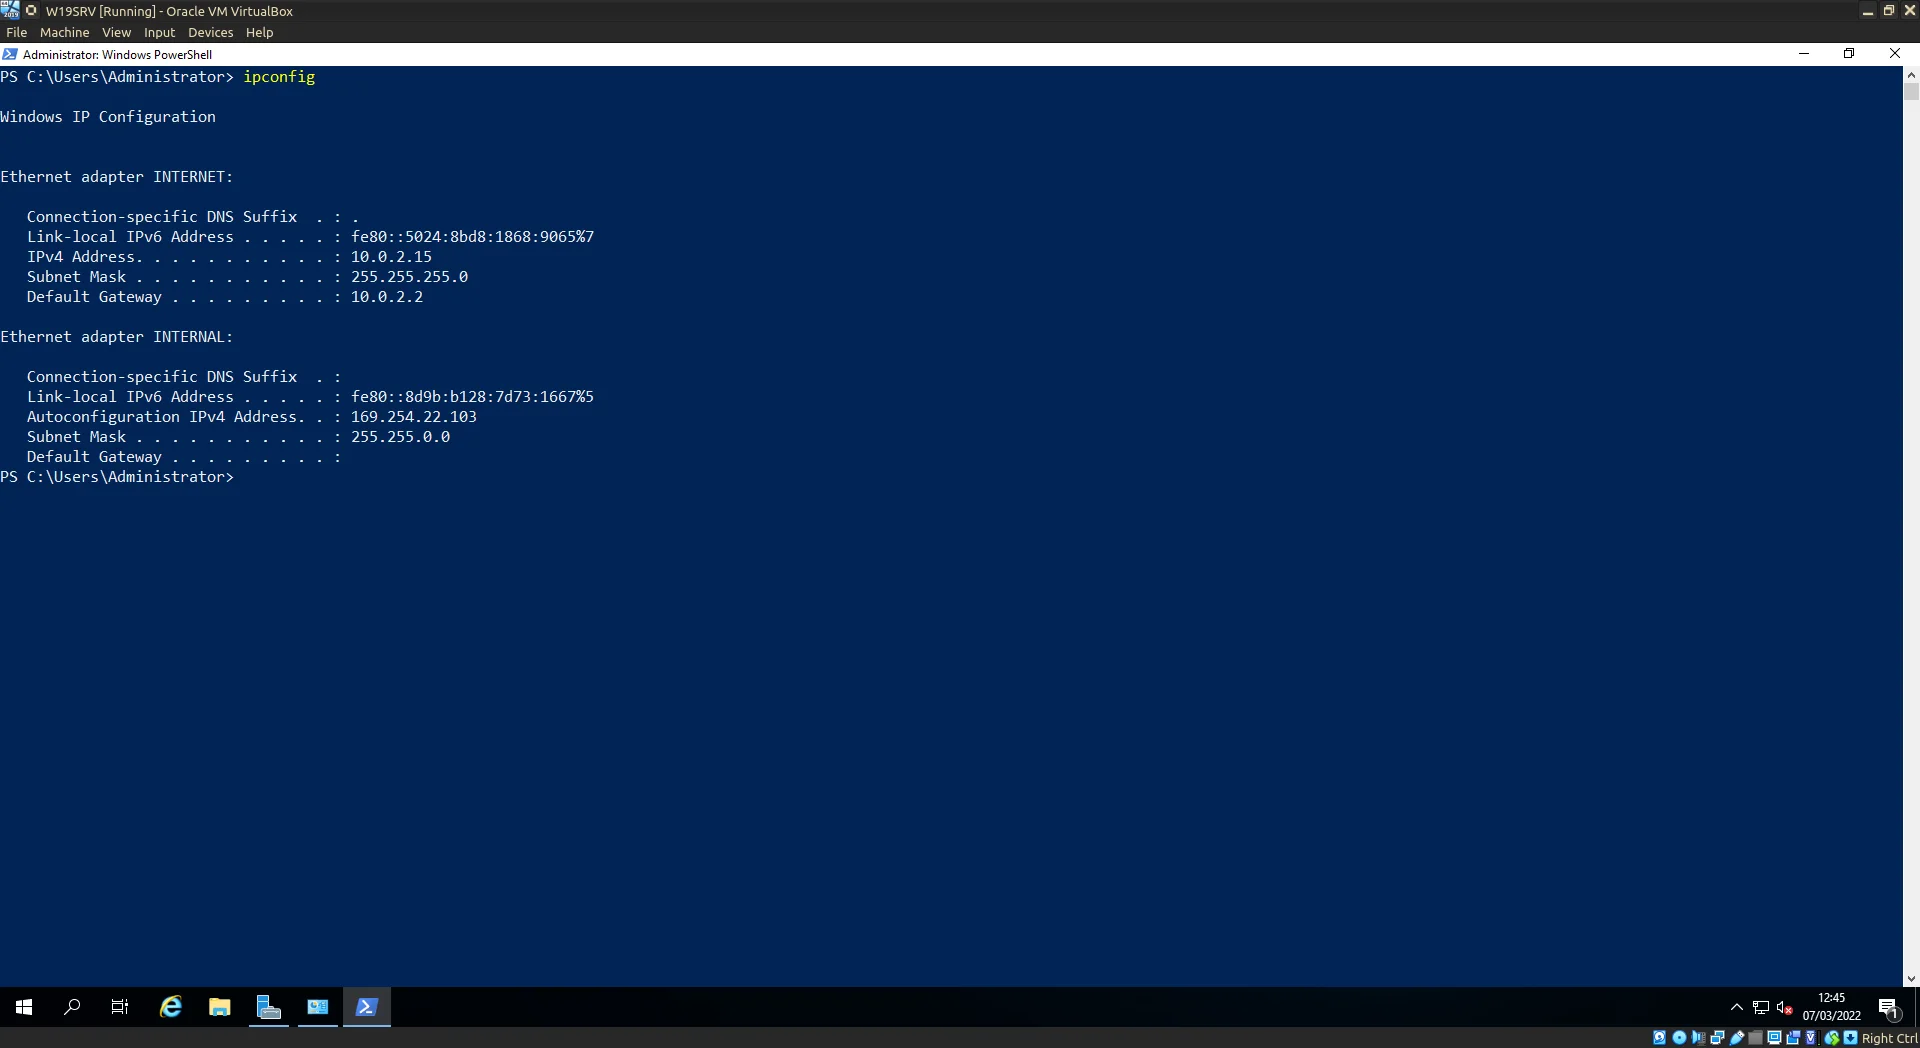
PowerShell output of the ipconfig command.
Diving into the IPv4 properties for the INTERNAL NIC we’ll start by deselecting the Obtain an IP address automatically radiobox instead opting for the Use the following IP address option.
Next we begin the definition of out private network. Choose your address range in this case 10.0.0.1/24 (in honesty a whack 24 is much too large for this scenario 2^8^ = 256 hosts but for simplicity /24 is easy to remember and write down). You don’t have to use this address range any valid address range will work, remember this is a private network the hosts connected will have no direct access to the Internet.
NOTE: leave the Gateway address blank this allows for all routing to be done through the Server.
The Preferred DNS address should be the same as the address for the Internet facing NIC. This is another reason to go for a static IP for that NIC.
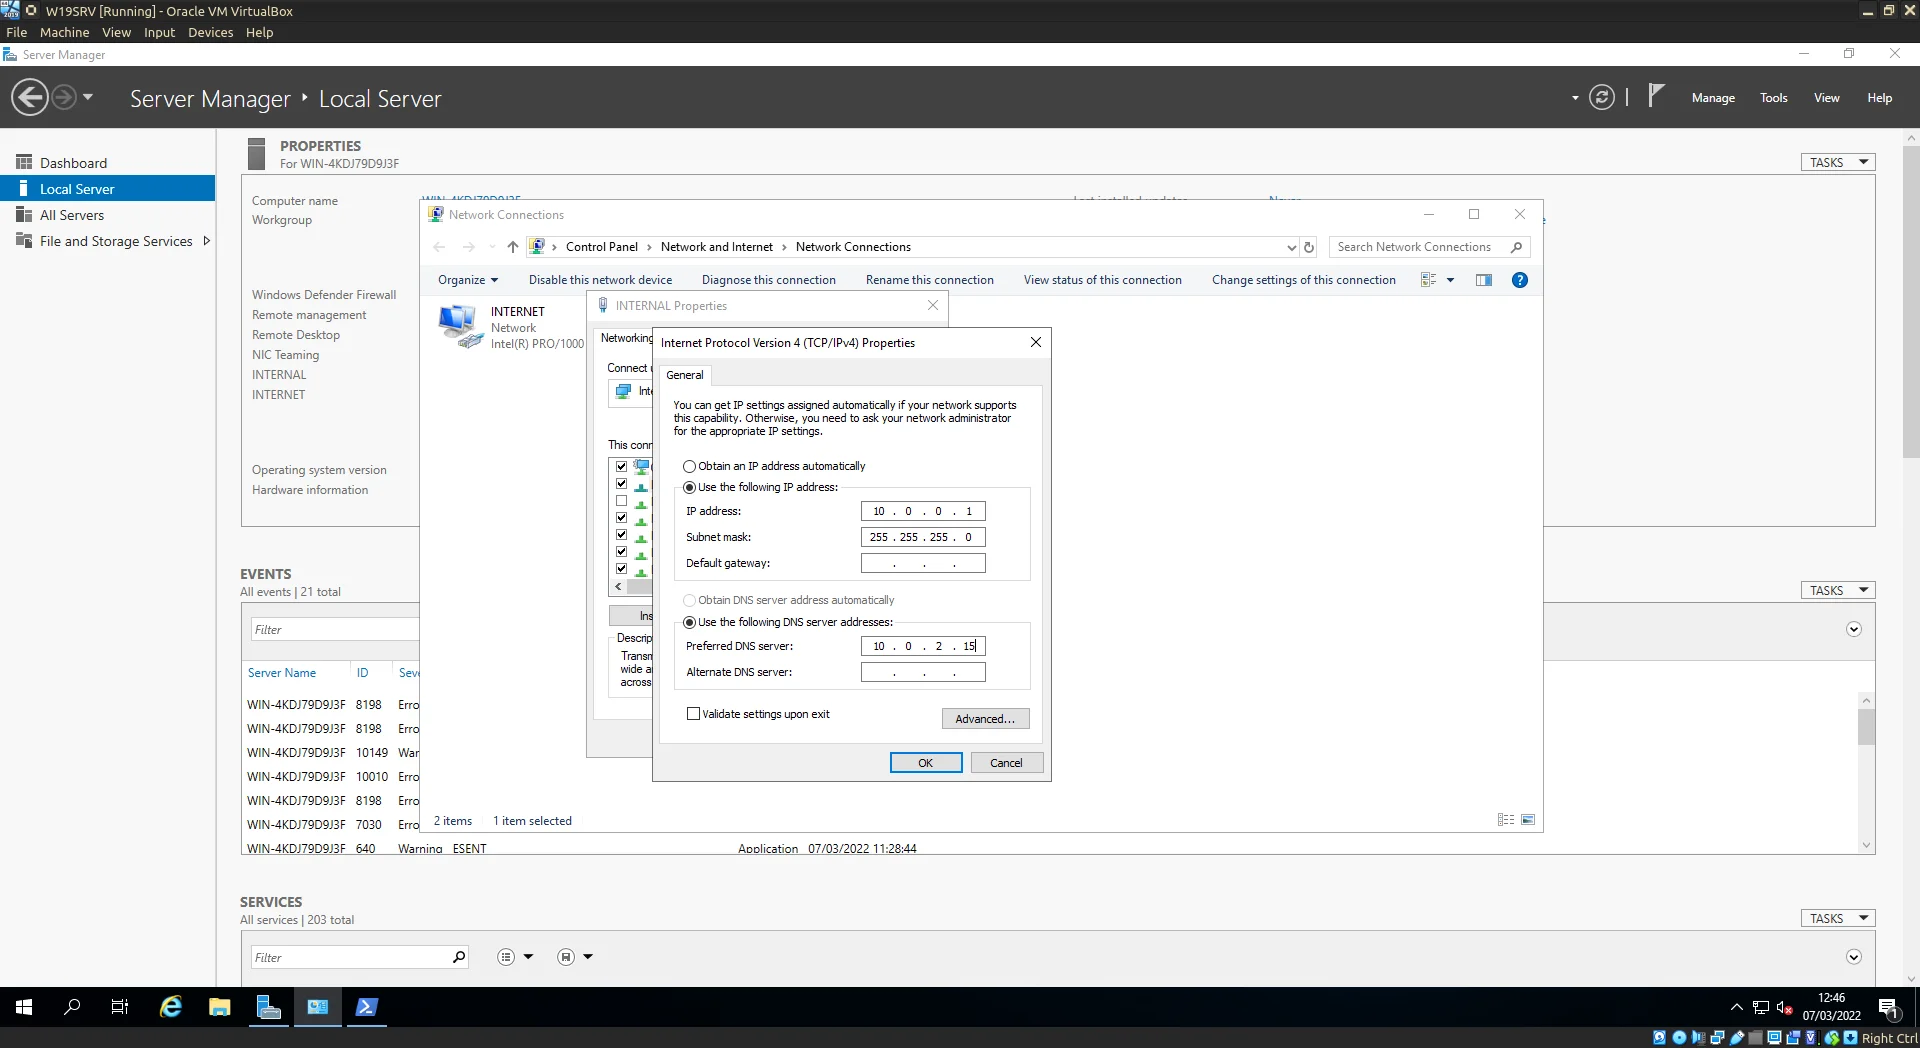
Double-check that DNS server address.
With the NICs setup we move onto the Domain…
Domain Setup
Time to start utilising the domain controller capabilities of Windows Server.
Start by launching the Add Roles and Features Wizard (Server Manager has a quick link to it under option 2).
Select the first option for Role-based or feature-based installation and click next.
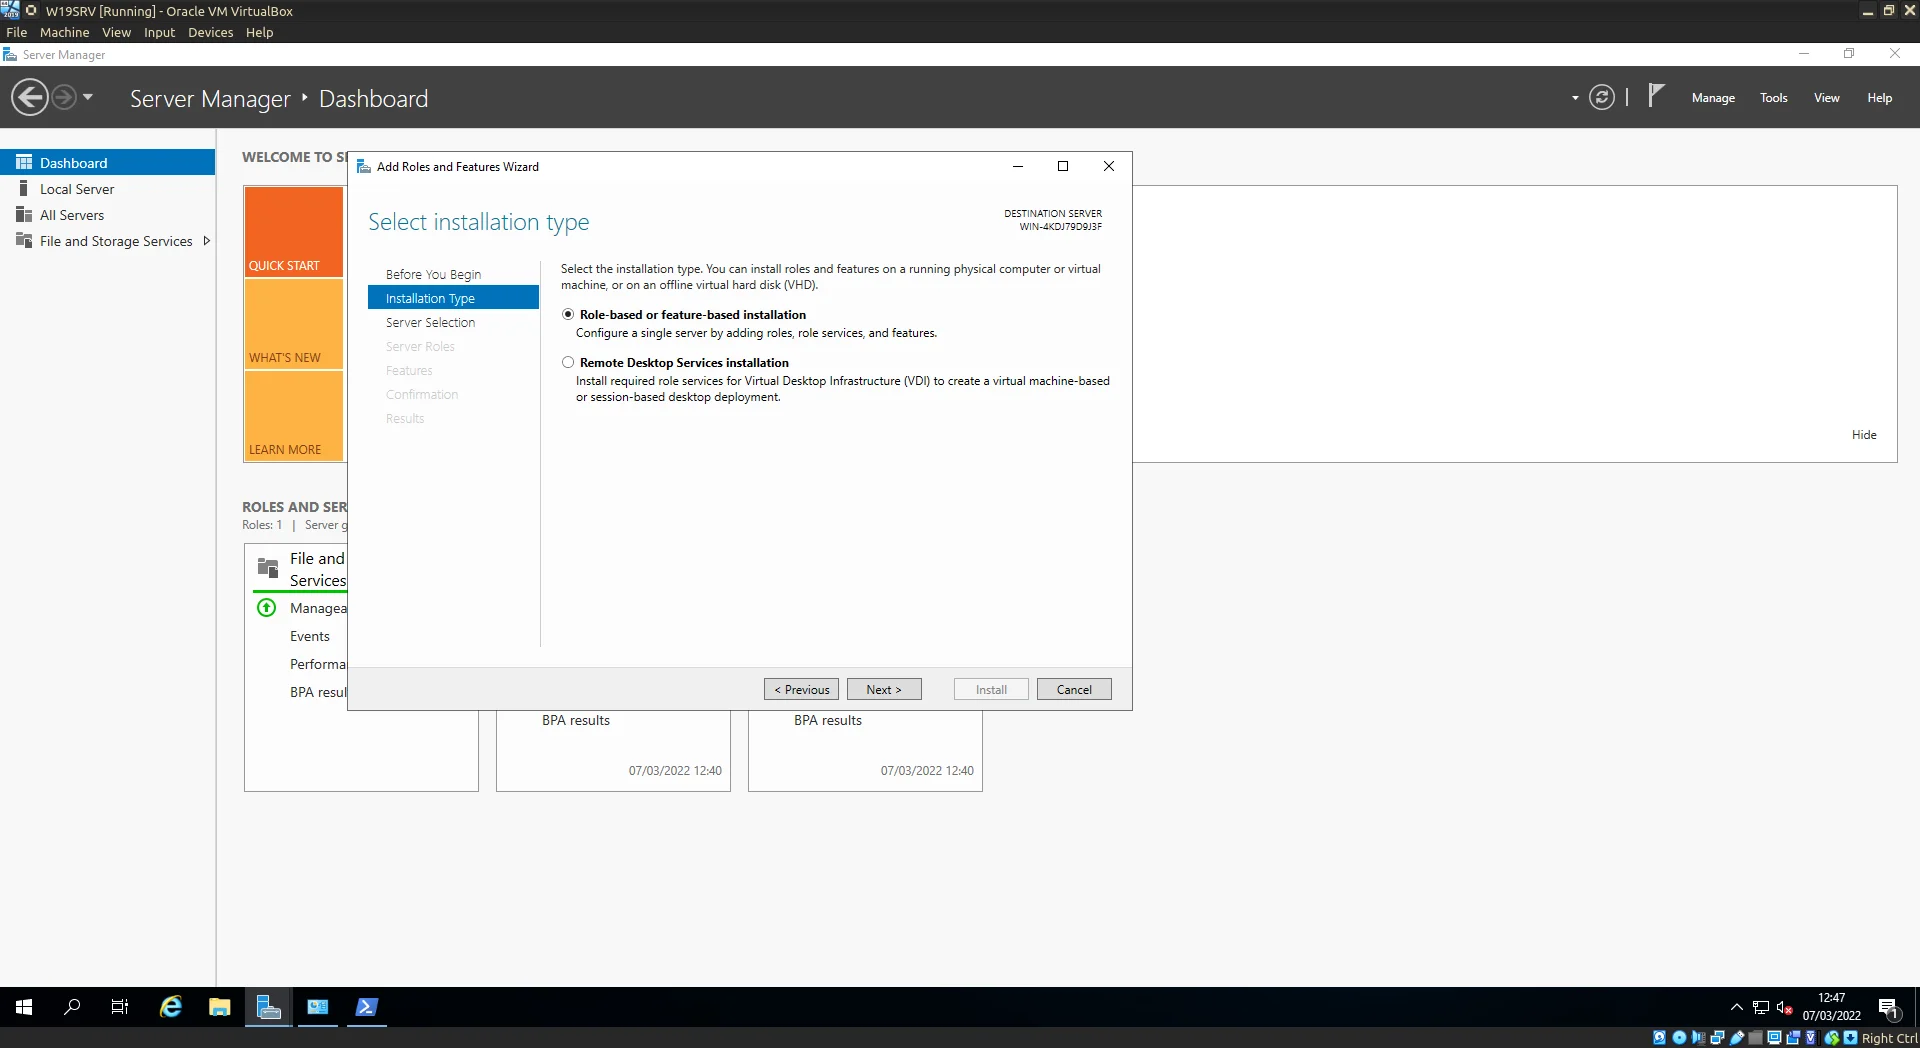
Add Roles and Feature Wizard.
(I’ve omitted the Server selection step as this is straight forward in our example, we only have 1 server to manage!) Scroll down the list selecting the following: Active Directory Domain Services, DHCP Server, DNS Server AND Remote Access (I forgot this at the time of initial installation whoops) (NOTE:
Selecting some of these options will present a pop-up window asking to also select additional required packages, skim the packages and accept.)
Once all selected click next.
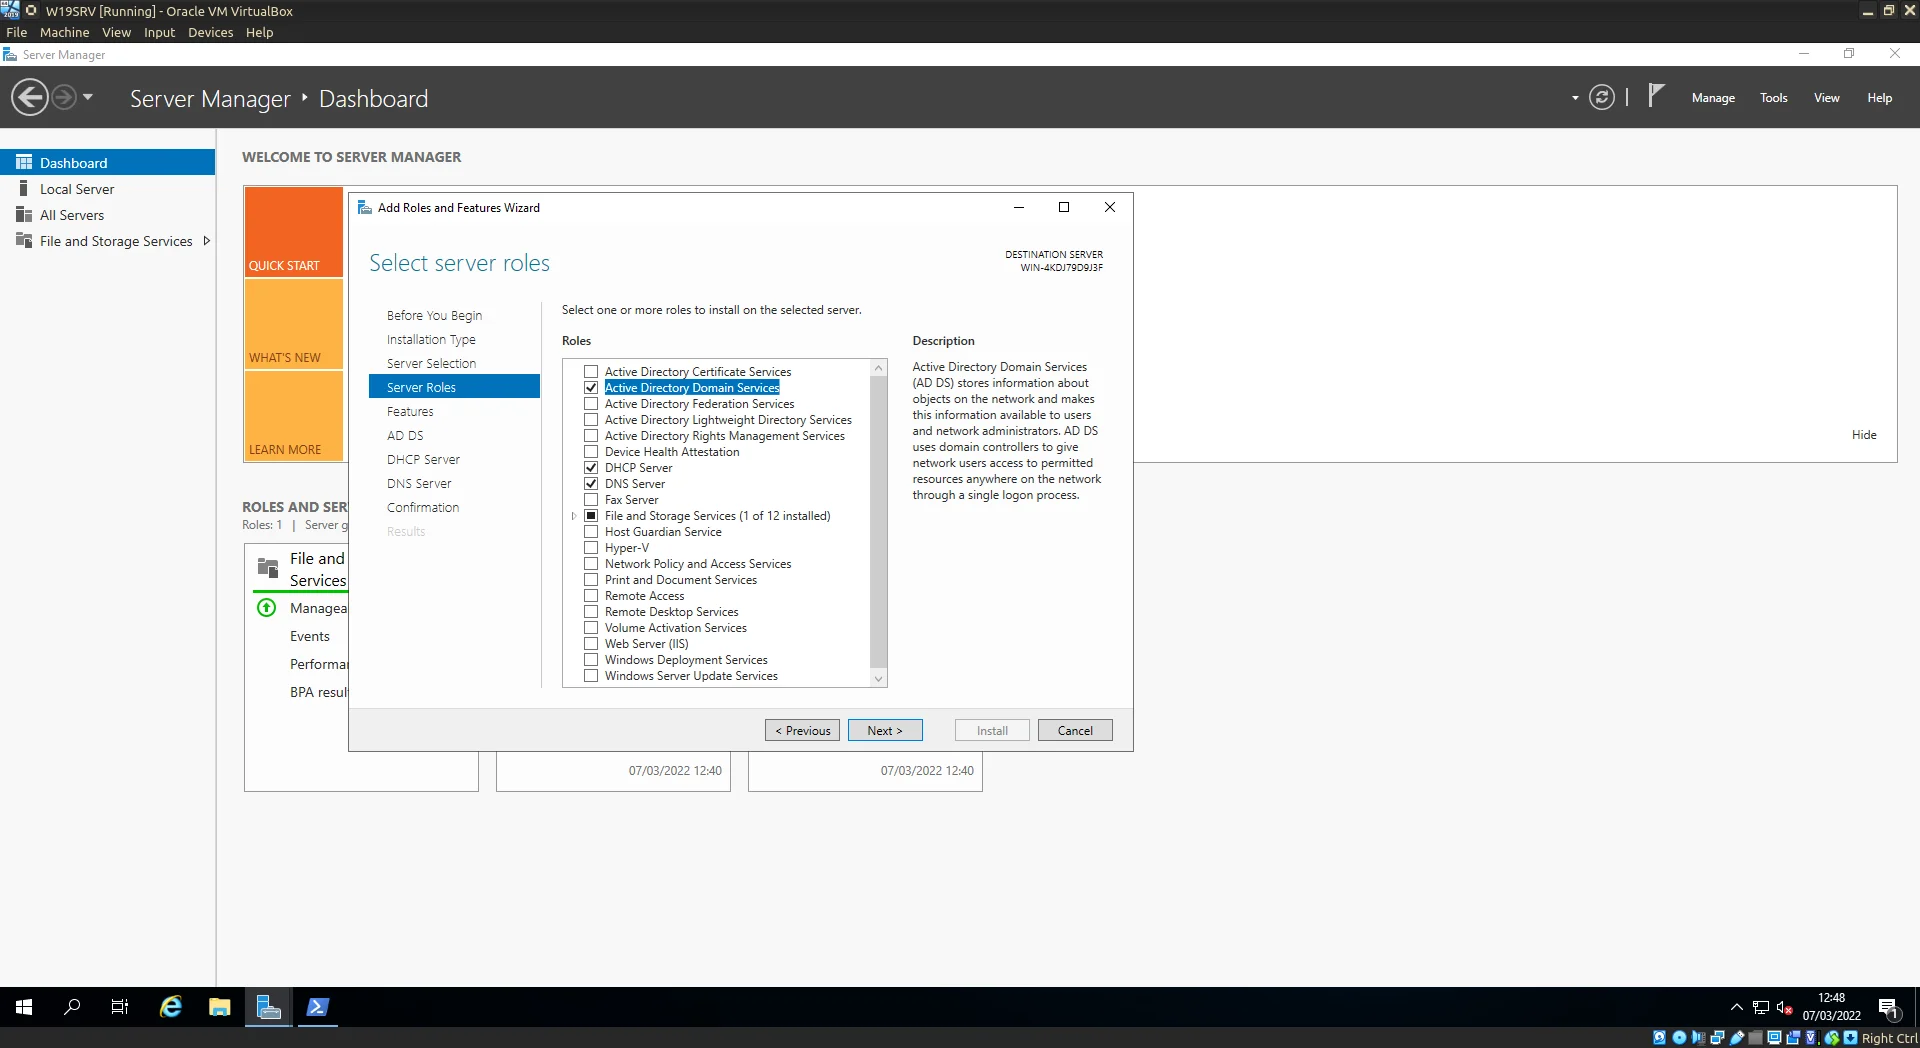
Select Active Directory Domain Services, DHCP Server, and DNS Server.
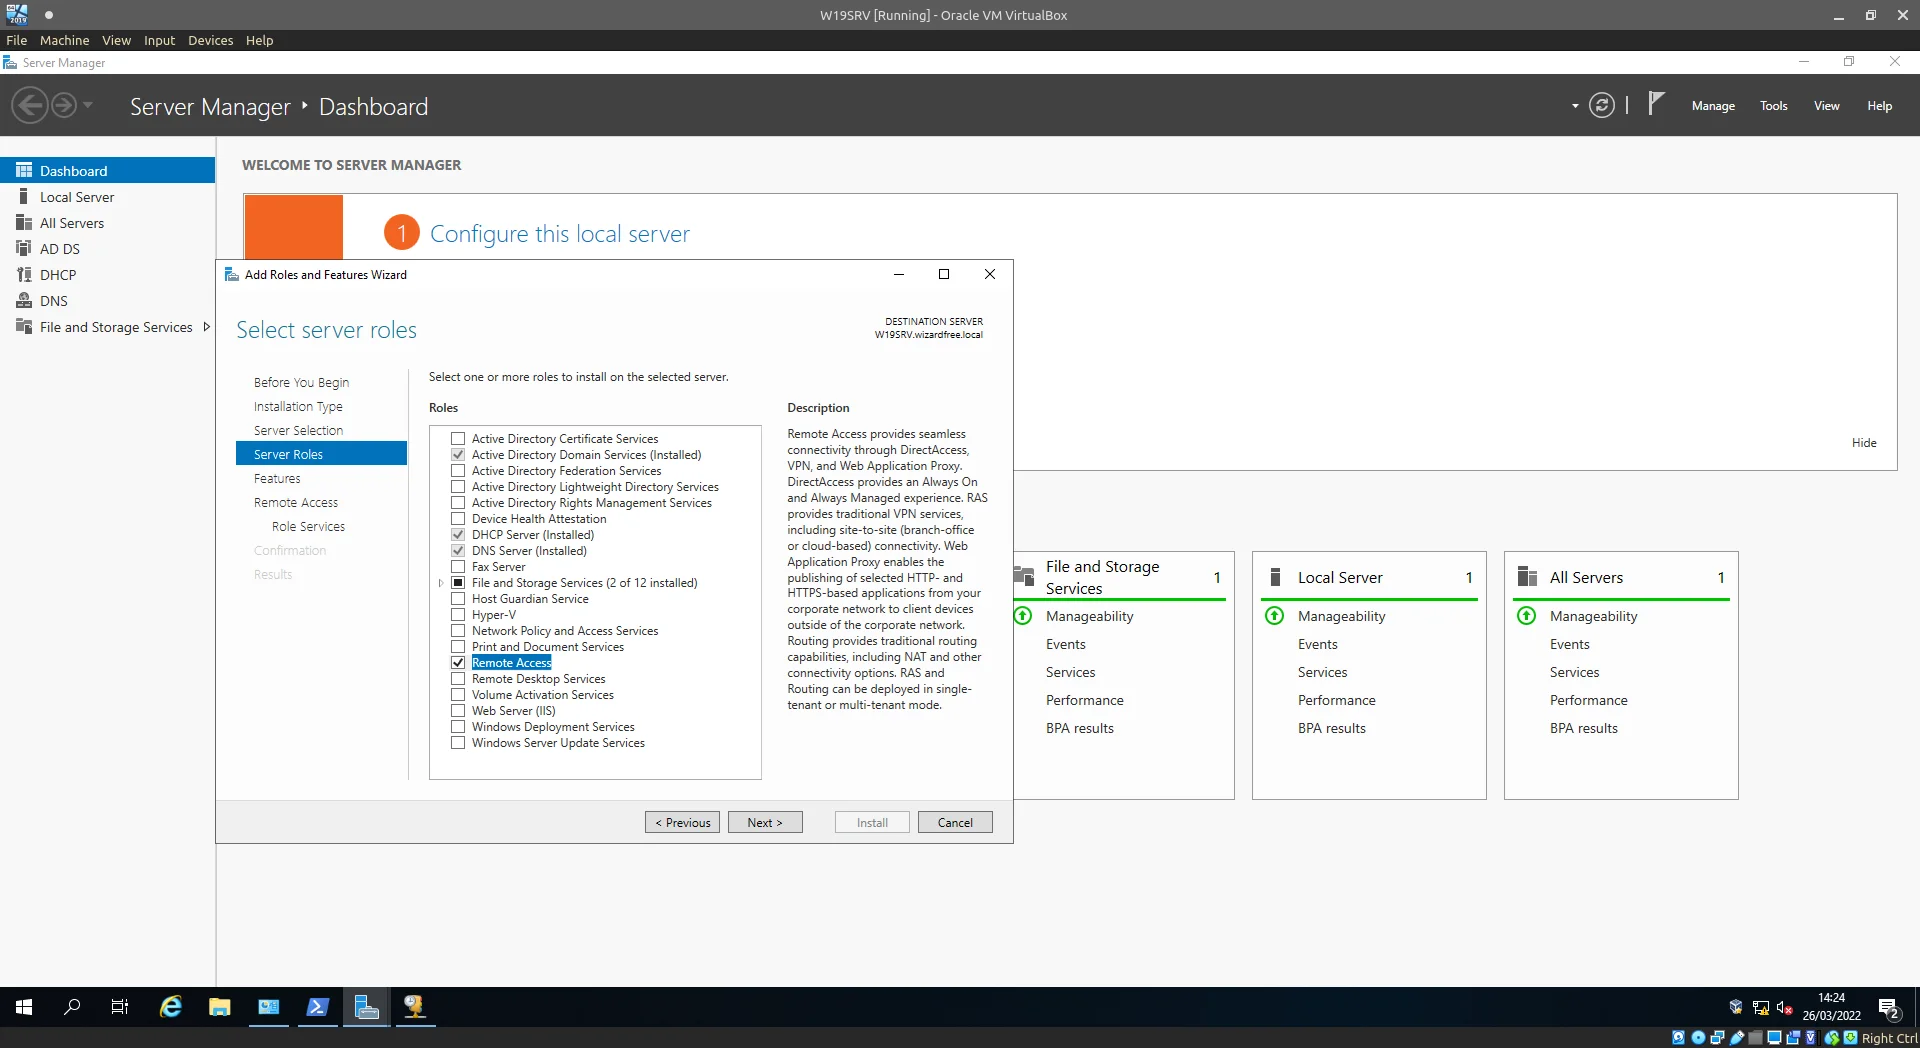
Don't forget Remote Access...
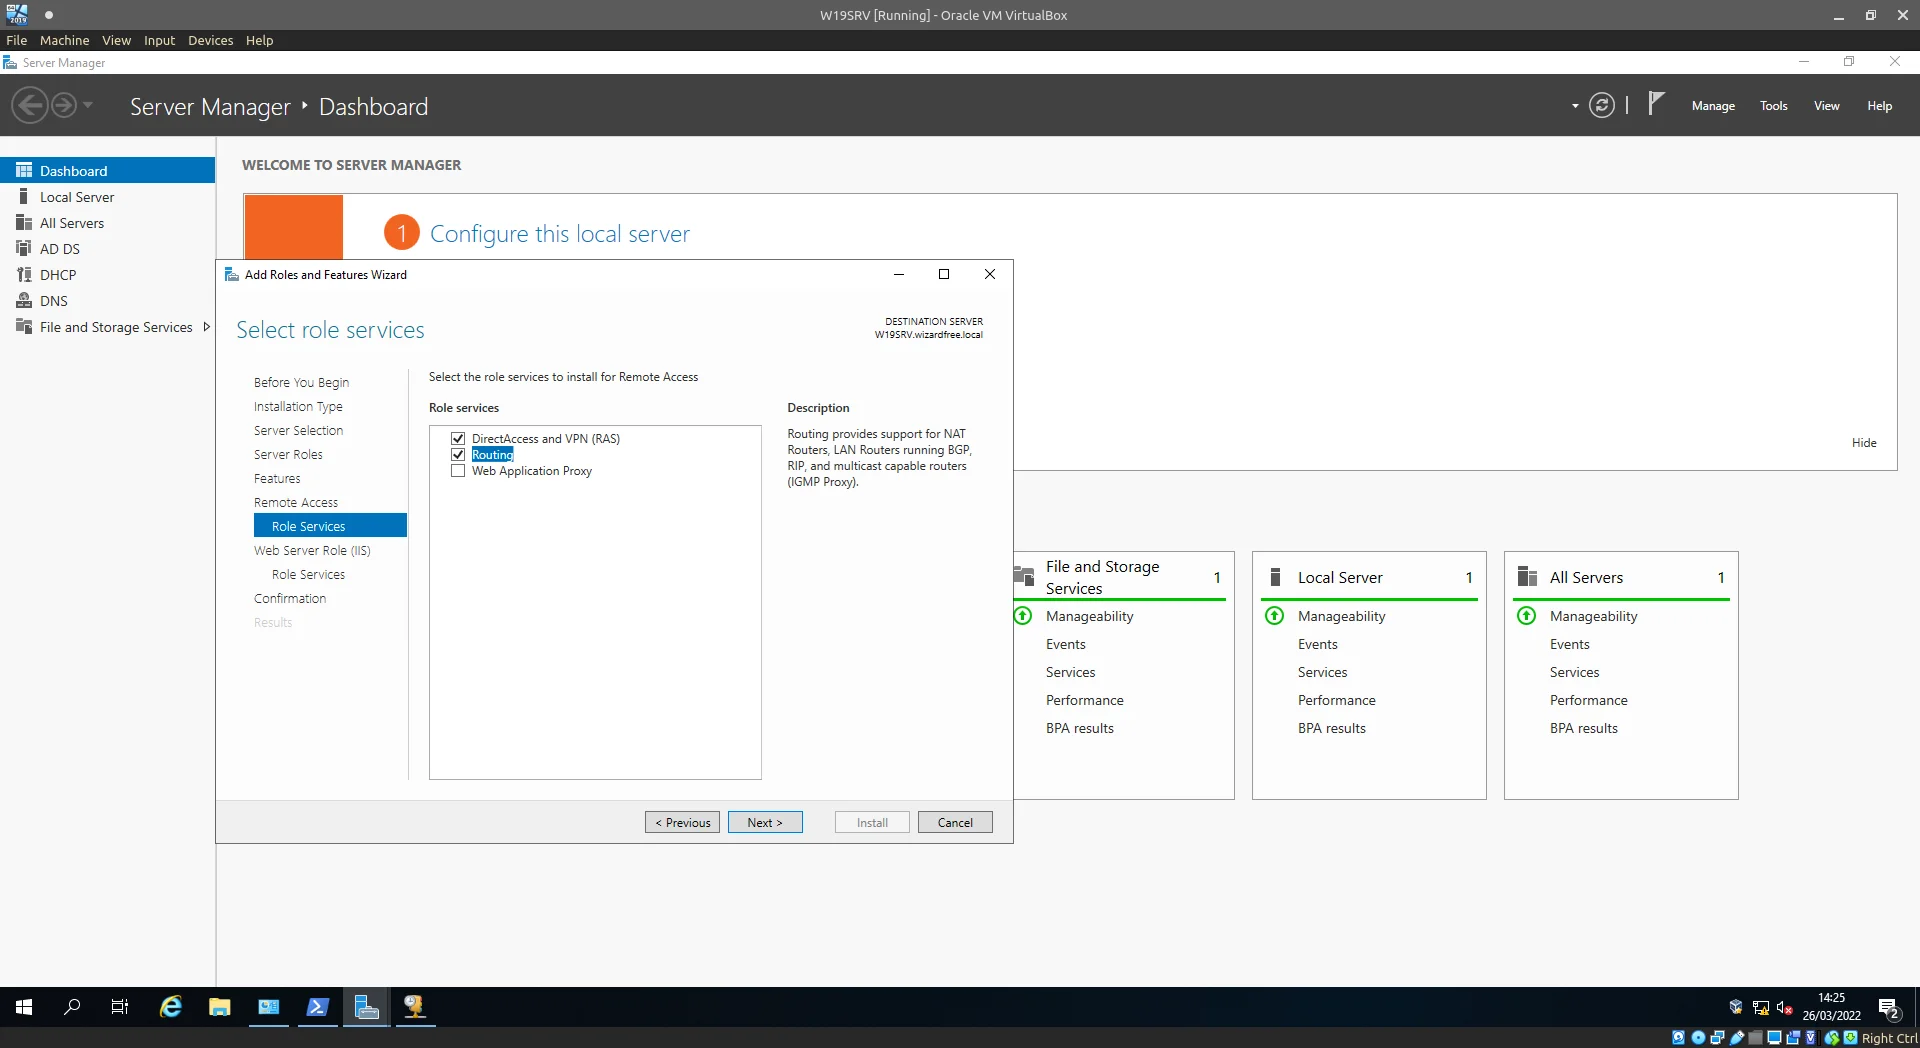
Select Routing.
Click next until the confirmation page is reached. Check the Restart if neccessary checkbox and click Install.
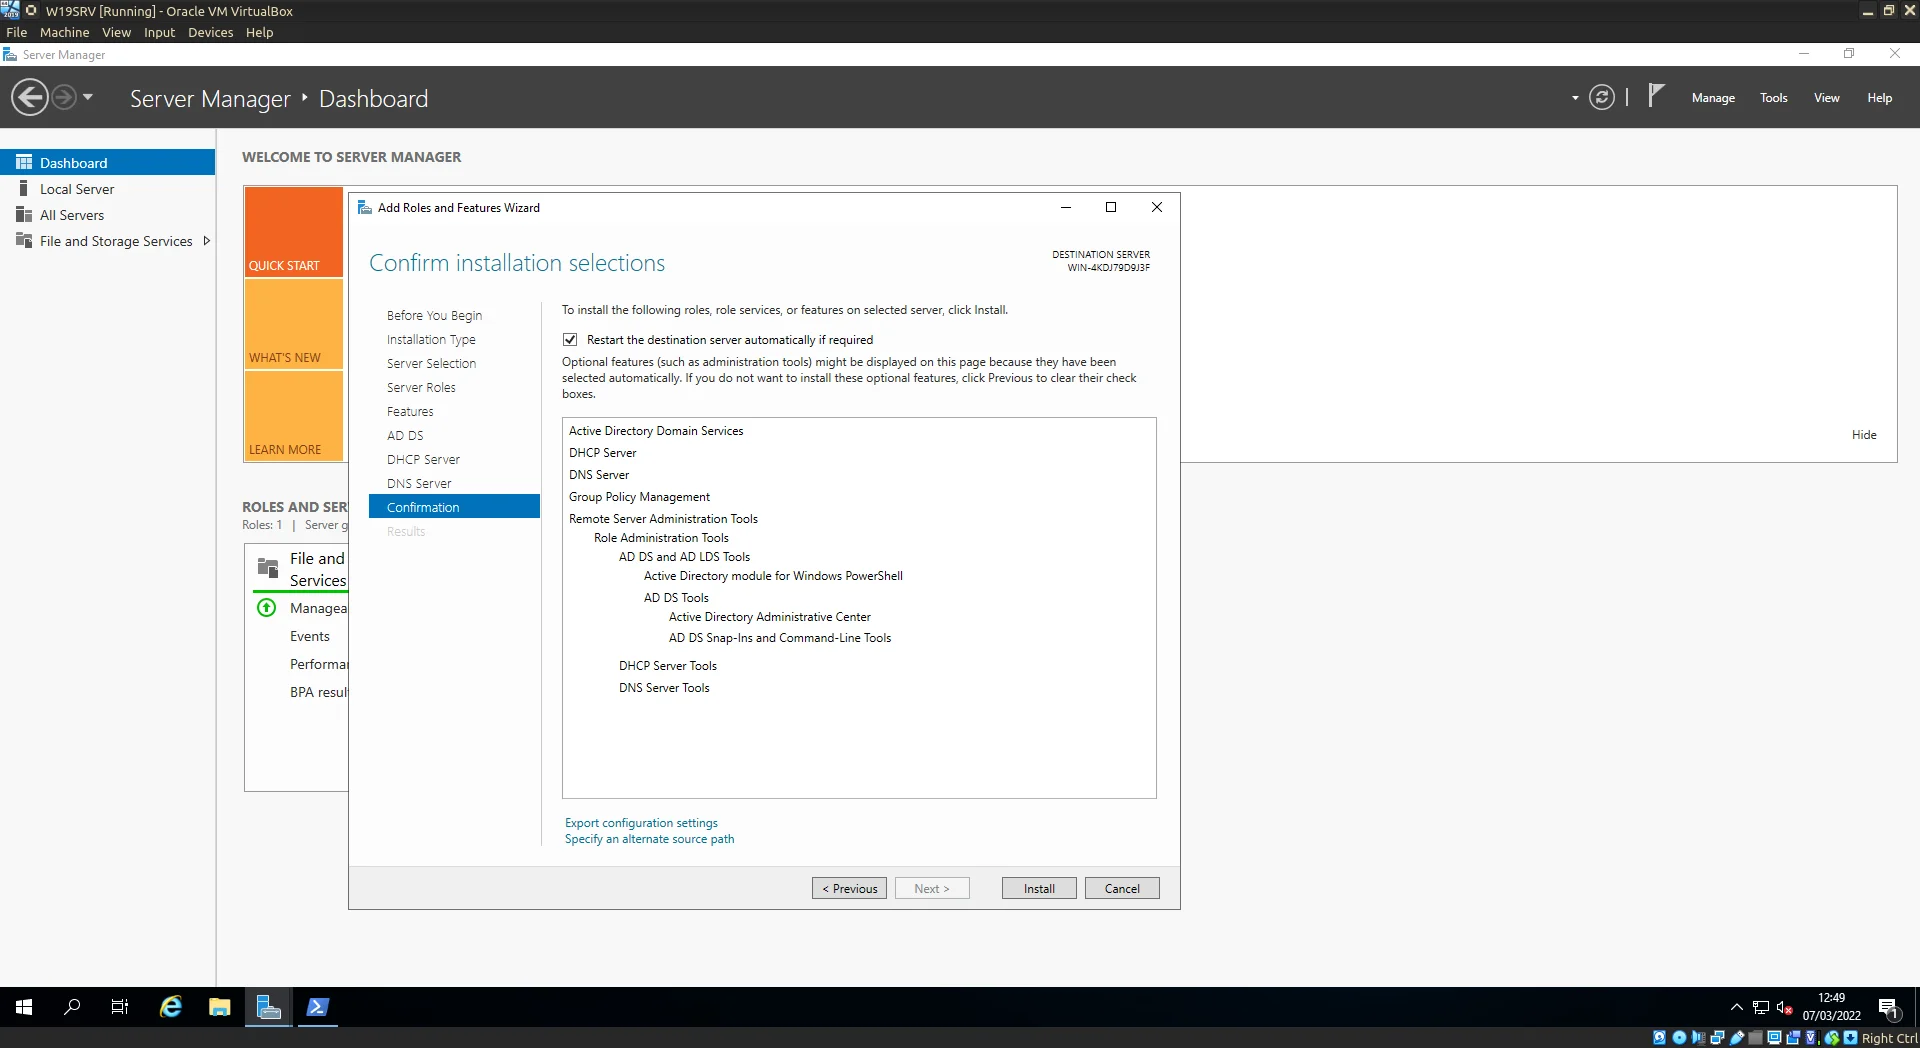
Confirm choices and Click Install.
Grab a coffee and let the installation happen. The server may restart at this point again let the server finalise installation.
Once completed the Server Manager will be displaying the warning sign in the top right, click on this to continue onto Post-installation configuration.
For now we’ll address the Domain Services issue which has been highlighted by the Server Manager.
Click on the link: Promote this server to a domain controller, to continue.
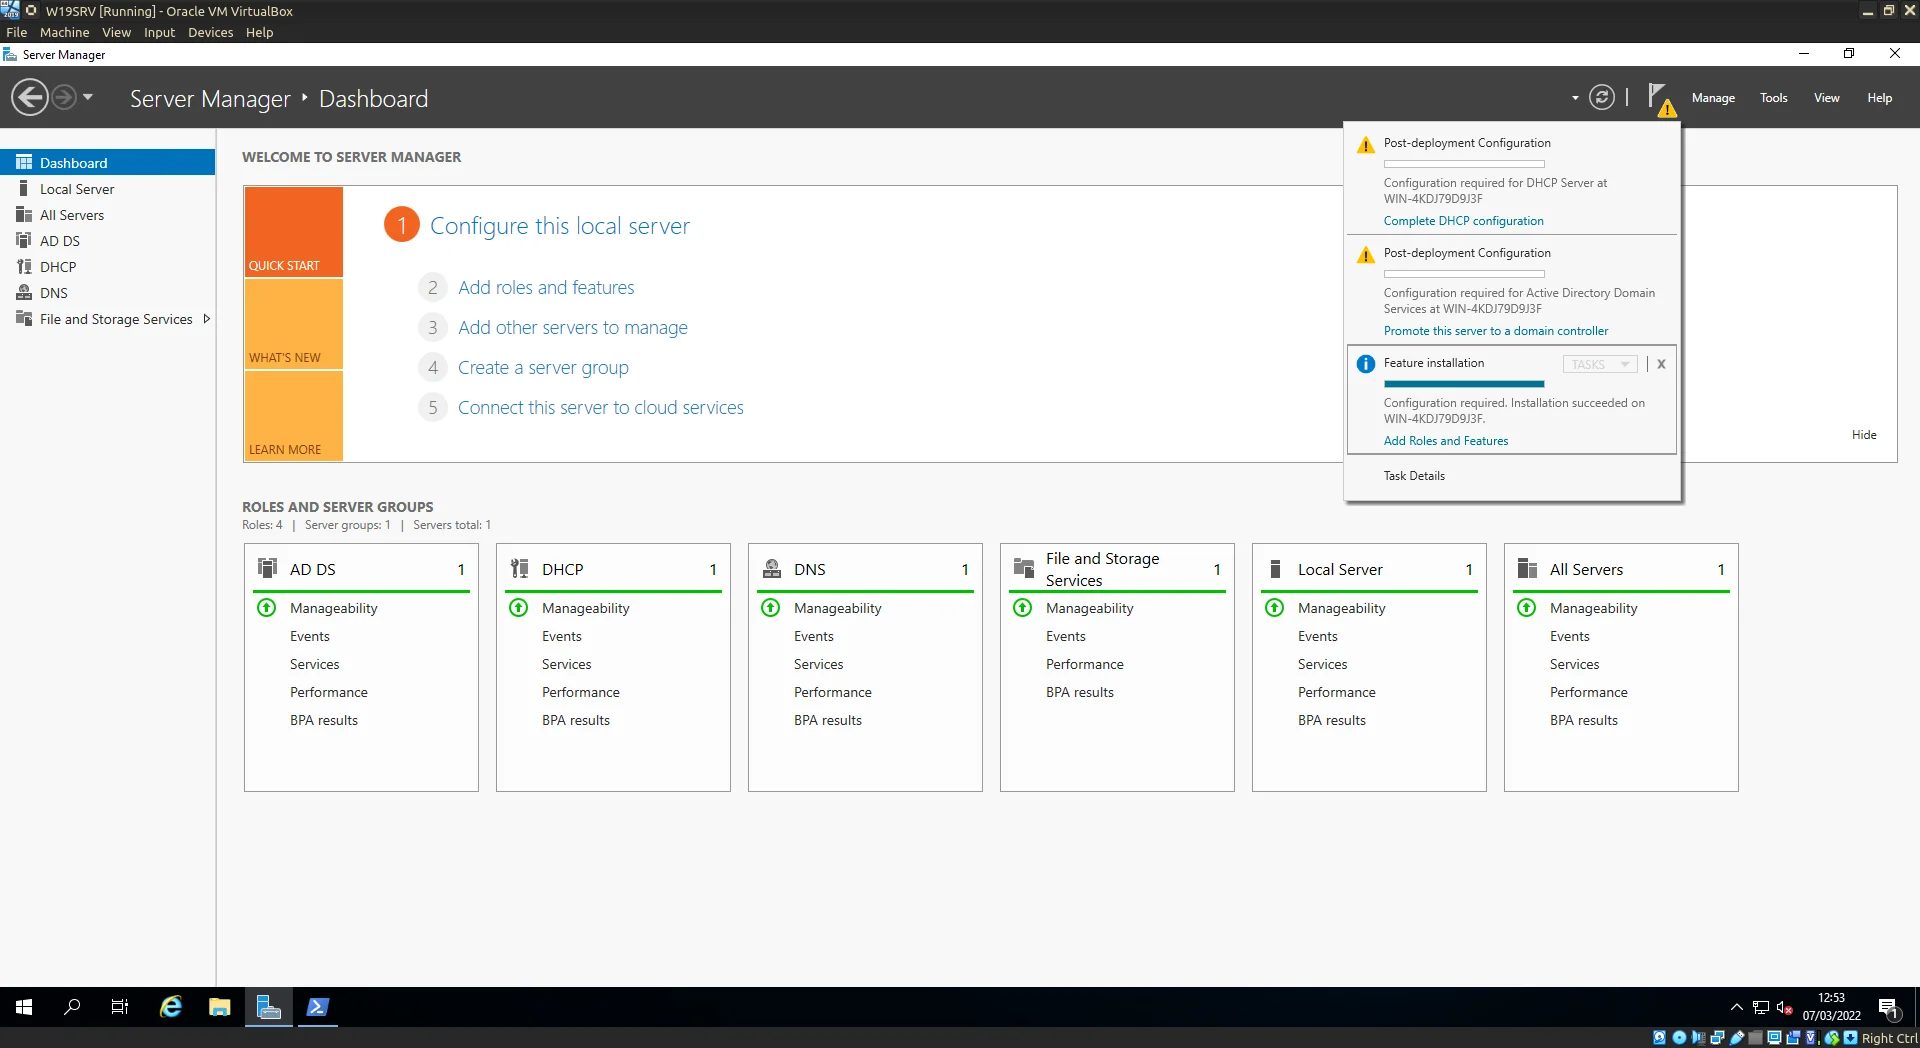
Select Promote this server to a domain controller.
On the window which pops up we’ll be creating a new forest. 1 Specify a root domain name this may be a domain you own or simply use one for testing. (foobar.local works nicely :wink:) Happy? Click next and next again.
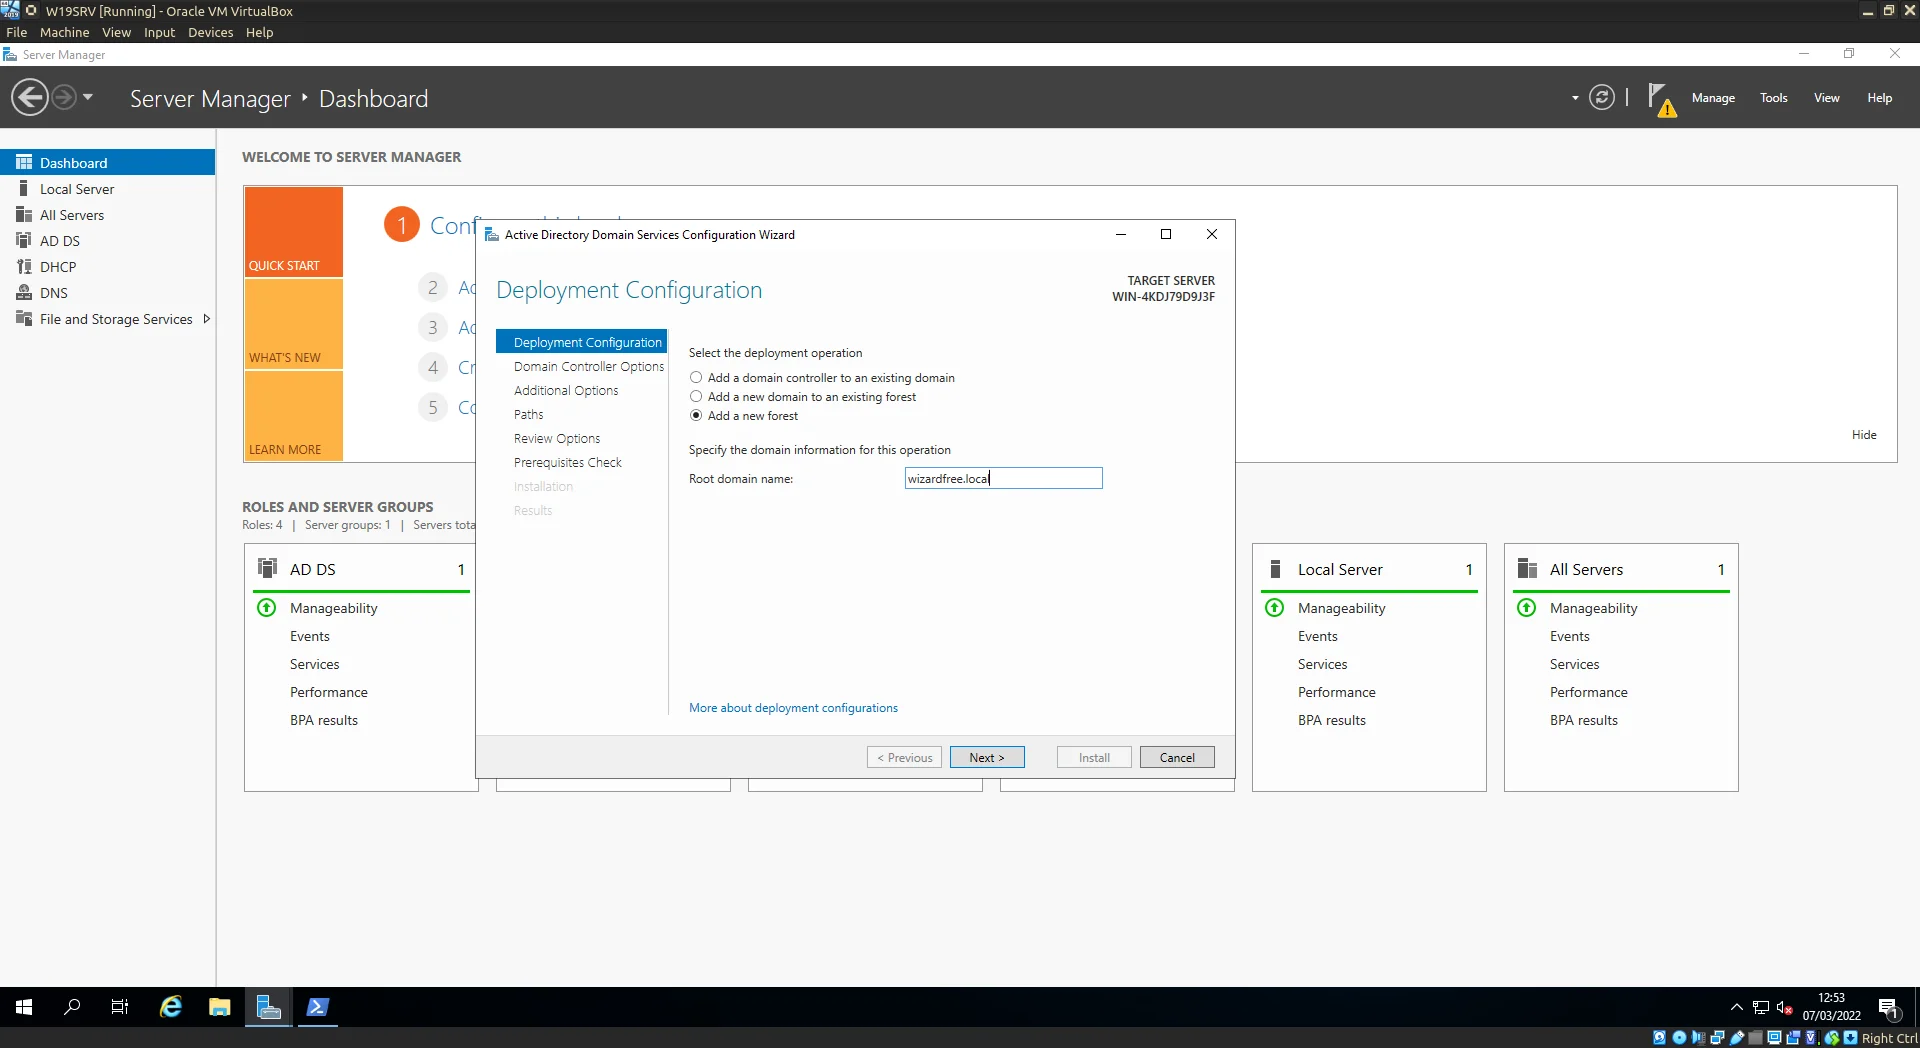
Adding the Root domain name.
On the review screen I’ve highlighted some important information which appears at the the bottom of the scrollable pane. Two important points are mentioned:
-
Firstly the DNS Server (service) will configured on this computer and this computer will be configured as its own preferred DNS server.
-
Secondly the password for the domain administrator account will be the same as the local administrator account of the server. (If the local admin password is weak now might be good time to change it)
Why is it important to have a DNS service running on our server well:
…when a network user with an Active Directory user account logs in to an Active Directory domain, the DNS Client service queries the DNS server to locate a domain controller for the Active Directory domain… (From the horses mouth)
Click next.
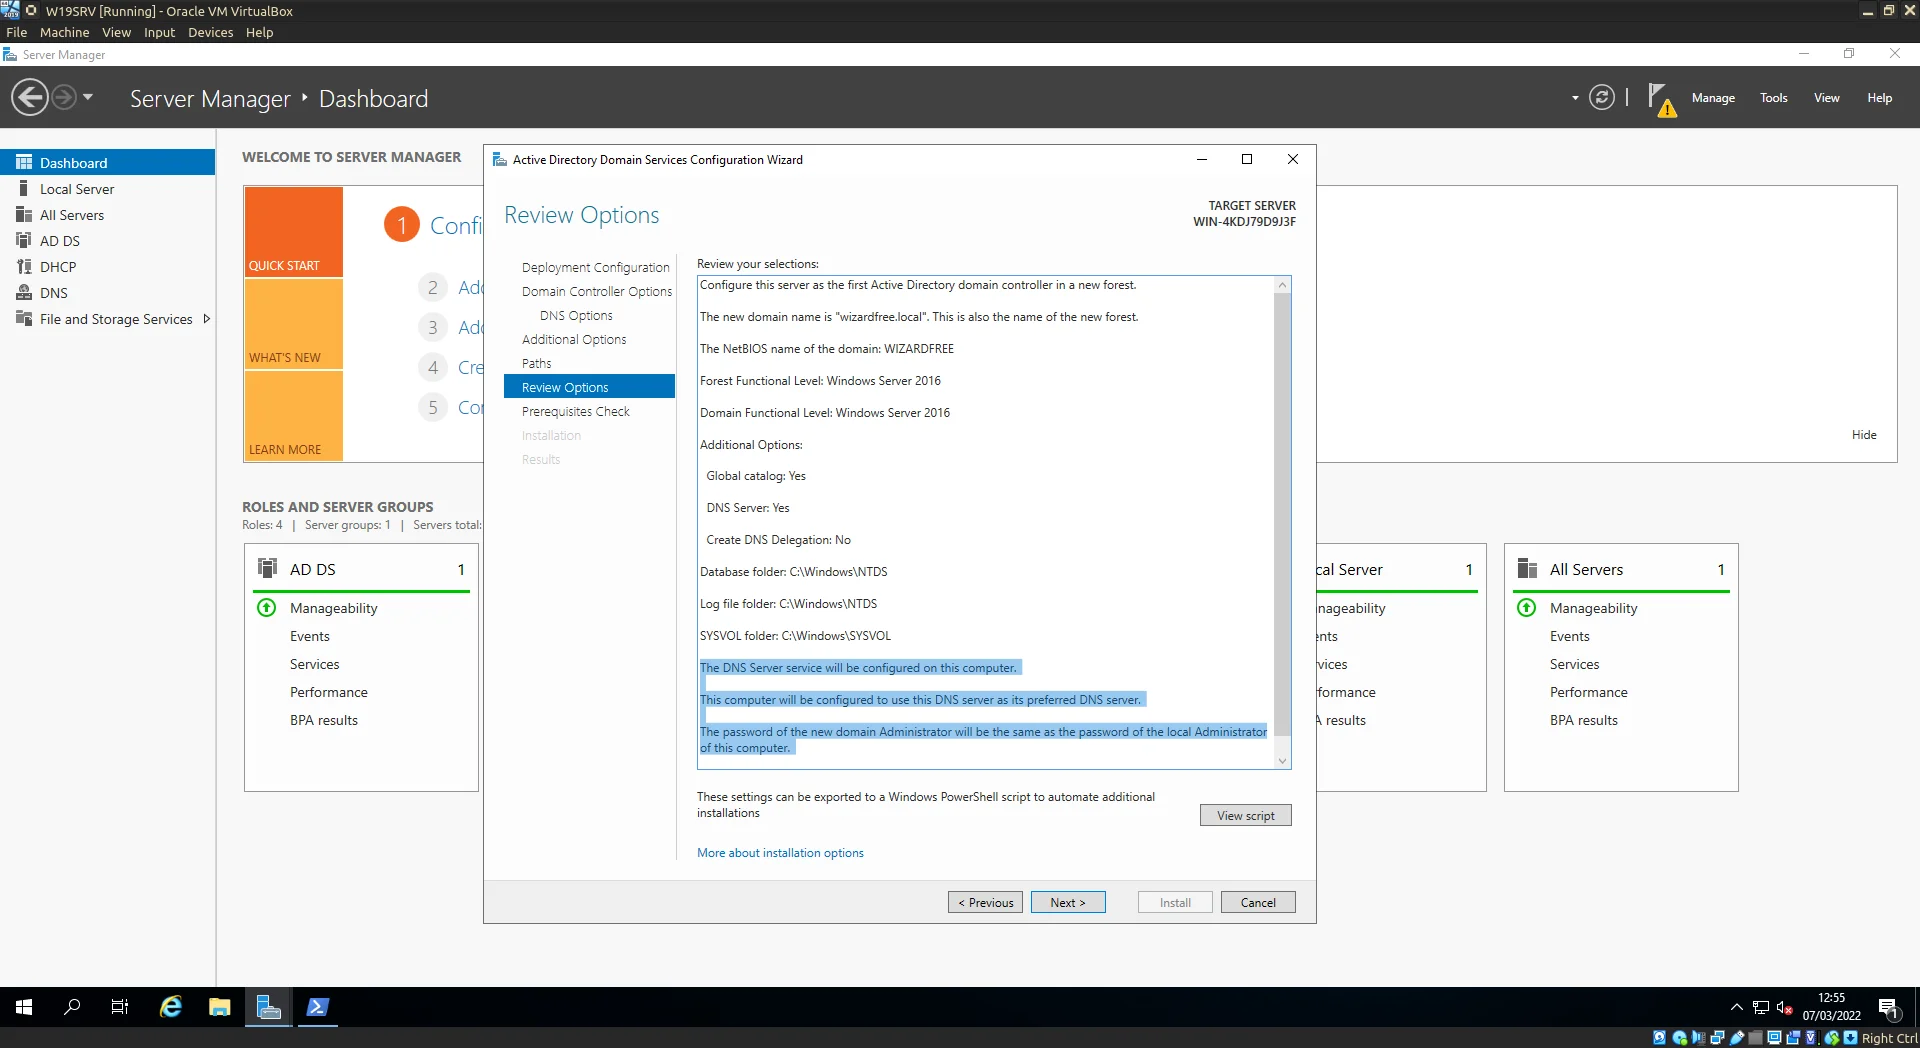
Review and Click Next.
A couple warnings are thrown up during the prerequisite checks but nothing that bothers us for our example.
Clicking next at this point will begin the installation.
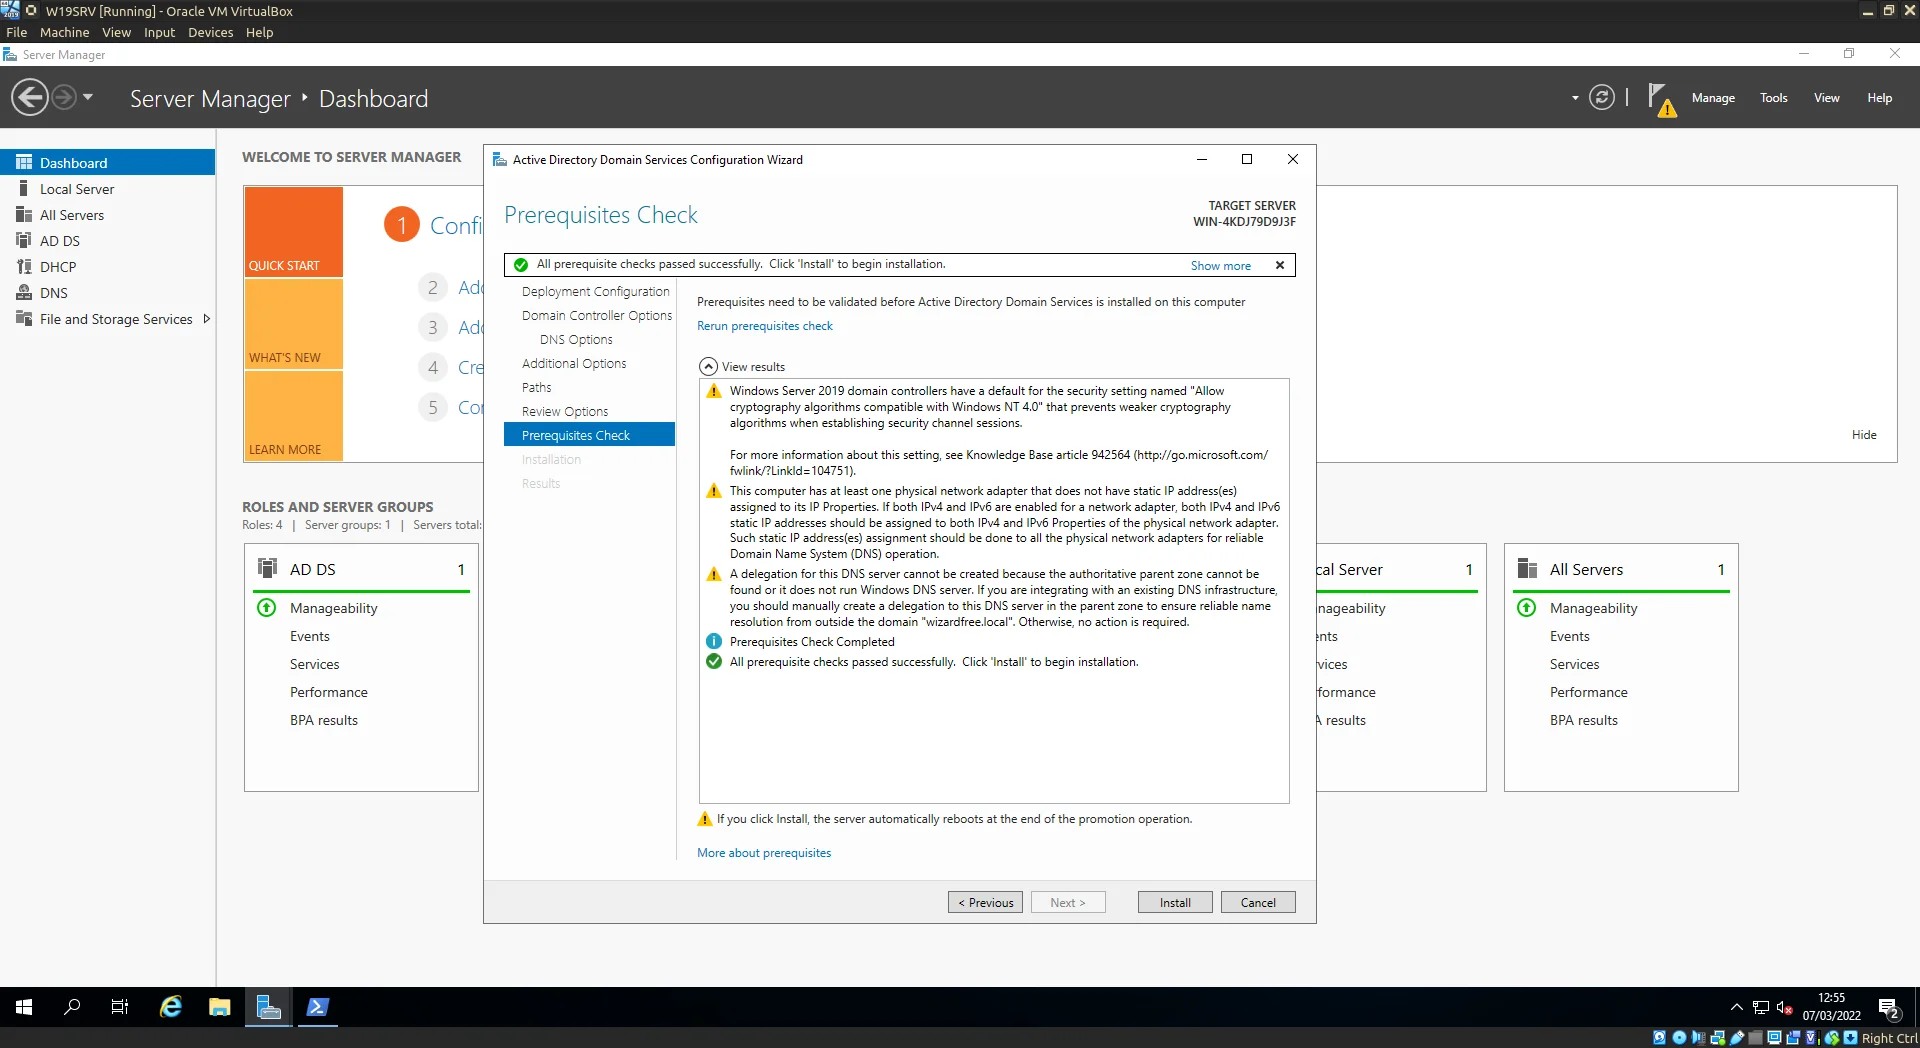
Installing...
Once installation is finished the server will restart and once it gets back to the login screen you should now see DOMAIN\Administrator as the prompt (DOMAIN being whatever the root domain NETBIOS name was set to).
Remebering back to the review screen the password for this Domain Administrator account is the same as the local Administrator account, using that we can sign in as usual.
Before we begin connecting clients to this domain we need to continue setup on our private network for our clients namely their leases…
DHCP Setup
To setup our DHCP (Dynamic Host Configuration Protocol) configuration, we begin by navigating to the DHCP tool either through the Start Menu or Server Manager/Tools/DHCP.
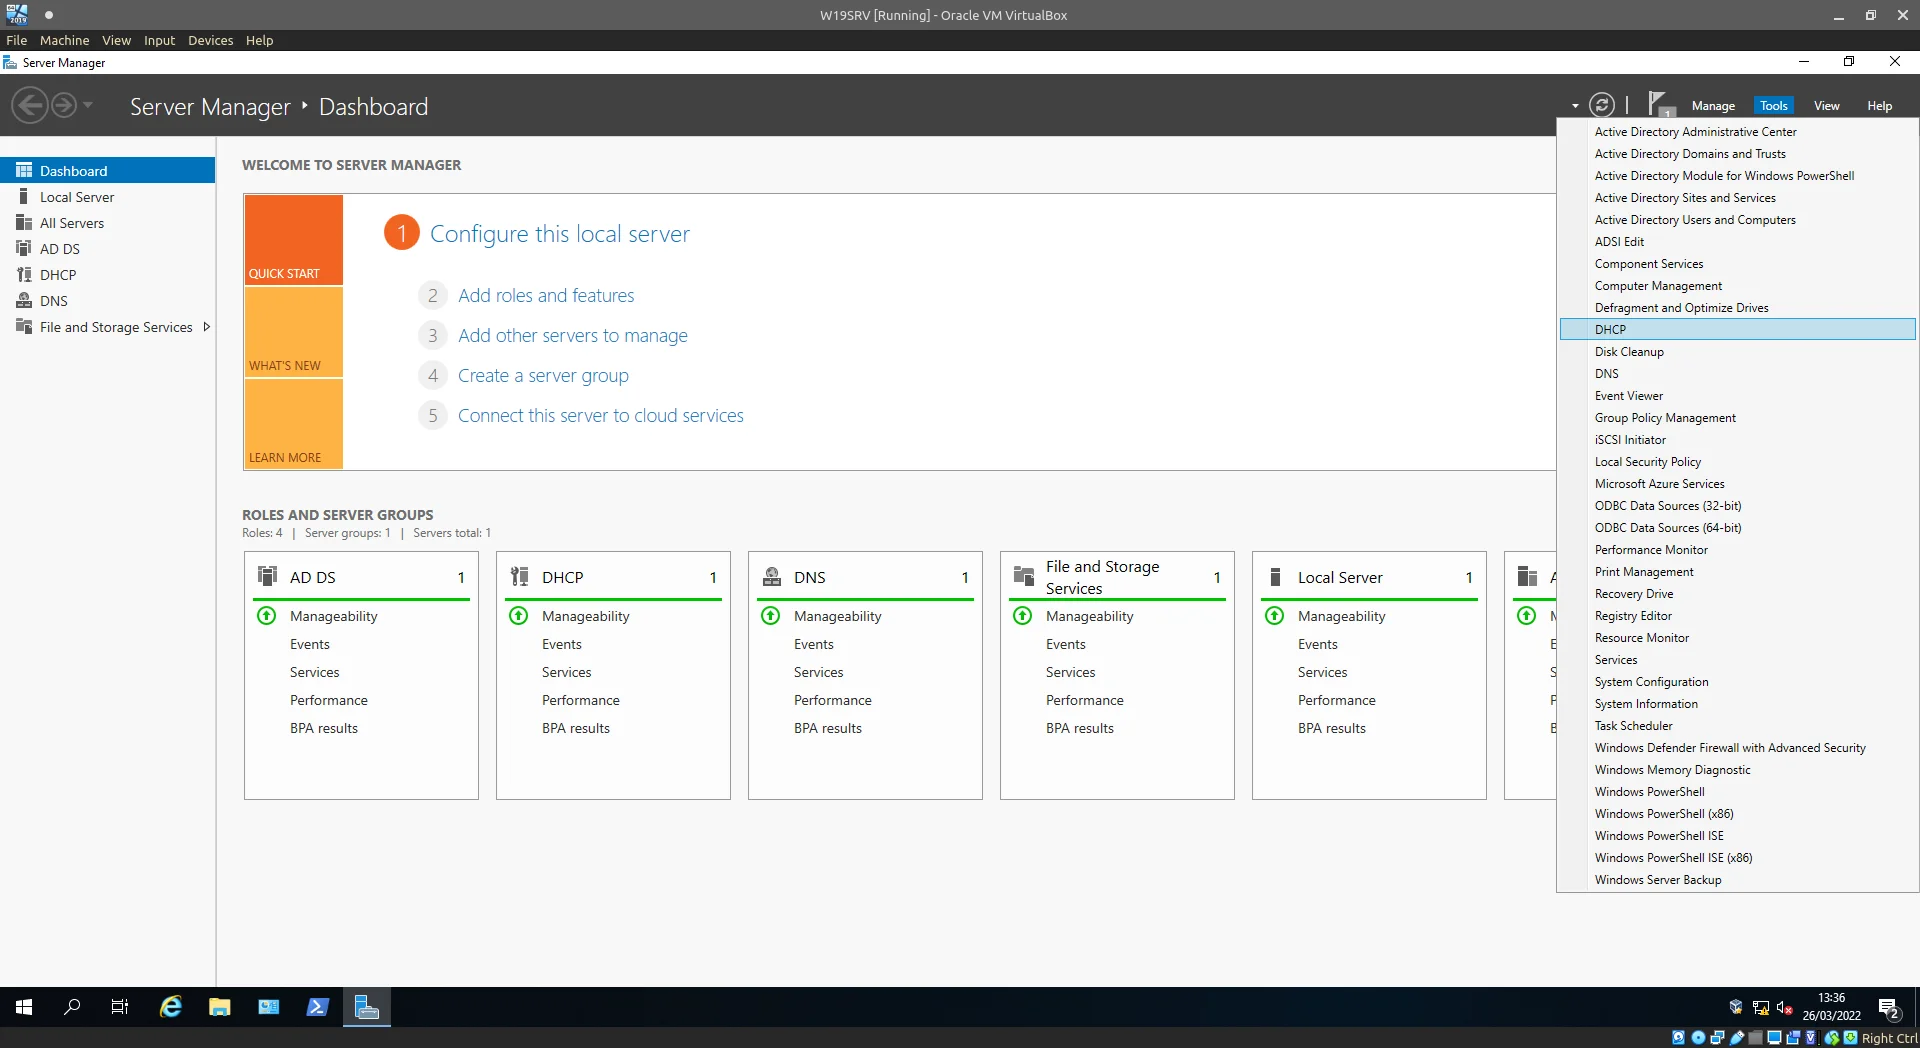
DHCP settings can be found under Tools in Server Manager.
We should see only 1 server present under the DHCP tree menu in the left-hand pane, expanding this server option, then further expanding IPv4 we can right-click on the IPv4 menu item to select New Scope…
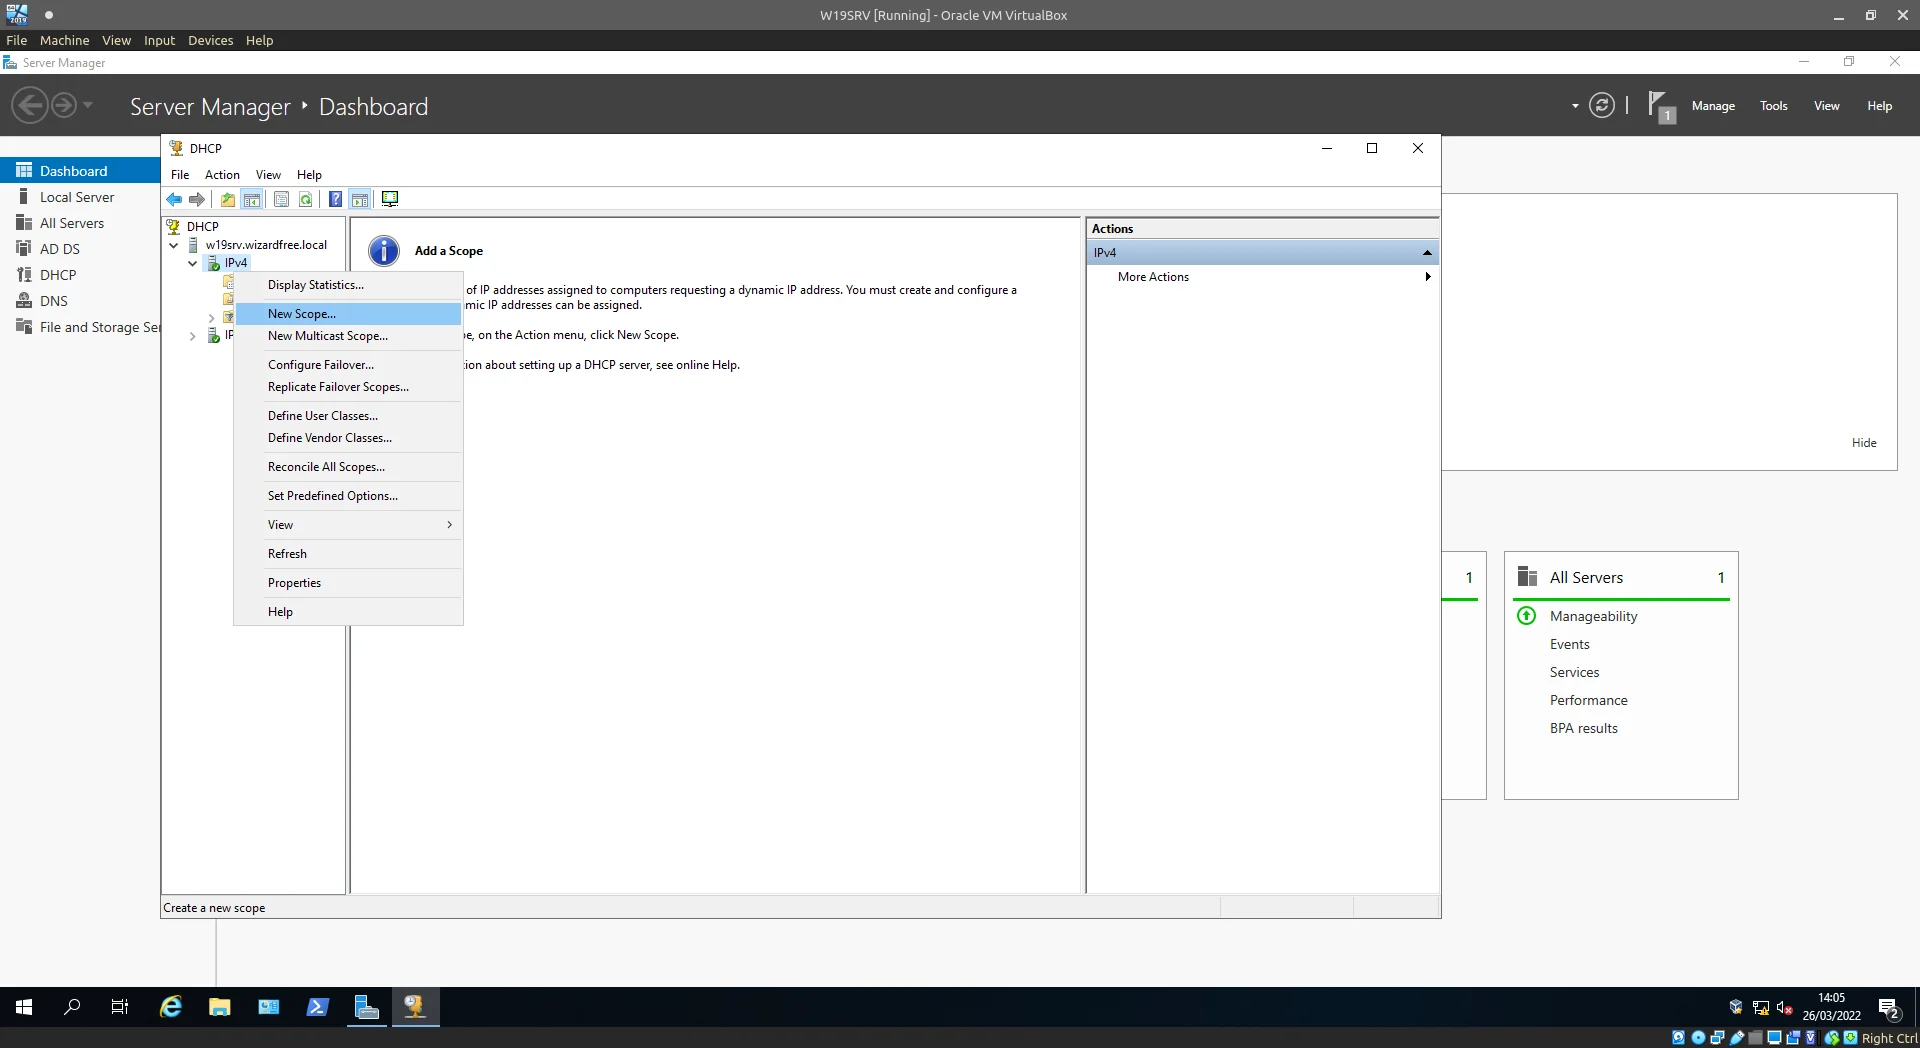
Create a New Scope.
Provide a name, something like “Homelab clients” works.
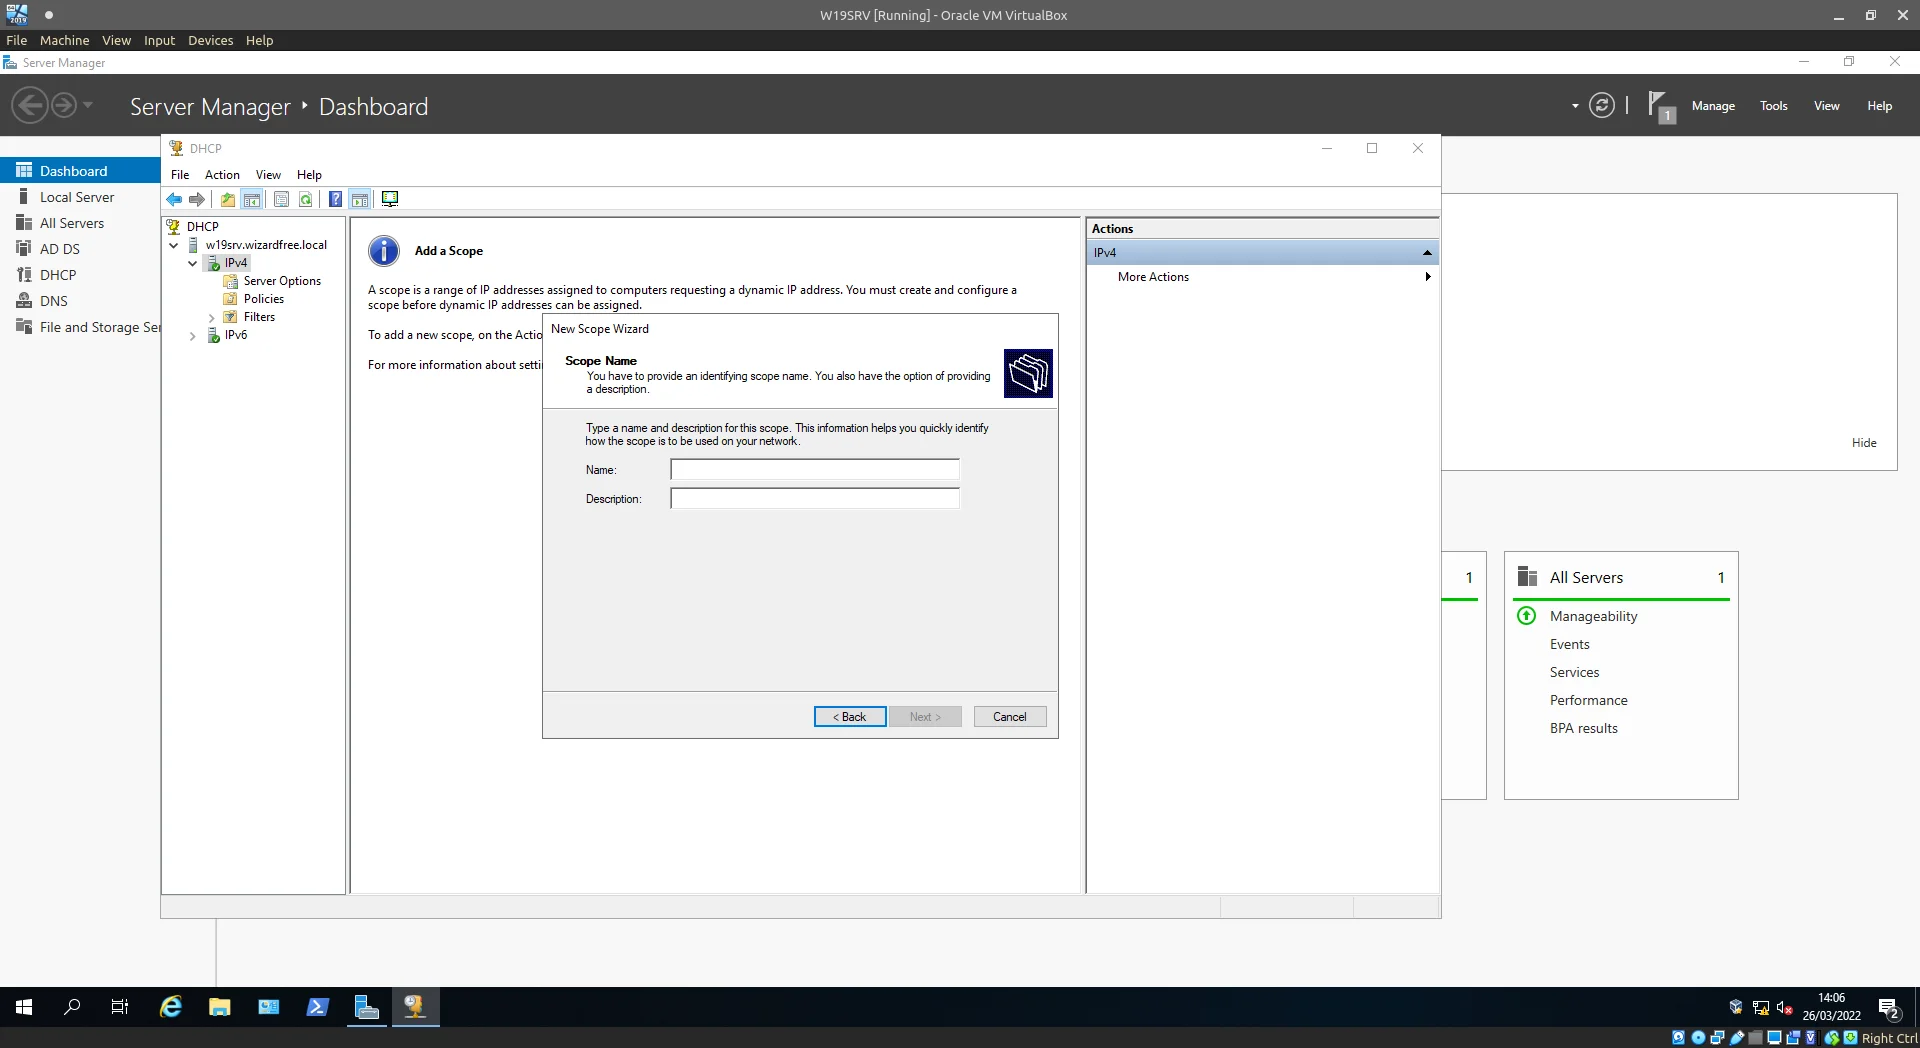
Add a name.
Now we set out the IP ranges we wish to use for our clients, remembering back to the Network configuration we done earlier.
The INTERNAL nic uses an address of 10.0.0.1 and I want all of the clients connecting to this internal network to be given a 10.0.0.1/24 address so adding those settings to the wizards, lets continue.
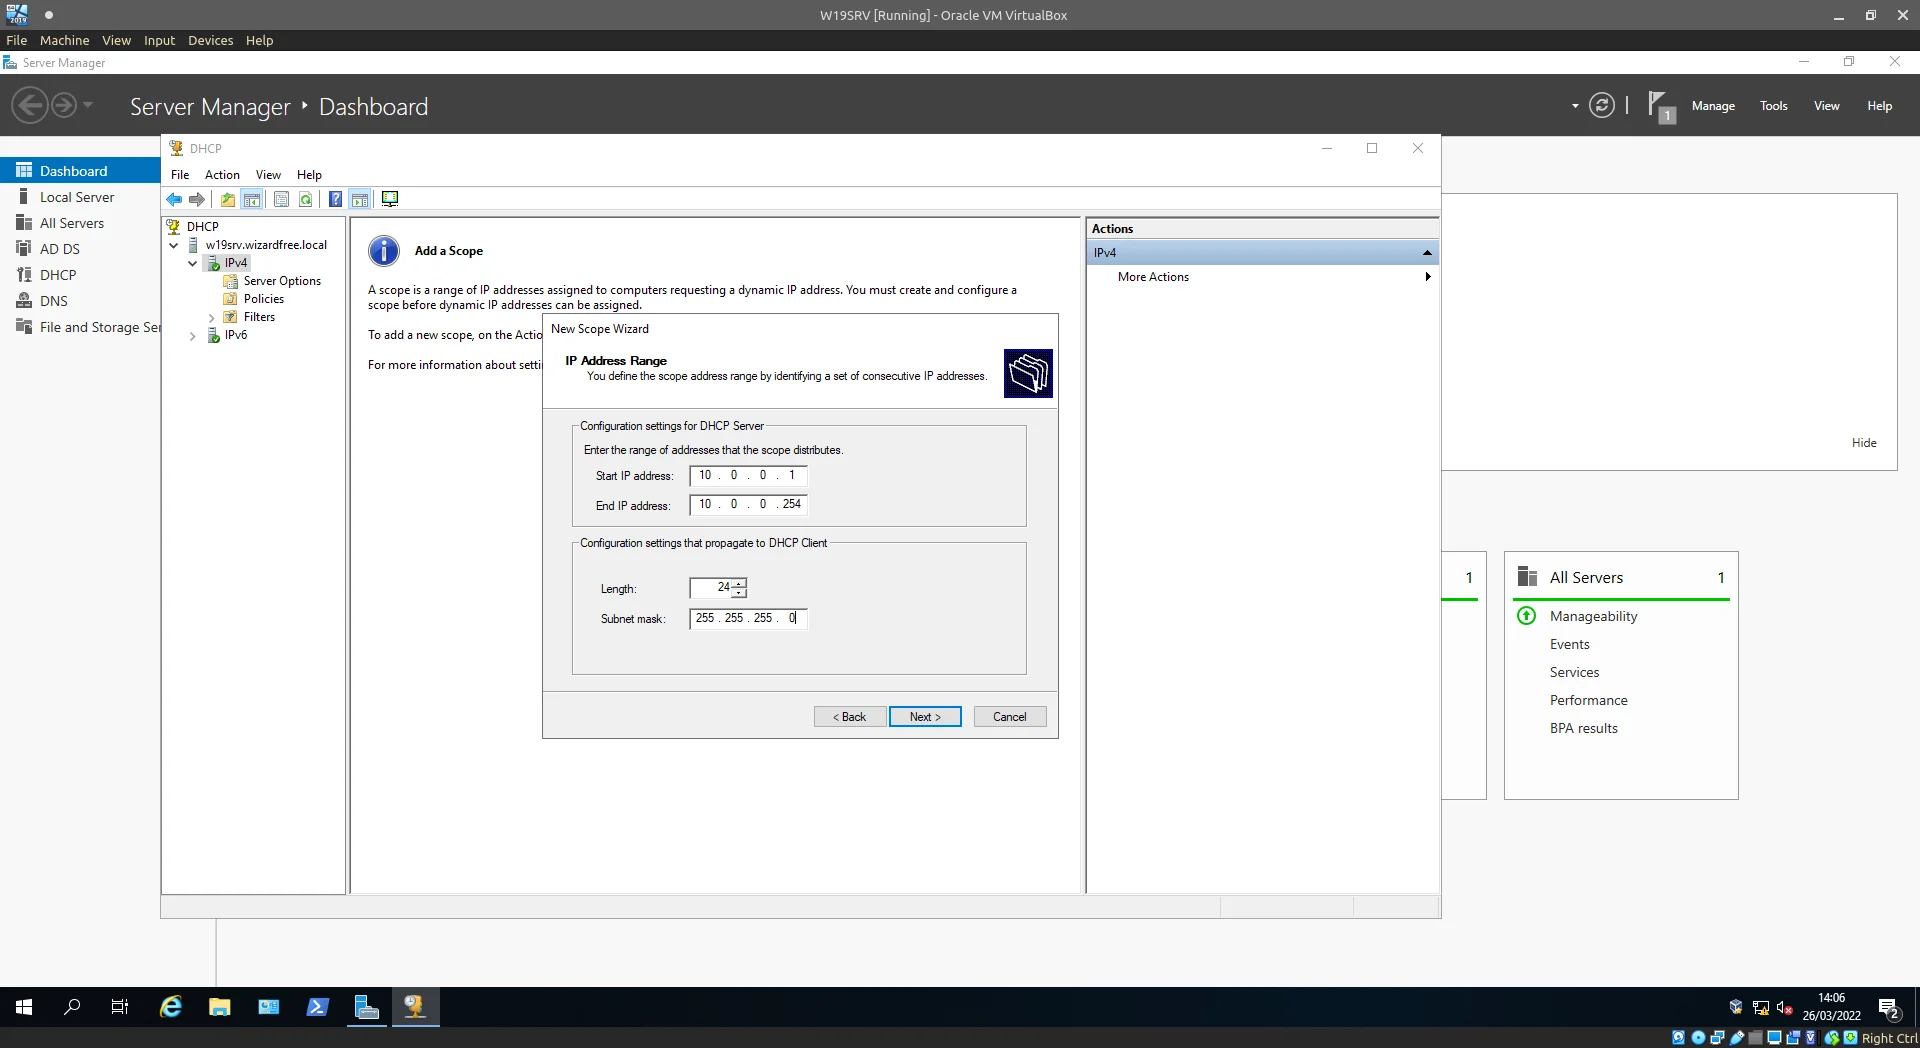
Add the DHCP scope.
For exclusions lets not hand out our NIC address as this could cause some confusion in the future if that lease was to expire.
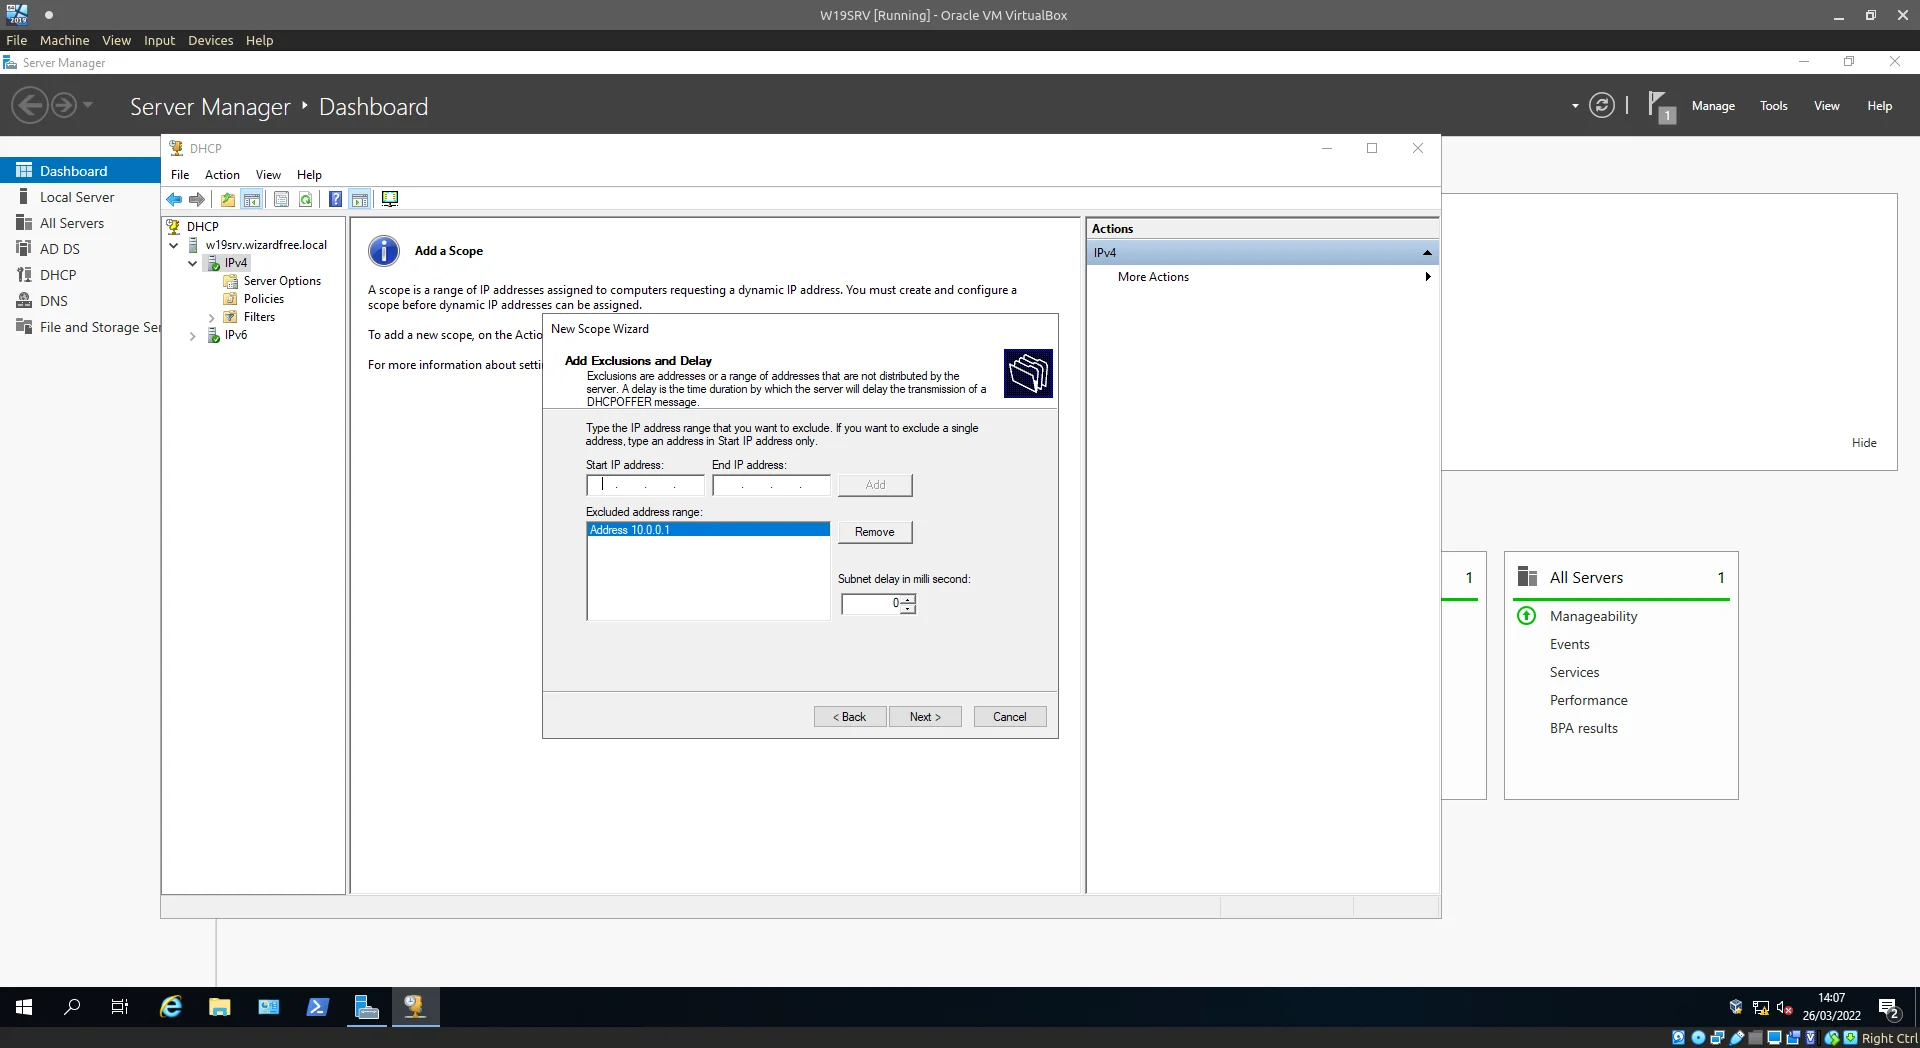
Remember to exclude the NIC IP.
The lease duration defaults to 8 days, in this case I’ve decreased this number by 1 to make it 7 days but adjust according to the network requirements of your homelab.
If you’re spinning up lots of client VMs and not releasing the leases before destroying them it may be worth adjusting the lease duration to be shorter.
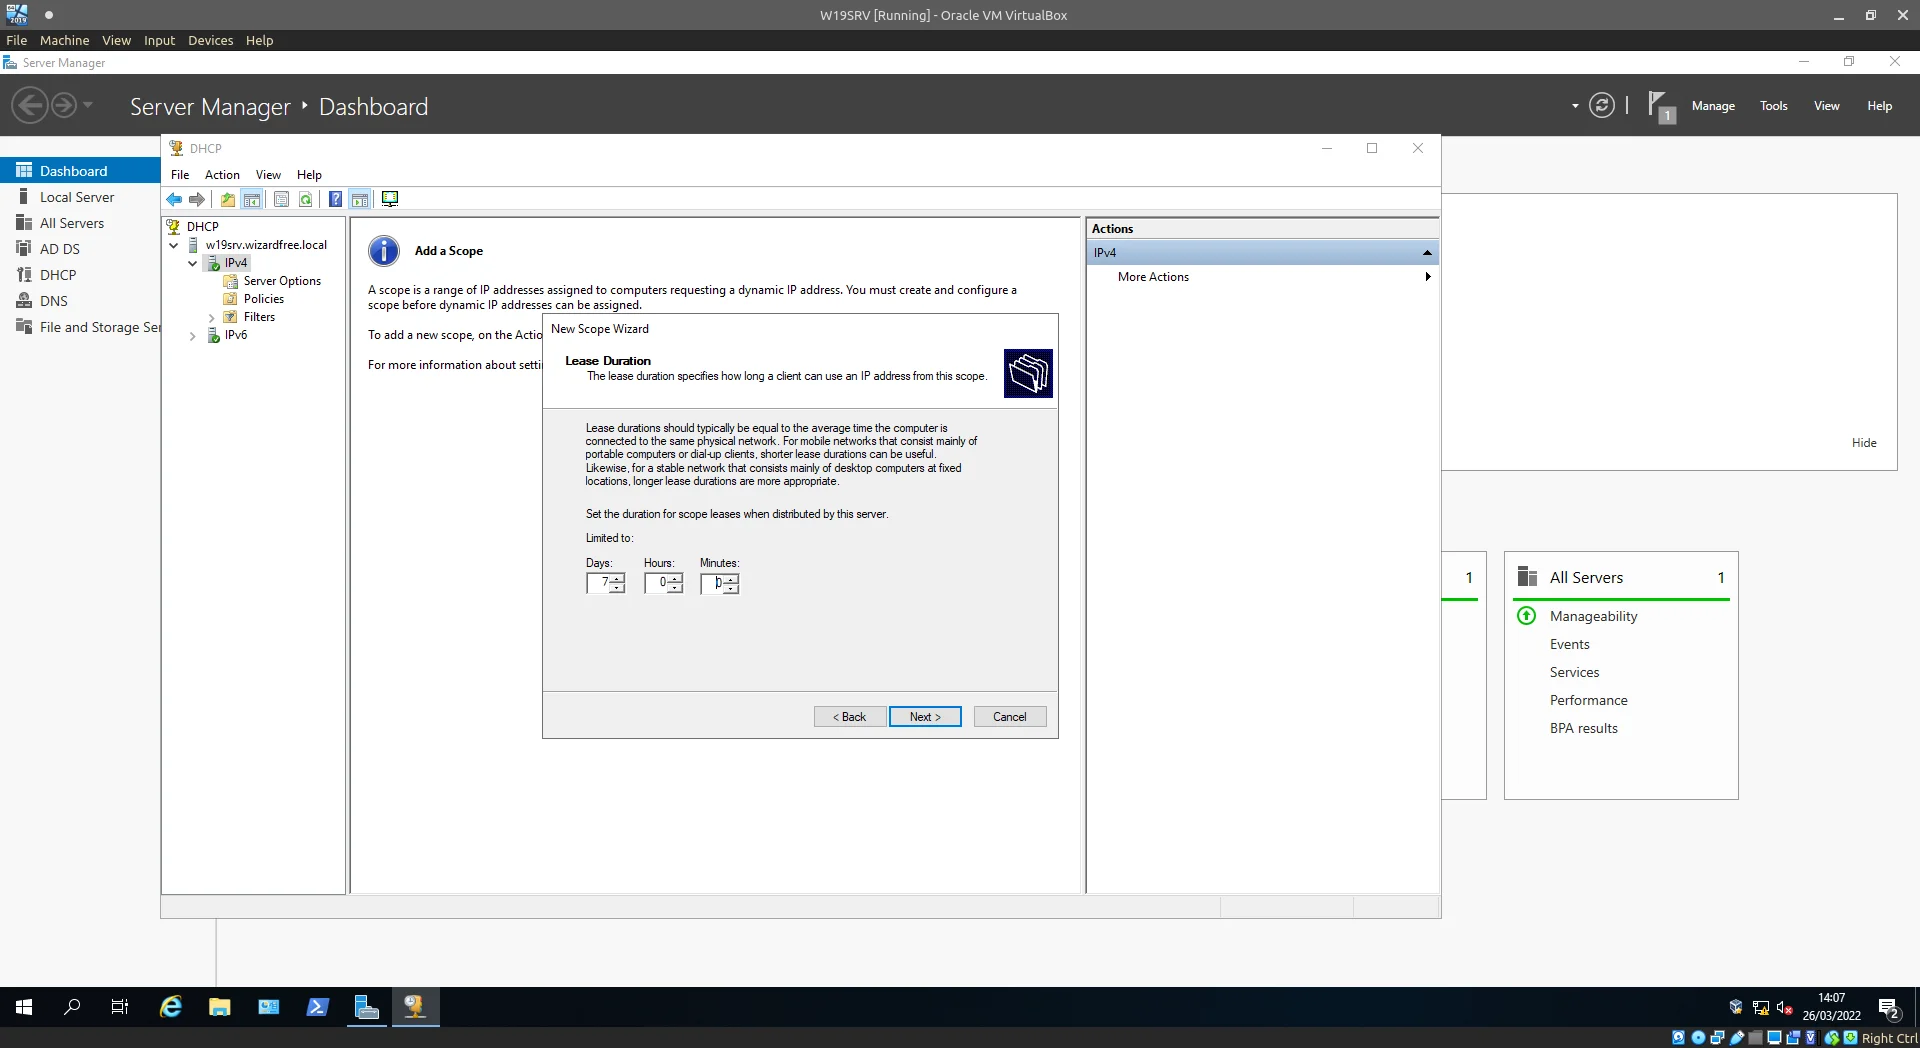
Play around with the lease times to best fit your environment.
Next up we’ll continue onto Gateway setup.
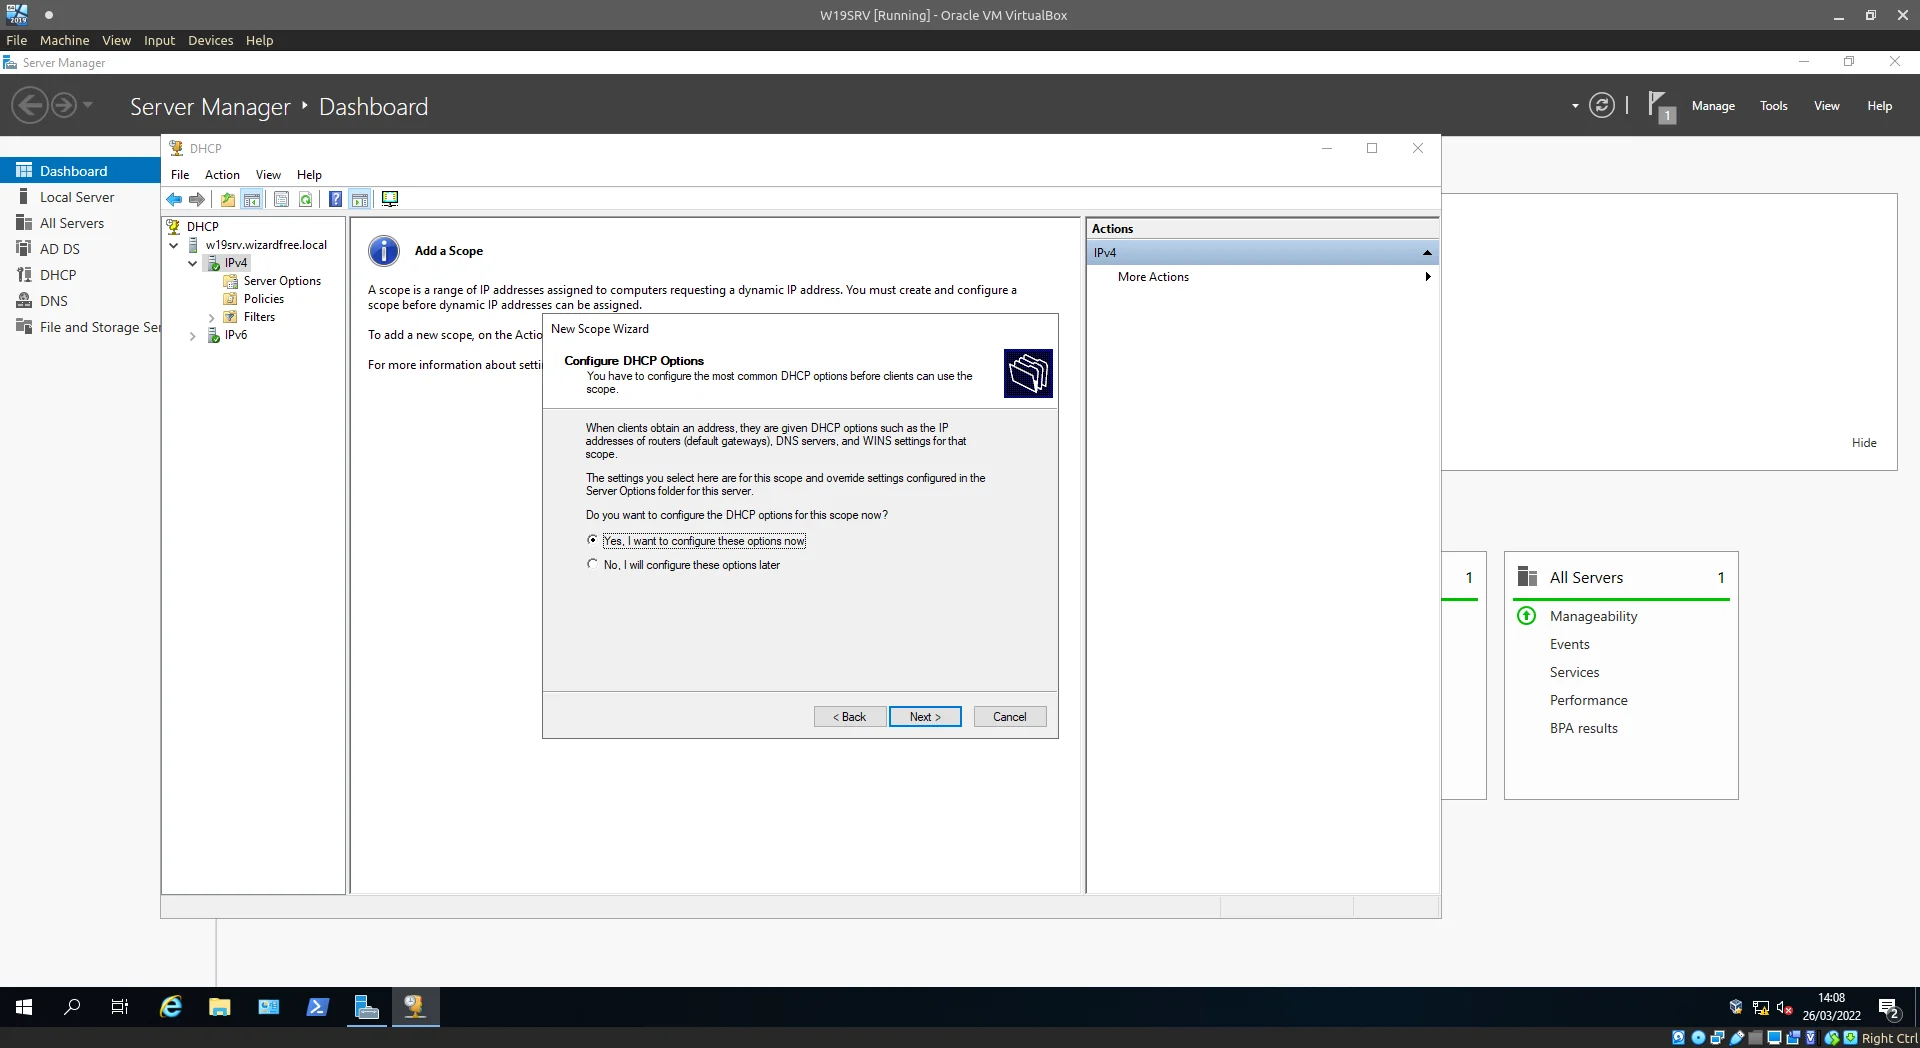
Select Yes, and Next.
Provide the IP address of the INTERNAL NIC here, as we want all network traffic to be filtered/processed by our domain controller.
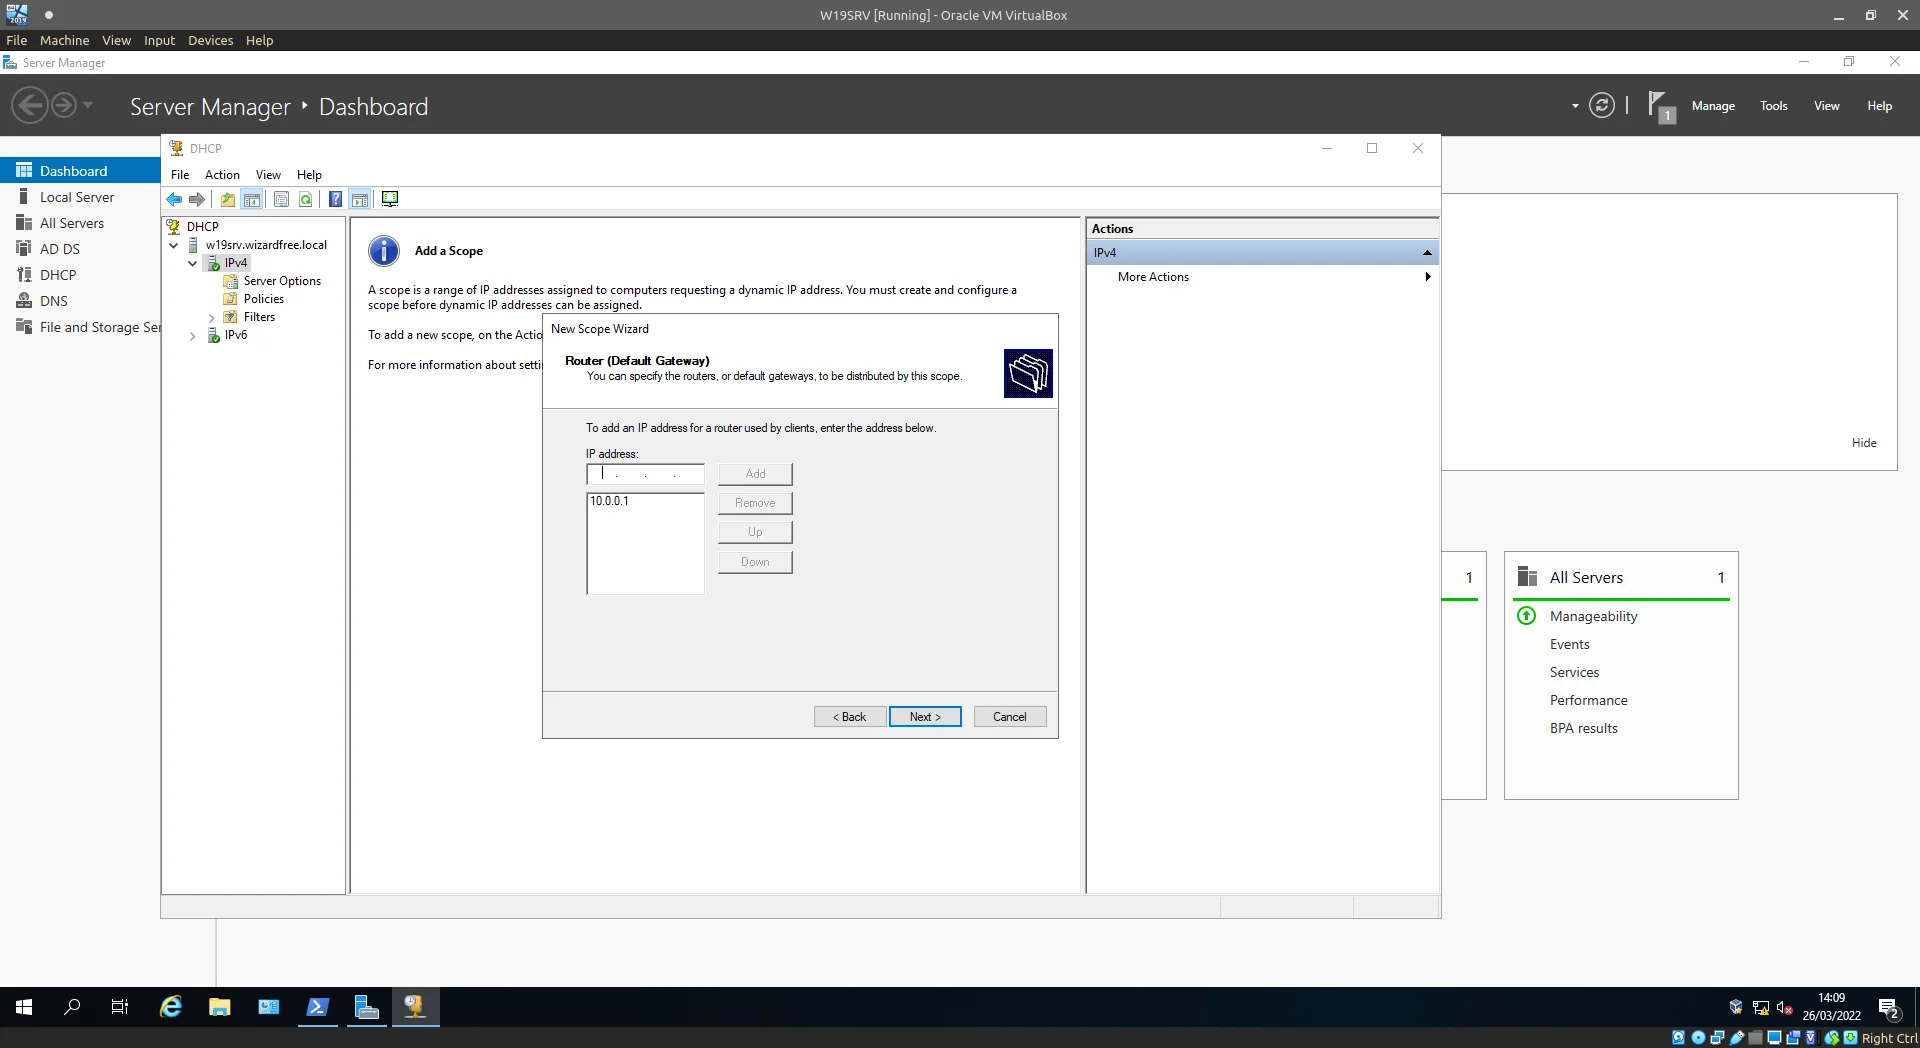
Bet you have this memorised by now.
Double-check DNS options, the defaults are good for our use-case. After this next through the wizard till setup is complete.
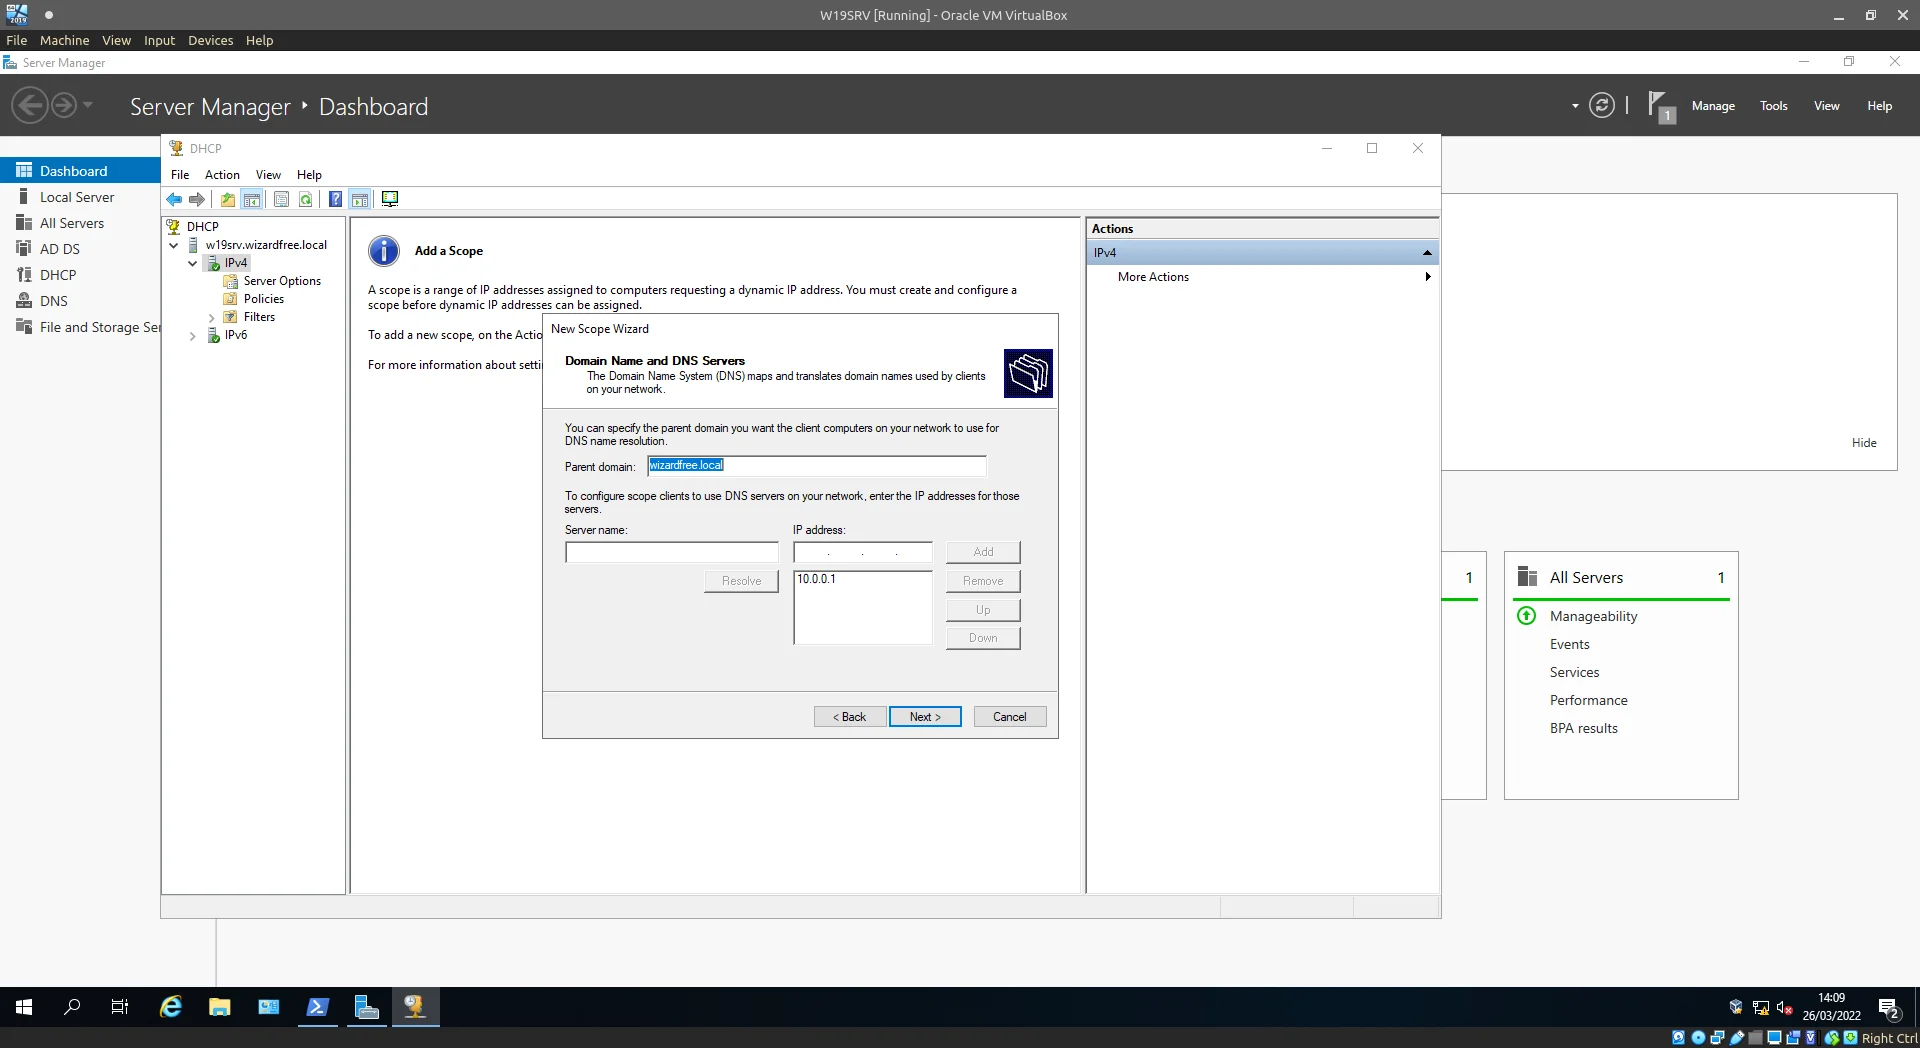
Confirm and Next.
Before moving on Right-click the Server Options menu under IPv4, select Configure options… and select the 003 Router checkbox providing the INTERNAL NIC IP once again.
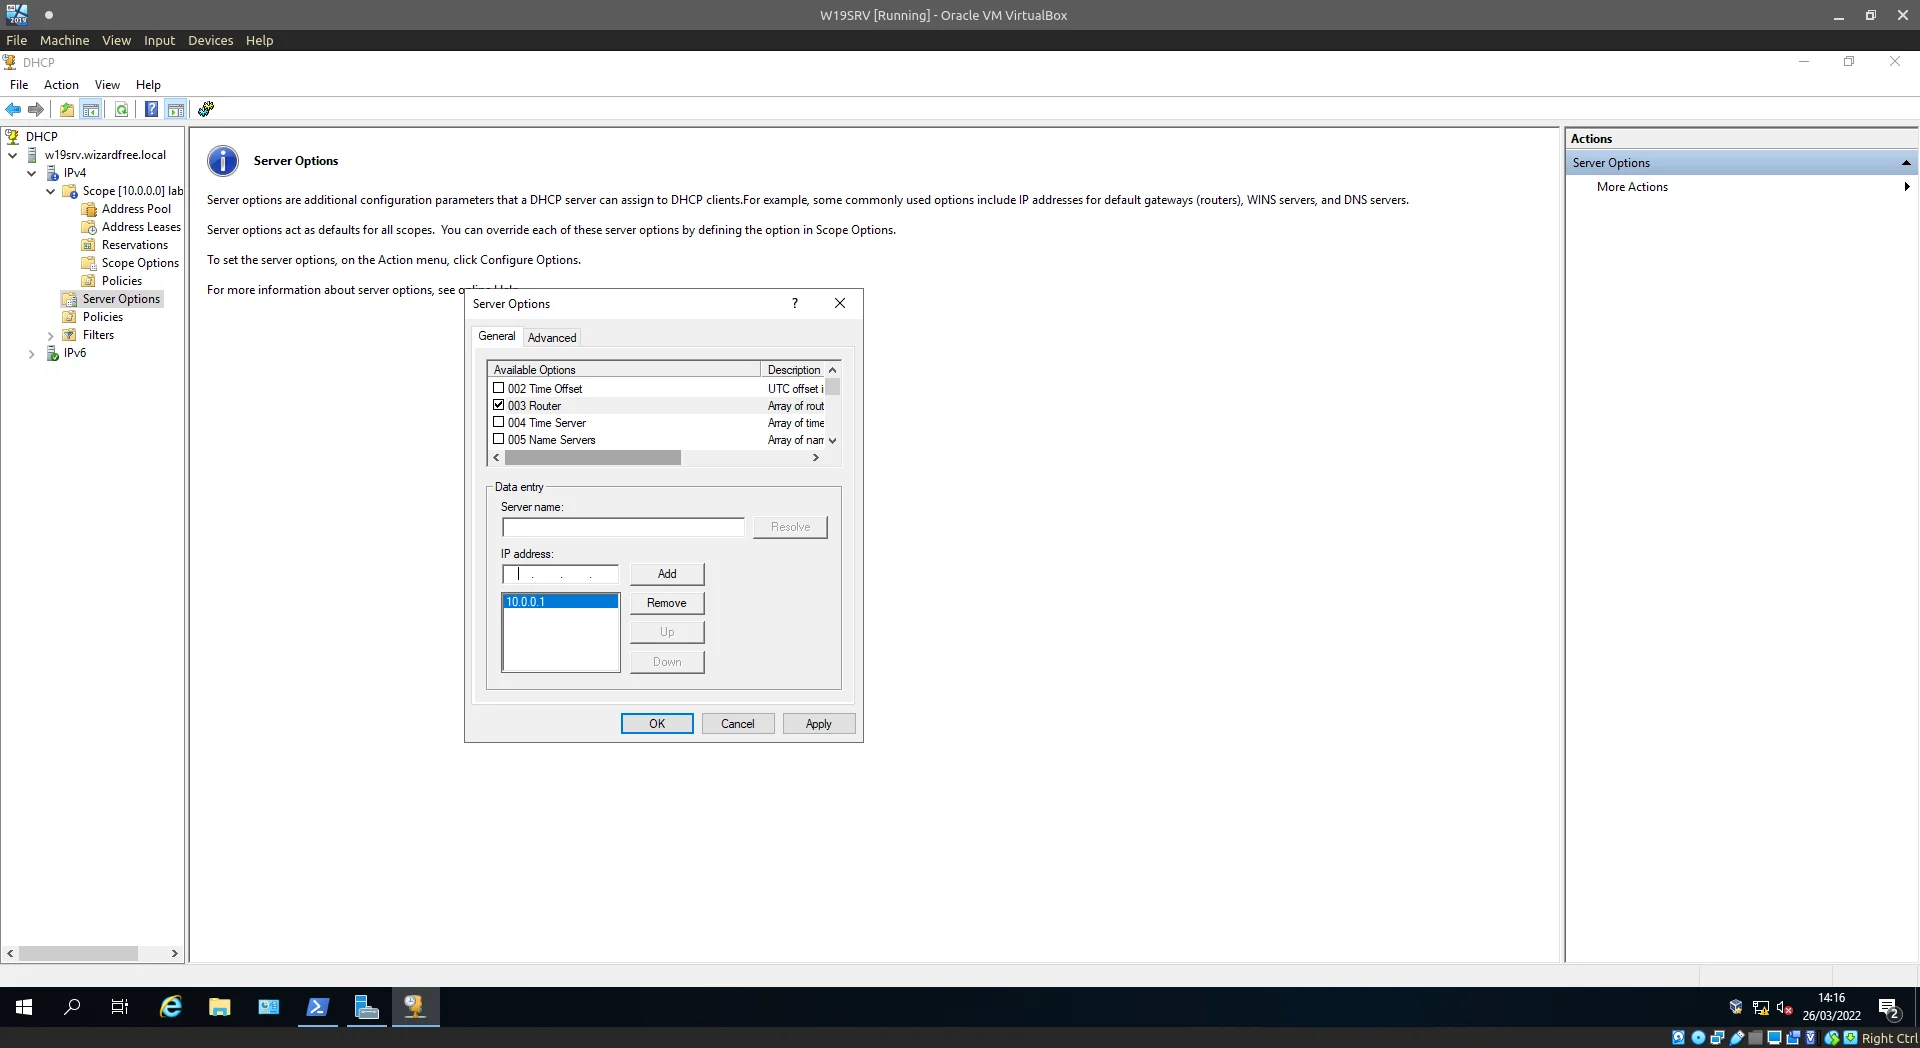
The traffic needs somewhere to go...
At this point we have a domain controller with no managed computers and a DHCP Scope without leases, just a little more to configure and then we can change that…
Routing
Returning back to Server manager lets navigate to Tools/Routing and Remote Access.
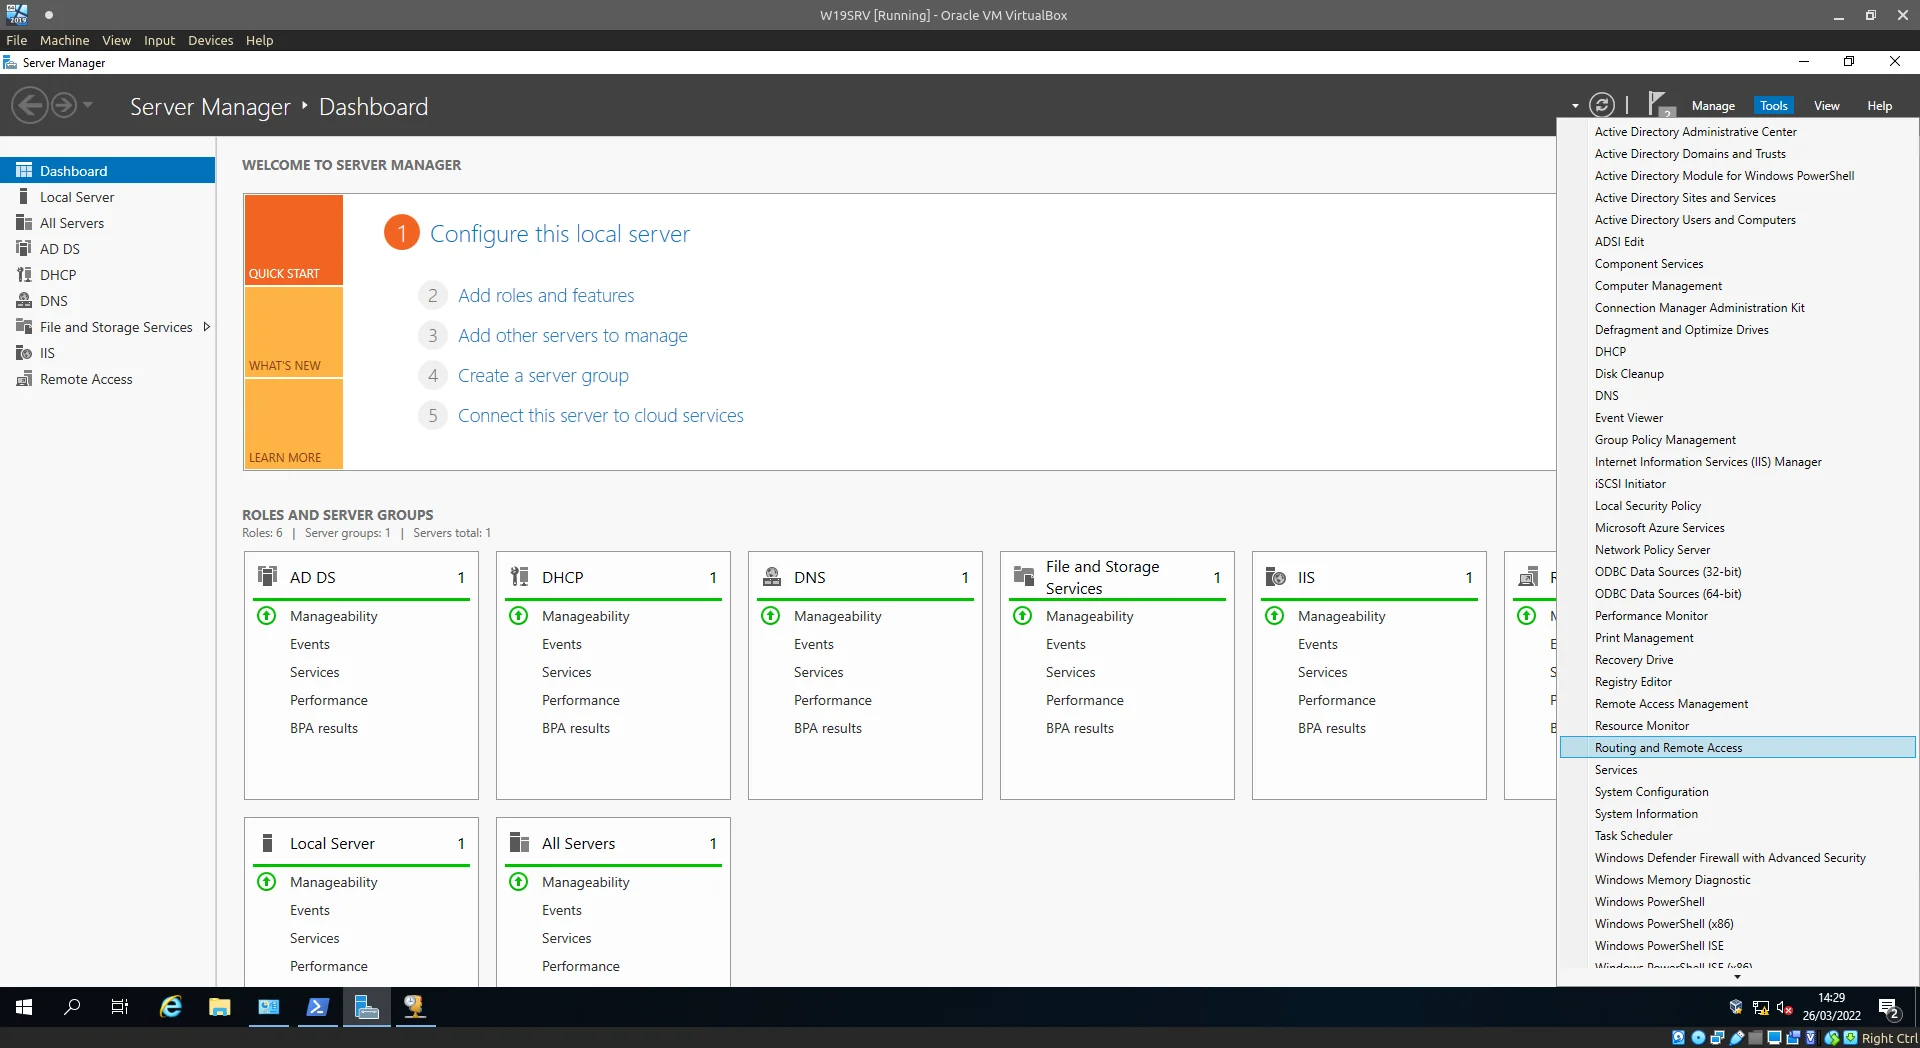
Server Manager > Tools > Routing and Remote Access.
Right-click the server name and select the first option: Configure and Enable Routing and Remote Access.
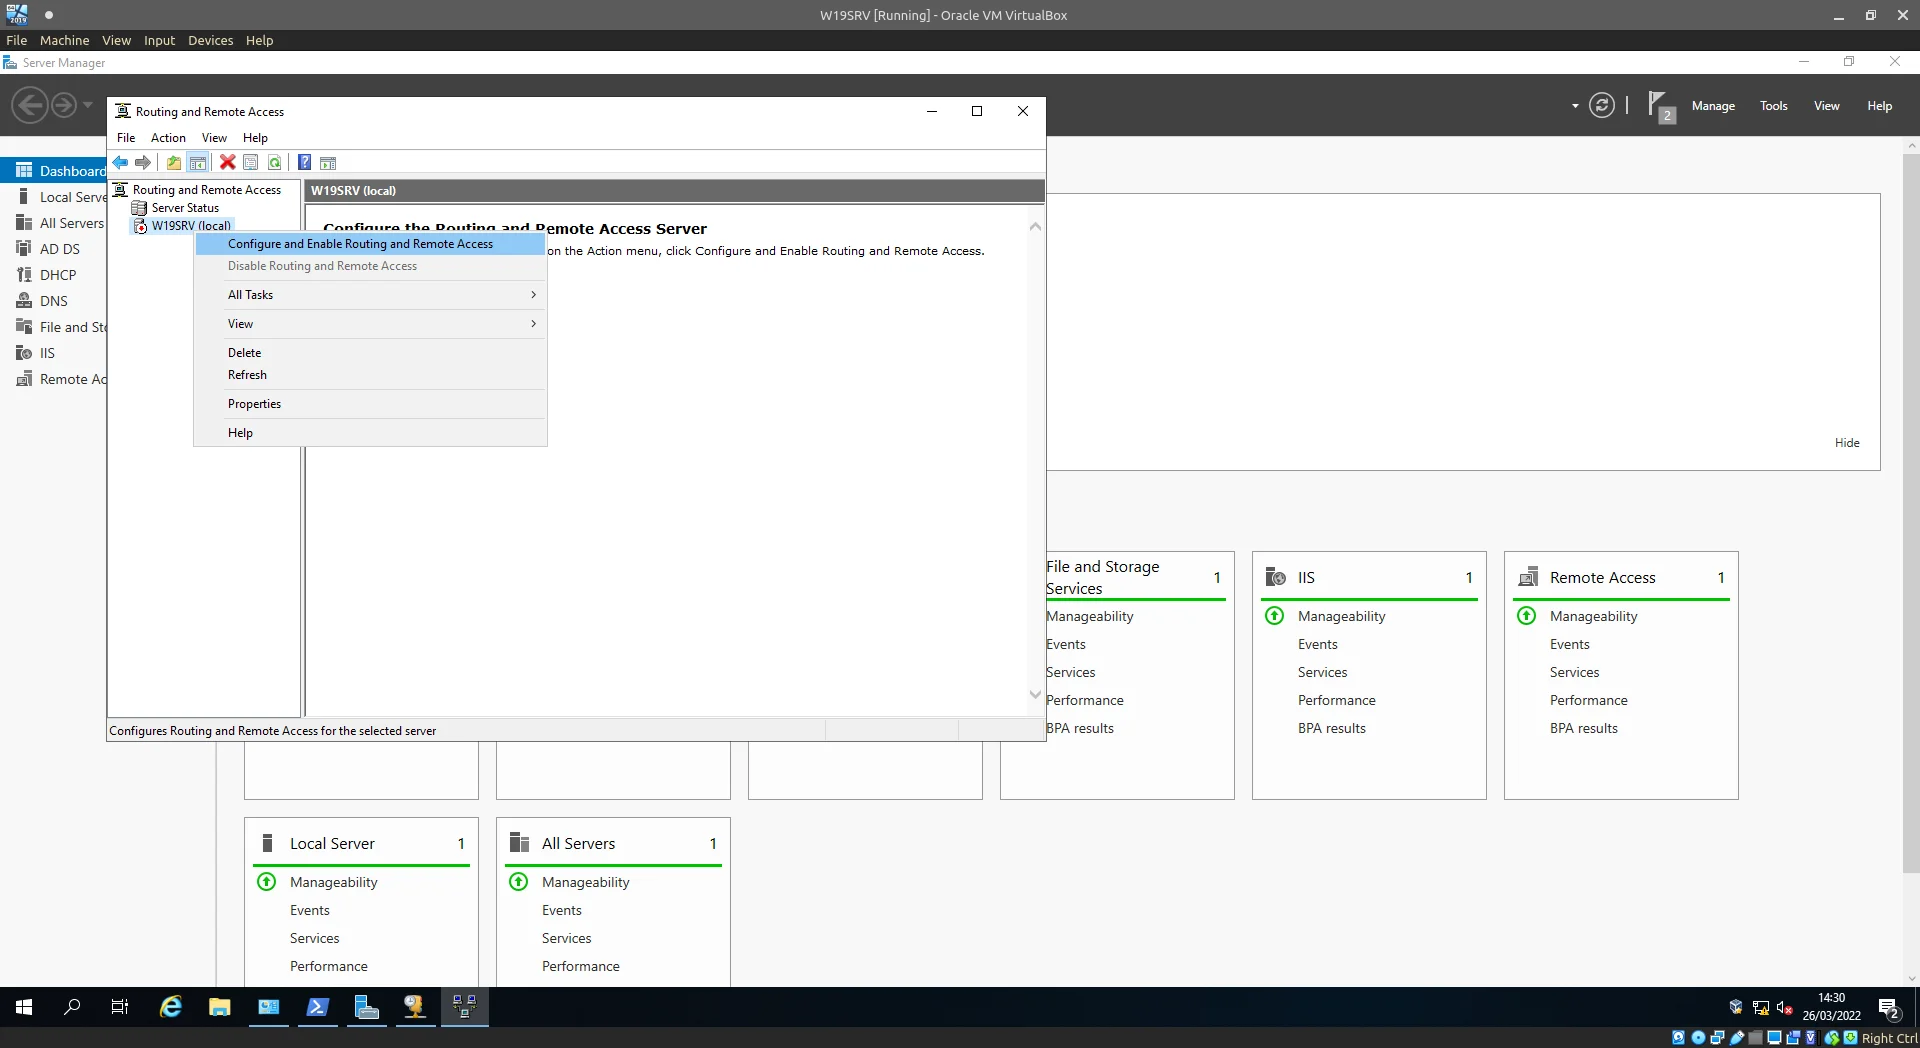
Configure and Enable Routing and Remote Access.
On this screen we select the 2nd option, the explanation underneath clues us in, as to what this option will do.
Without this feature/option being present/configured the internal network would provision nodes with IP addresses as configured in the DHCP scope but those nodes would be unable to access the internet.
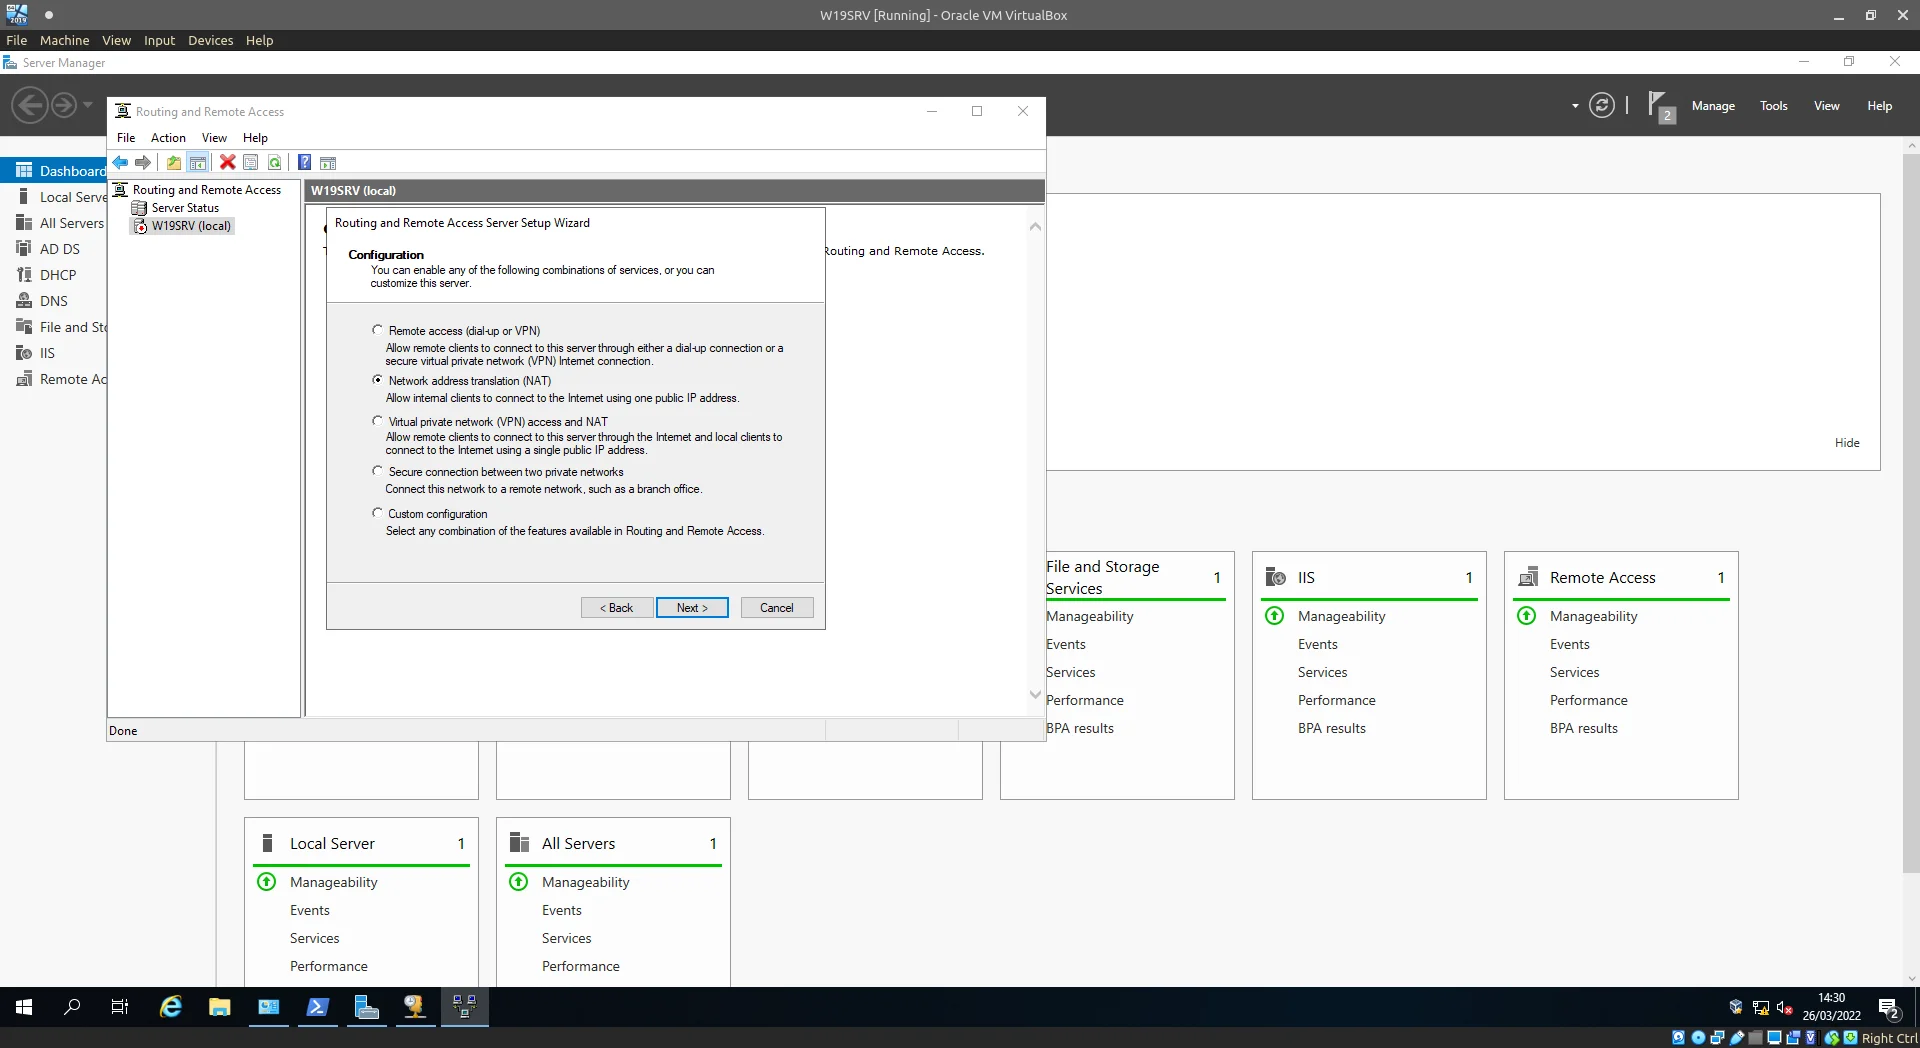
Select Network address translation (NAT).
Select your Internet facing NIC here.
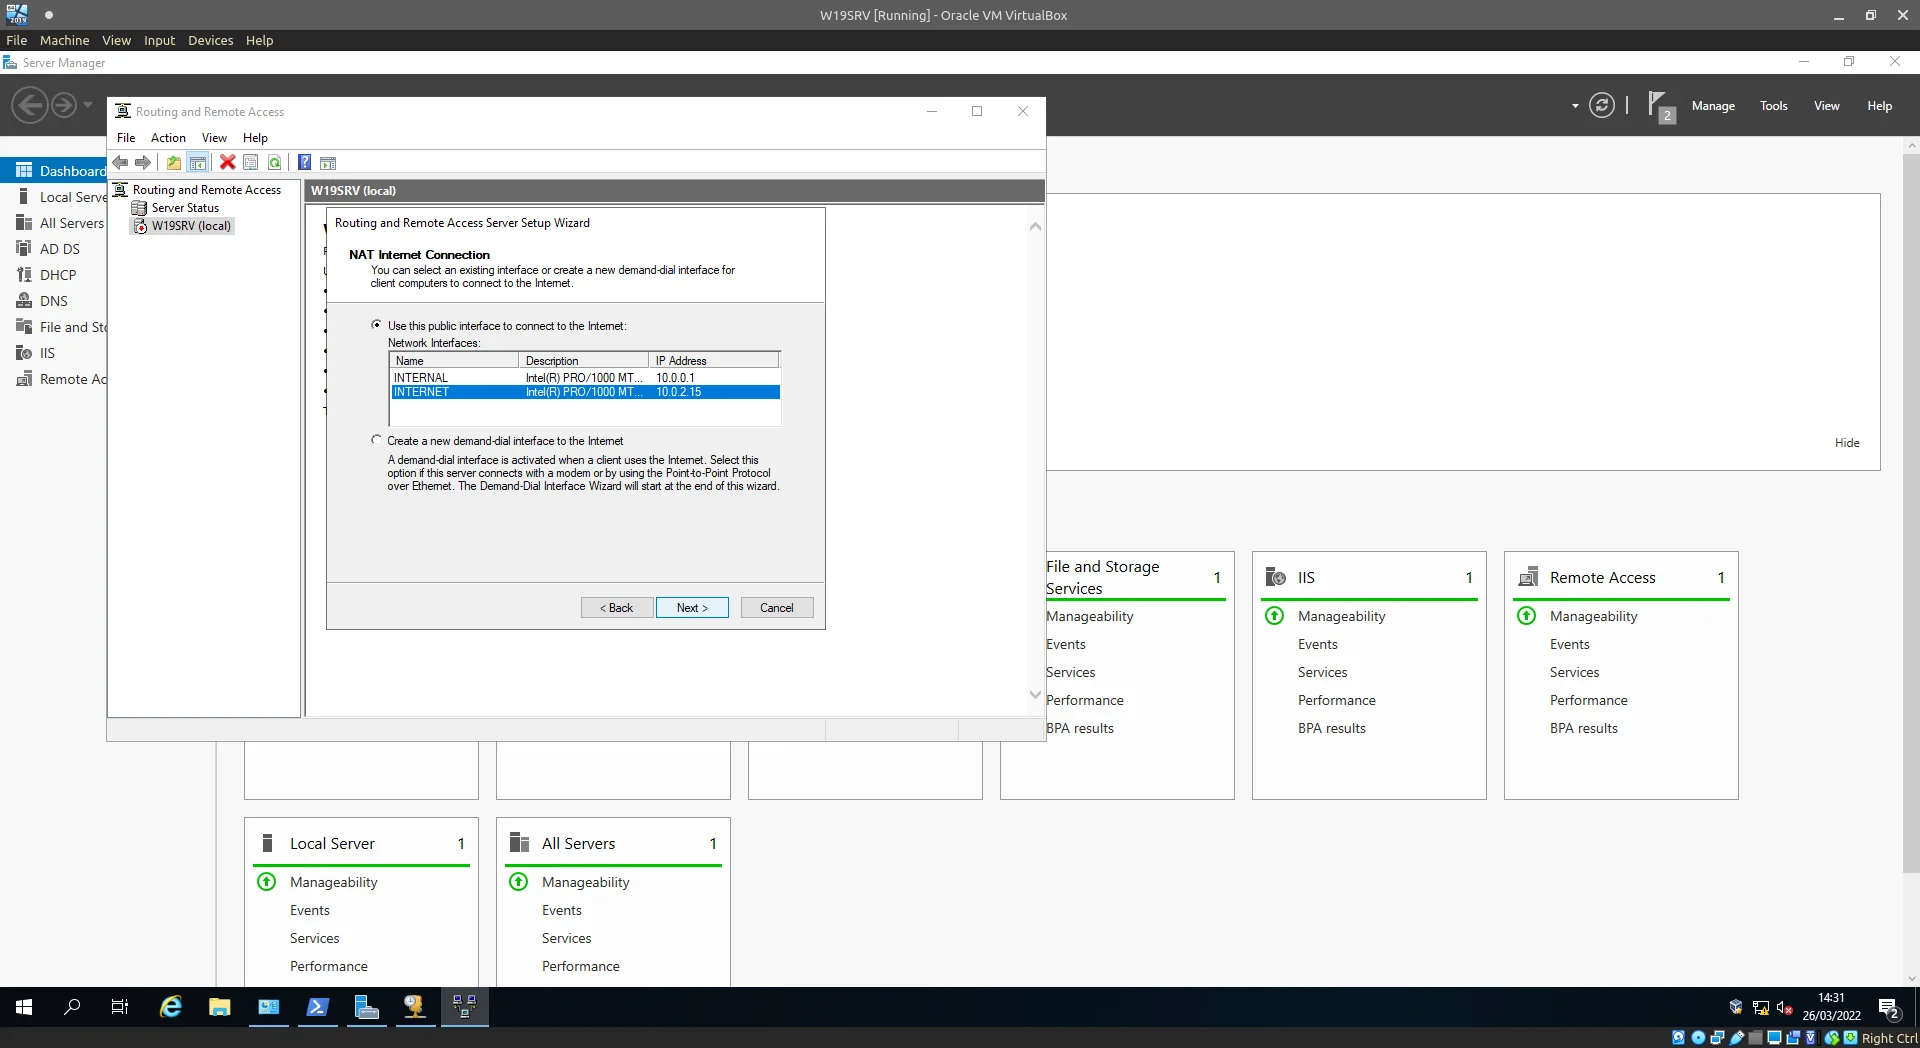
Select the External / Internet facing network adaptor.
Congratulations any clients connecting to the internal network are now handed out an IP lease you configured and can access Internet resources. :thumbsup:
Connecting a client
Spin up a Windows 10 VM in a similiar fashion to the Windows 2019 Server we setup, the settings should be fairly similiar to the ones pictured below.
Remember the important part here is the VM should reside on the Internal Network only, we want the server to control it’s DHCP/Routing.
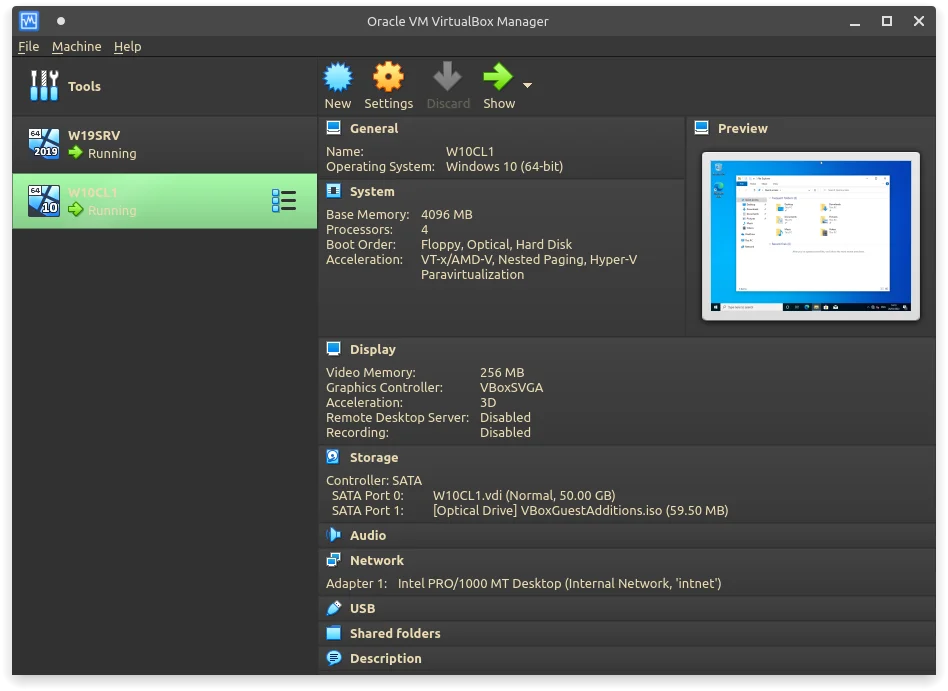
VM settings in VirtualBox Manager.
Once installation finishes and you can get to the desktop (a local user of any name is just as great :wink: ), let’s navigate over to Advanced System Properties (Under Start ⇾ System ⇾ System Info ⇾ Advanced system settings ⇾ Change… || Start ⇾ Control Panel ⇾ System ⇾ System Info ⇾ Advanced system settings ⇾ Change…) and connect the node to the domain.
Add in the domain name and click OK.
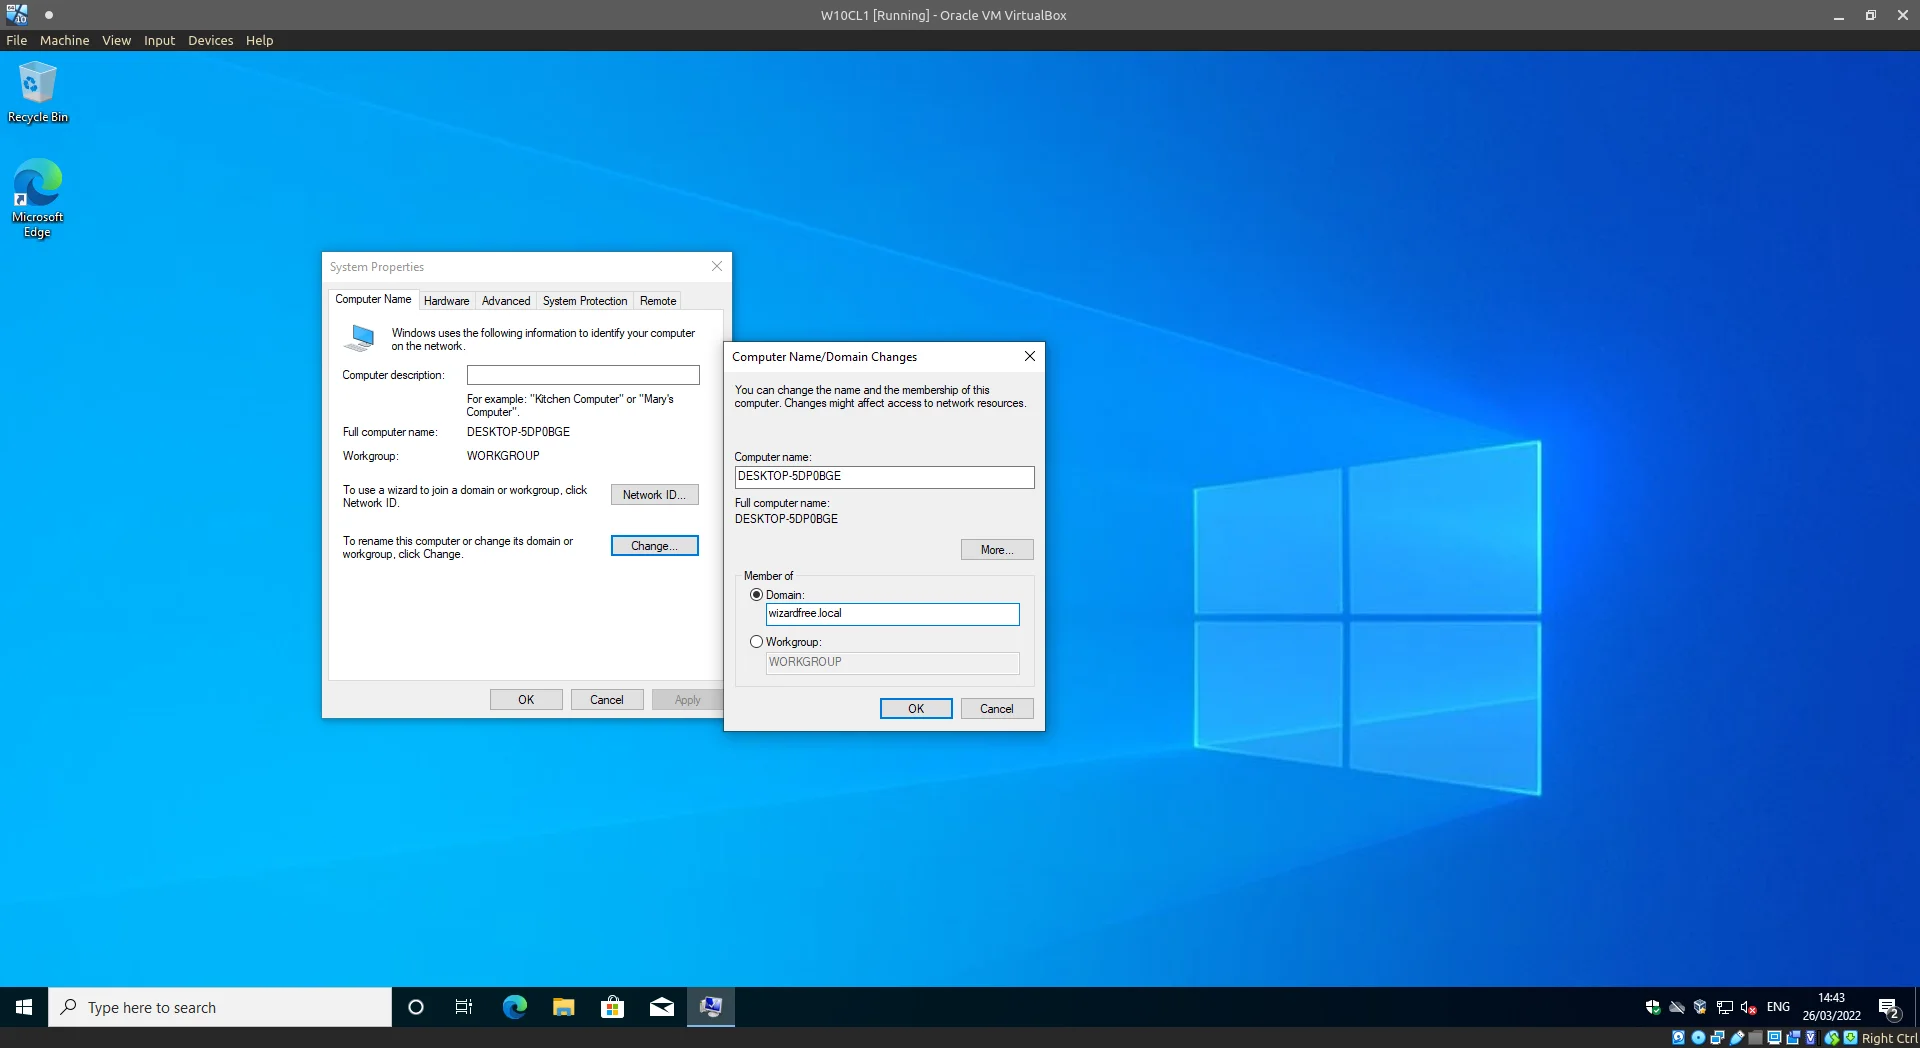
Joining the client VM to the Domain.
Enter in Admin credentials here to connect our node.
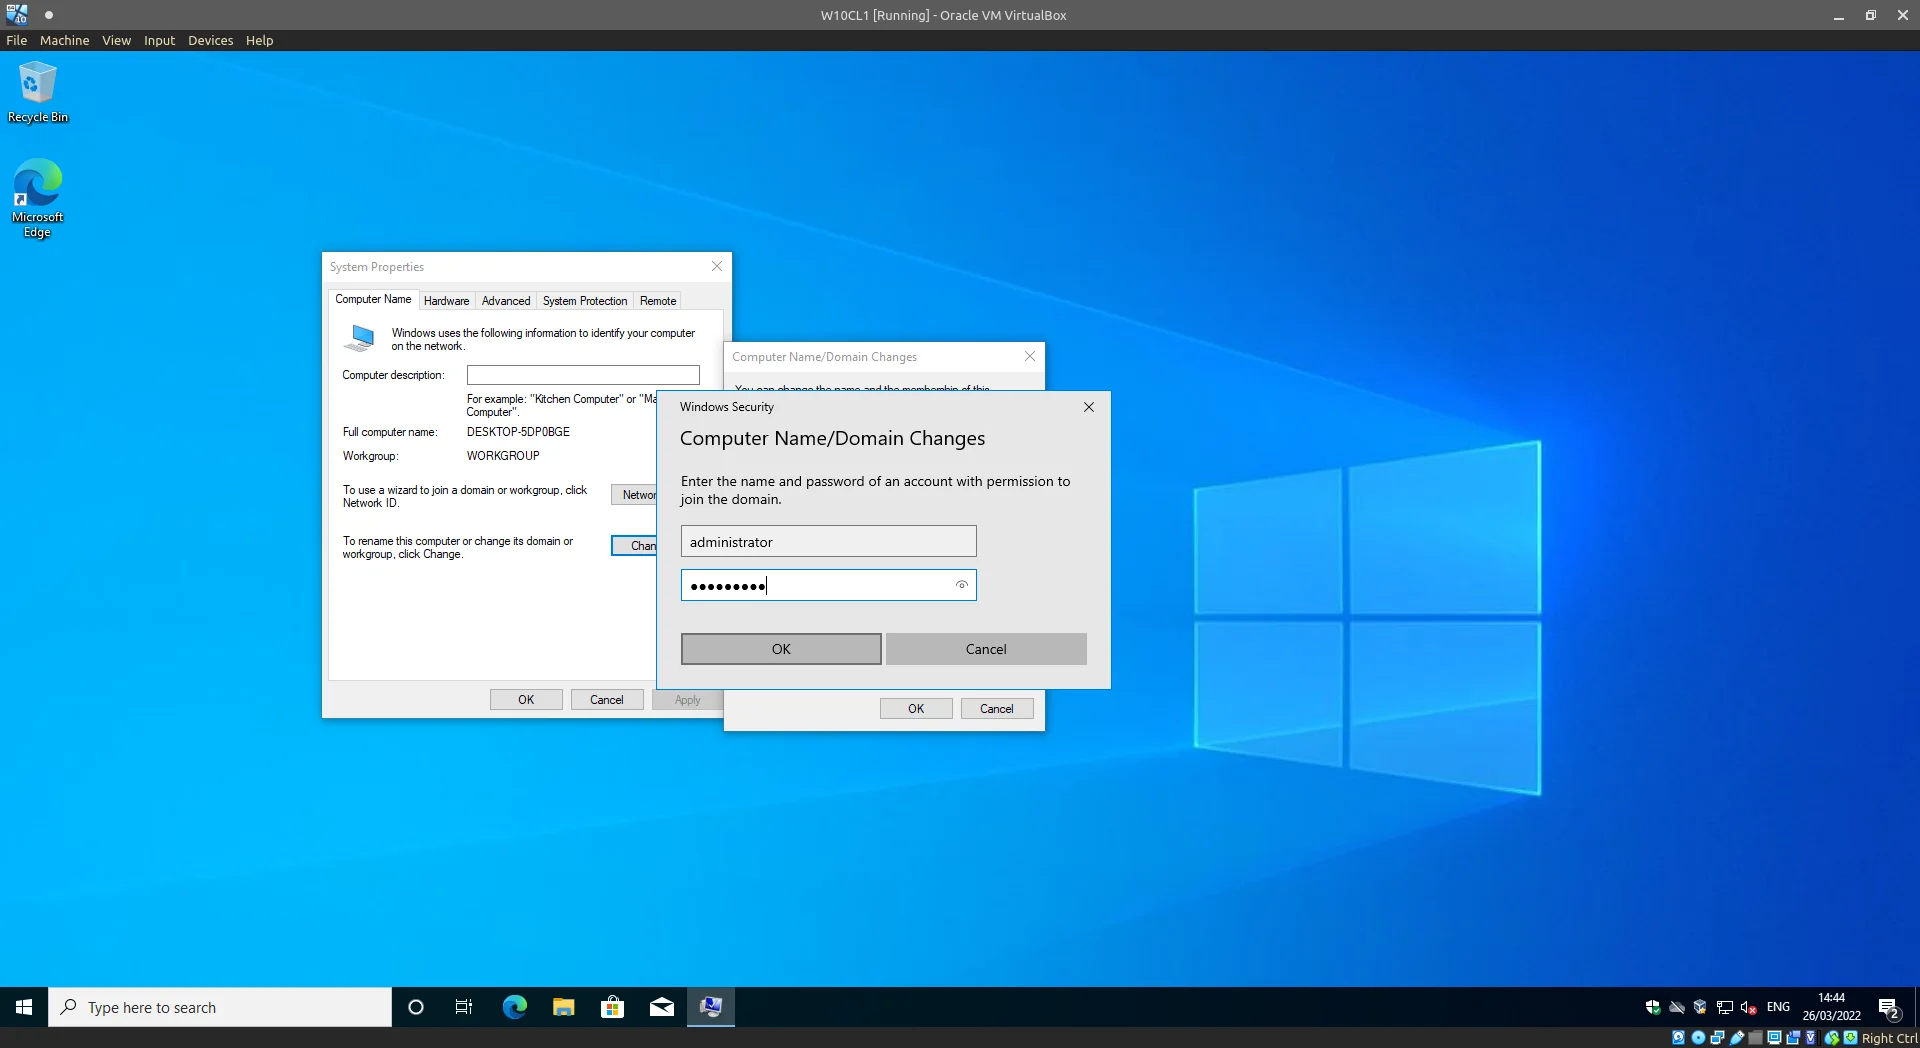
Enter the admin credentials.
Just like that it’s connected.
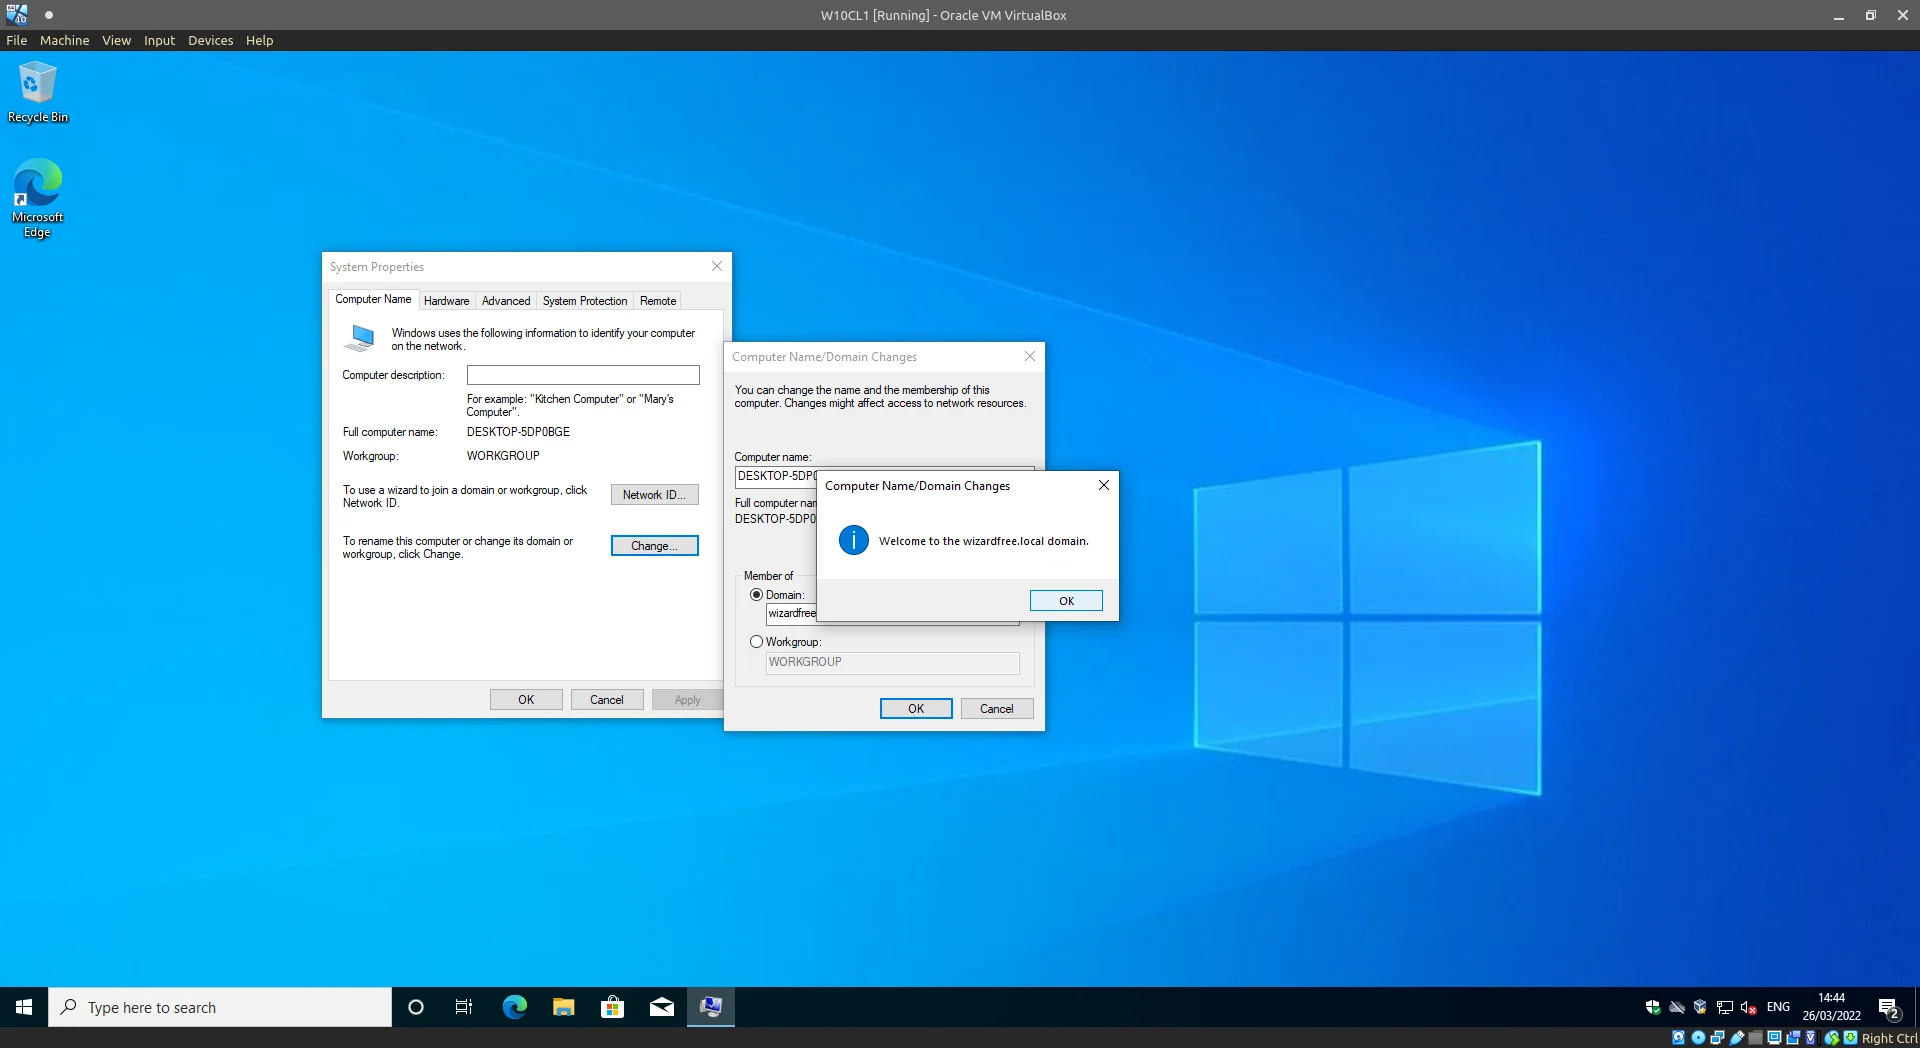
Success.
The system will need a Restart at this point to reconfigure itself, once back at the login screen you should now see an option to not only login with a local account but also domain accounts.
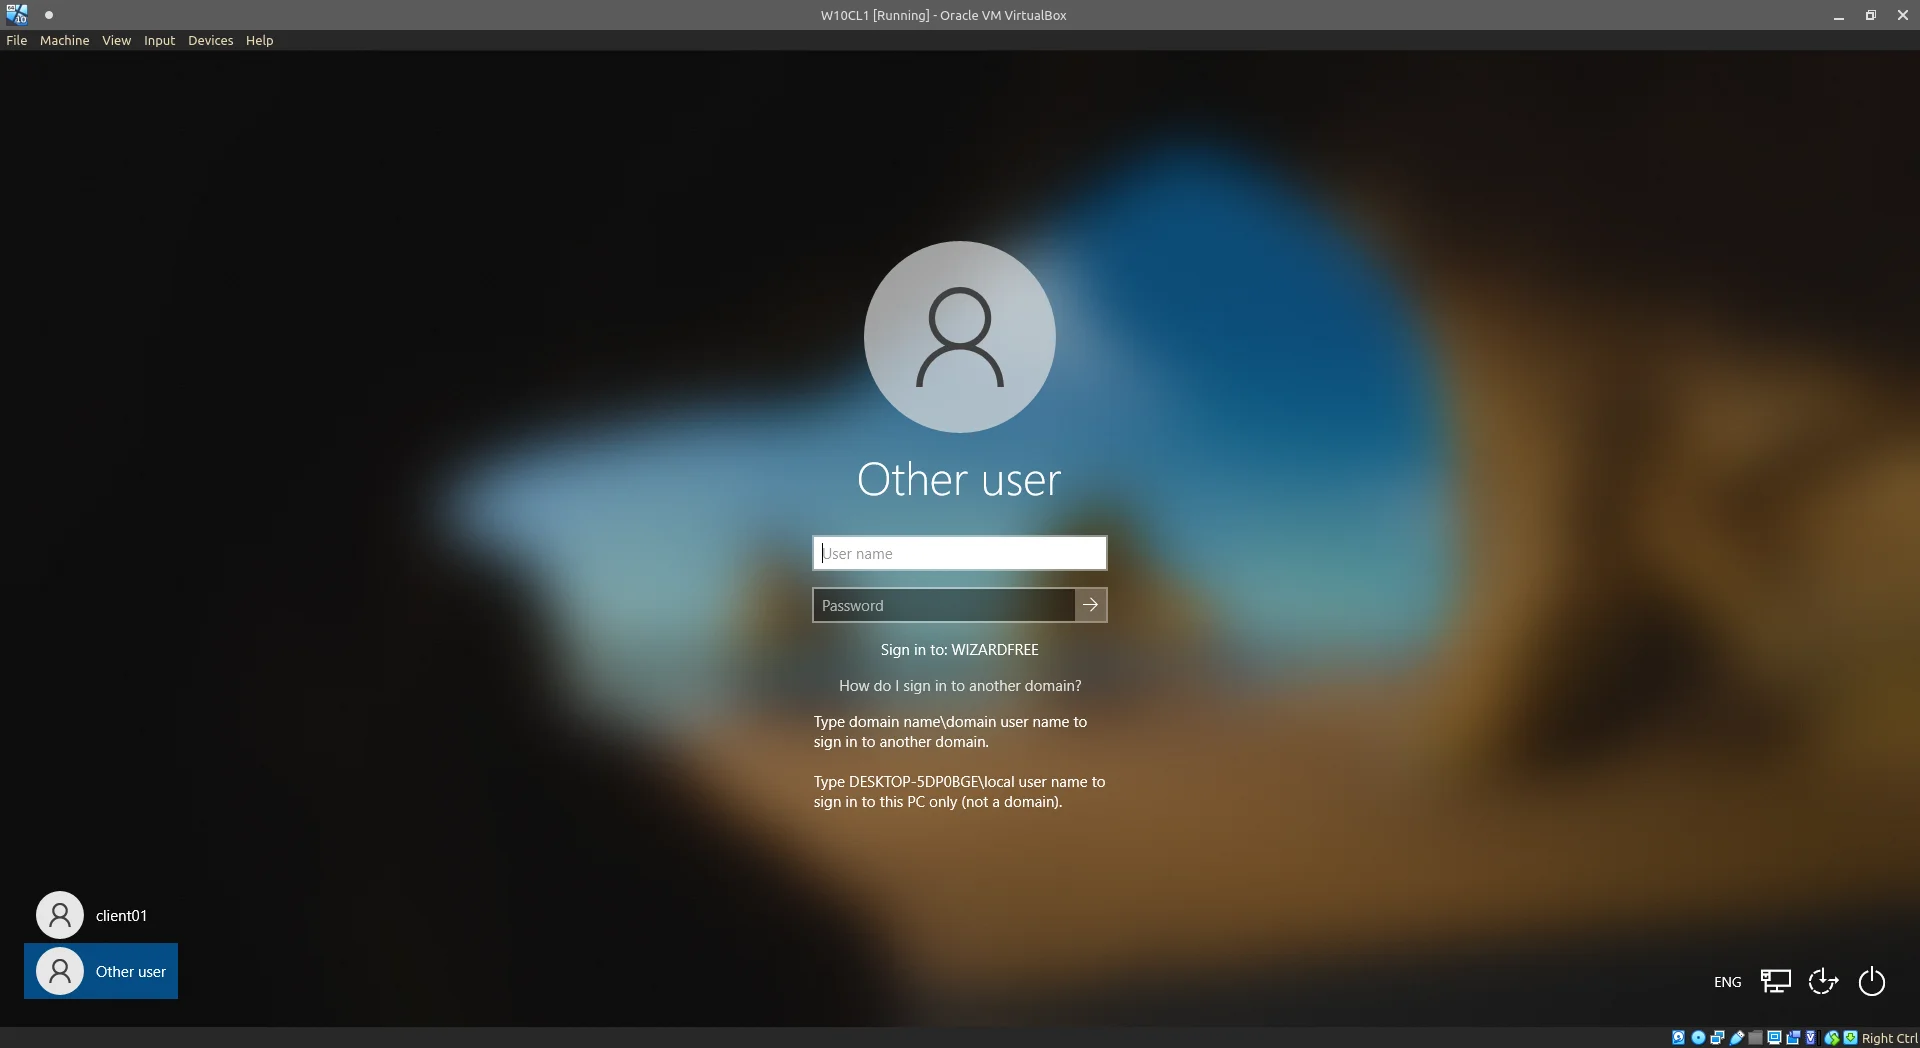
Windows login screen confirming connection to the domain.
Checking in our DHCP leases and Active Directory Computers, we see our W10 VM has been joined successfully.
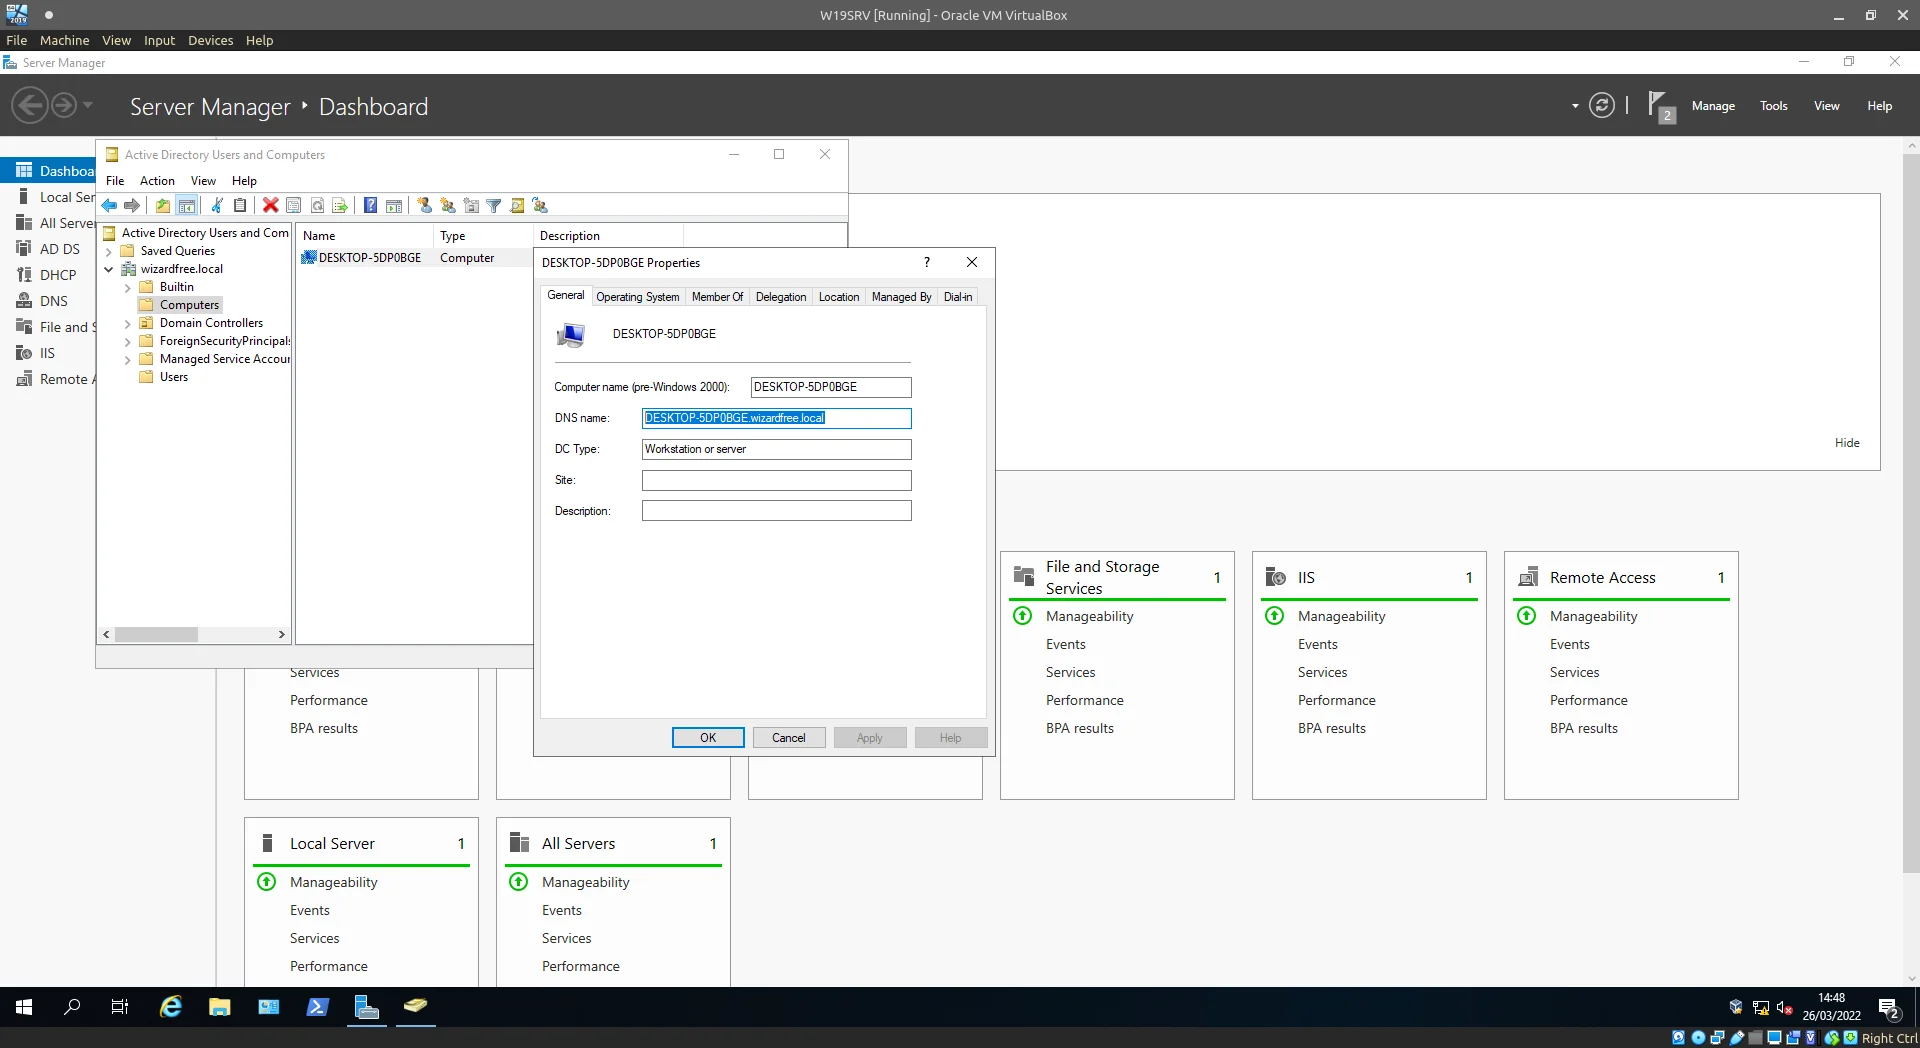
ADUC confirming the Client VM has joined.
Closing thoughts
If you’ve managed to follow through with this guide, let me congratulate you and if you’ve skimmed through to check out all the steps before implementation what are you waiting for.
If you break something fix it, break it again, enjoy the process. A homelab needn’t be this daunting task which requires you hundreds of hours of setup and big 4U servers all neatly aligned in a rack.
Some interconnected VMs will teach you a lot, Snapshots mean nothing is truly broken and if you completely, absolutely, catastrophically, f–k up, start again from scratch, cement your knowledge, perhaps try something different that time and maybe just maybe have some fun.
Help from
- This technet article (accessed through the waybackmachine due to broken image links)
- Brilliant video from Josh Madakor
-
A forest in this scenario is the top-most “block” for how resources are managed by Windows Server (resources meaning users, domains, computers etc) ↩︎

